Epoxy Flooring Rates in Melbourne: A Straight-Talking Breakdown

Epoxy Flooring Rates in Melbourne: A Straight-Talking Breakdown

Epoxy flooring rates in Melbourne typically range from around $40 to $120 per square metre, depending on the system chosen, the condition of the existing slab, and the complexity of the job. Decorative finishes like metallic or flake systems sit toward the higher end, while single-coat industrial epoxy sits lower. Most residential jobs fall somewhere in the $60 to $90 per square metre bracket once prep and materials are included.

What factors push epoxy flooring rates up or down?

Epoxy flooring rates shift based on four main variables: the condition of the concrete, the system being applied, the size of the area, and access to the site. A freshly poured, flat slab in an open garage is the simplest job. A cracked, contaminated, or previously coated slab in a tight space will cost more because it needs more work before a single drop of epoxy goes down.

Here is a plain breakdown of what moves the needle on price:

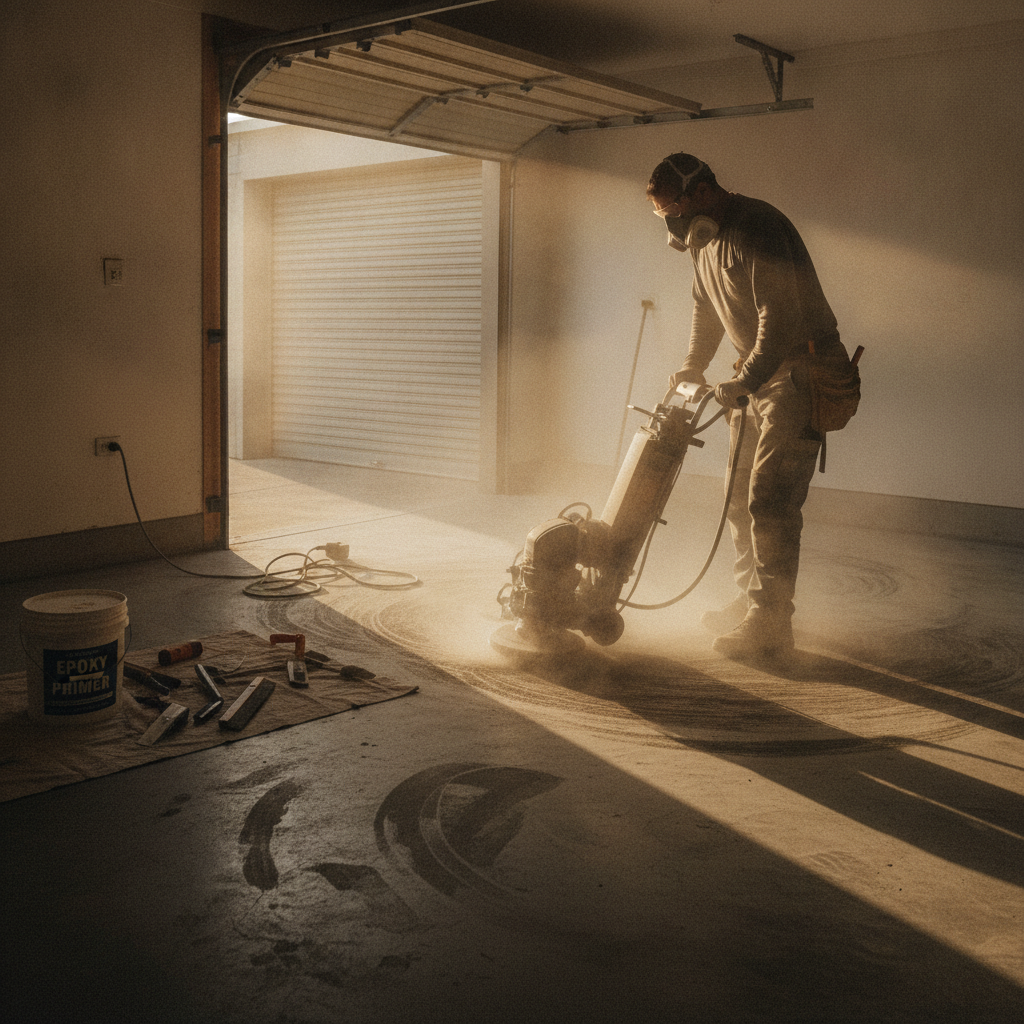
  • Concrete preparation. This is the big one. Diamond grinding or shot blasting to open up the slab surface is not optional. It is what makes the coating stick for a decade rather than peel in a year. If a contractor skips it or charges nothing for it, that is a red flag. Prep alone can account for 30 to 40 percent of the total job cost.
  • Moisture in the slab. Melbourne’s older homes and commercial buildings often have slabs with no moisture barrier underneath. High moisture vapour transmission rates can cause adhesion failure. Dealing with it properly means using a moisture-tolerant primer or a specialist barrier coat, which adds cost but saves a blowout later.
  • The system itself. A plain two-part epoxy paint is cheap. A full broadcast vinyl flake or a metallic pigment system with a polyurethane topcoat is a multi-layer process that takes two or more days and uses significantly more material. You are paying for that durability and finish quality.
  • Area size. Larger jobs bring the per-square-metre rate down because setup costs, machinery hire, and travel time are spread across more floor. A 20 sqm garage will cost more per square metre than a 200 sqm warehouse floor.
  • Access and obstacles. Multiple cars to move, floor drains to mask, columns to work around, stairs, or a site on the upper floor of a building all slow the job down and add to the rate.

What does a typical residential garage epoxy floor cost in Melbourne?

For a standard single or double garage in Melbourne, expect to pay between $1,500 and $3,500 for a quality epoxy flooring job. A single garage at roughly 18 to 20 sqm with a vinyl flake system and polyurethane topcoat generally lands around $1,800 to $2,400. A double garage at 35 to 40 sqm in the same system typically comes in between $2,500 and $3,500, depending on slab condition.

These are real-world numbers, not teaser rates. Budget quotes you see advertised at $25 per square metre rarely include proper diamond grinding, two coats of epoxy, and a UV-stable topcoat. When you add those in, the “cheap” job often catches up to the proper price, except you find out after things start peeling.

It is worth knowing that the Epoxy flooring industry in Australia has no licensing requirement for the work itself. That means anyone can buy a roller and some hardware store epoxy and call themselves an installer. The difference between a floor that lasts 10 years and one that starts delaminating in 18 months comes down almost entirely to surface preparation and product quality, not the branding on the truck.

How do commercial epoxy flooring rates compare to residential?

Commercial epoxy flooring rates in Melbourne are often lower per square metre than residential rates because the jobs are larger and simpler in layout. A warehouse or factory floor at 500 sqm or more can come in at $35 to $60 per square metre for a heavy-duty industrial system, depending on the specification. Smaller commercial spaces, food-grade kitchens requiring a self-levelling system with coved skirtings, or showrooms wanting a high-gloss decorative finish will sit higher.

Commercial clients also need to factor in downtime. Most epoxy systems need 24 hours before light foot traffic and 72 hours before vehicle traffic, so timing the work around business operations matters. Some products, including certain fast-cure polyurethane-modified systems, can be walked on in as little as 8 to 12 hours, but they carry a premium on the material cost.

A coved skirting detail, which is common in commercial kitchens and food manufacturing, adds time and labour because the applicator is essentially hand-forming a curved transition between floor and wall. That detail alone can add $15 to $25 per lineal metre to the quote.

Why do epoxy flooring quotes vary so much between contractors?

Epoxy flooring quotes vary because contractors are often quoting completely different scopes of work. One quote might include diamond grinding, a moisture primer, two coats of epoxy, a full vinyl flake broadcast, and a two-part polyurethane topcoat. Another quote might mean one thin coat of single-part epoxy rolled over an unprepped slab. Both quotes might say “epoxy floor” on them. That is the core problem with comparing prices in this trade.

When you are comparing quotes, ask each contractor to specify:

  • The preparation method (diamond grinding is the standard. Acid etching alone is not sufficient for a long-lasting bond).
  • The number of coats and the product brand and system being used.
  • The dry film thickness of the finished system in microns.
  • What the warranty covers and for how long.

A professional installer will not hesitate to answer those questions. Someone cobbling together a quote from whatever is on the shelf at the trade store probably will.

Is a cheaper epoxy floor ever the right choice?

Sometimes a lower-spec system is genuinely appropriate. A garden shed floor that sees light foot traffic and the occasional wheelbarrow does not need the same system as a busy mechanic’s workshop. A single-part, water-based epoxy coating at the lower end of the price range is fine for low-traffic utility spaces where aesthetics are not a priority and you accept you may need to recoat in five to seven years.

For anything that will take vehicle traffic, chemical exposure, hot tyres, heavy drops, or daily cleaning with commercial products, a full two-part solvent-free or solvent-based epoxy with a polyurethane topcoat is the minimum. Cutting corners on a garage floor that parks a car every day, or a kitchen that gets hosed down nightly, ends up costing more in the long run when you are grinding it back and starting again in two years.

The smartest thing you can do before making a decision on price is get a detailed, itemised quote that breaks out prep, materials, labour, and any return visit for the topcoat. That way you are comparing like with like, and you know exactly what you are getting for your money.

Request a detailed epoxy flooring rate quote
How to Seal a Concrete Floor: Steps, Products and Tips

How to Seal a Concrete Floor: Steps, Products and Tips

To seal a concrete floor properly, you need to clean and prepare the surface first, choose the right sealer for the job (penetrating, acrylic or epoxy-based), apply it in thin even coats, and allow full cure time before foot traffic. Skipping any of these steps is the most common reason sealers peel, blush or wear out early.

Why should you seal a concrete floor in the first place?

Sealing a concrete floor protects it from moisture, oil, stains and surface abrasion that will otherwise break down the slab over time. Unsealed concrete is porous, so spills soak straight in, salts migrate up from below, and foot traffic gradually dusts the surface. A good sealer closes those pores and gives you a surface that is far easier to clean and maintain for years.

Concrete looks solid but it is genuinely full of tiny capillaries. Water and oils travel through those capillaries and cause problems you can see: efflorescence (white salt deposits), spalling in cold weather, tyre marks in garages, and dark staining from cooking oil or motor grease. A sealer acts as a barrier between the slab and whatever lands on it.

For Melbourne homes, moisture is a particular concern. The city’s variable climate means slabs in garages, patios and laundries are regularly exposed to humidity and ground moisture pushing up from below, especially on older slabs without a proper vapour barrier underneath.

What products can you use to seal a concrete floor?

The main product types used to seal a concrete floor are penetrating sealers (silane or siloxane), acrylic sealers, polyurethane sealers and epoxy coatings, each suited to different performance needs and surface conditions. Penetrating sealers soak in and repel water without changing the look; acrylics sit on top and add a sheen; polyurethanes and epoxies deliver a hard, durable film ideal for garages and high-traffic areas.

Here is a plain breakdown of the main options:

  • Penetrating sealers (silane/siloxane): These soak into the concrete and chemically bond with the silica. They are invisible, breathable and ideal for driveways, paths and outdoor slabs where you want protection without changing the appearance. They do not form a film, so they will not peel.
  • Acrylic sealers: Water or solvent-based, they sit on the surface as a thin film. They are relatively affordable and easy to apply, and they add a low to high gloss finish. Reapplication every two to three years is typical for exterior use.
  • Polyurethane sealers: Thicker and harder than acrylics, these are a solid step up in durability. They resist scuffs, chemicals and UV better than a basic acrylic. Good for internal garage floors and commercial spaces.
  • Epoxy coatings: A two-part system that creates a thick, hard, bonded surface. Epoxy is not technically just a “sealer” but it does seal the concrete while also transforming the look. It is the most durable option for garage floors and workshops, and it can incorporate colour, metal pigments or flake for a premium finish.

For outdoor areas in Melbourne, a penetrating sealer or a good-quality solvent-based acrylic is usually the go-to. For garages and internal concrete floors where you want both protection and a sharp look, epoxy coatings are the benchmark.

How do you prepare a concrete floor before sealing?

Before you seal a concrete floor, the surface must be clean, dry, free of existing coatings and properly profiled so the sealer can bond. Any grease, paint, curing compounds or old sealer left on the slab will cause the new product to delaminate, sometimes within weeks of application.

Follow these steps in order:

  1. Clear the area completely. Move out furniture, vehicles, boxes. Everything.
  2. Degrease. Use a concrete degreaser on any oil or grease spots and scrub with a stiff brush. Rinse thoroughly and allow to dry fully, which can take 24 to 48 hours depending on conditions.
  3. Remove old coatings. If there is an existing sealer or paint, it needs to come off. For small areas a chemical stripper works. For a full garage floor, mechanical grinding is the practical choice.
  4. Etch or grind the surface. New concrete and smooth slabs need to be opened up so the sealer has something to grab onto. Acid etching with a diluted hydrochloric acid solution (around 1:10 with water) is the traditional approach for DIY. Diamond grinding gives a more consistent profile and is preferred by professionals. The surface should feel like 80-grit sandpaper after etching.
  5. Neutralise and rinse. After acid etching, neutralise with a baking soda and water solution, rinse thoroughly, then let the slab dry completely. Moisture in the slab at the time of sealing is one of the top reasons for adhesion failure.
  6. Check for moisture. Tape a piece of plastic sheeting (about 600mm x 600mm) to the floor with tape on all four edges. Leave it for 24 hours. If moisture appears on the underside, the slab has a moisture issue that needs to be addressed before sealing.

What is the correct process to apply a concrete sealer?

To apply a concrete sealer correctly, work in thin, even coats using the right applicator for the product, overlap each pass by about a third, allow proper recoat windows between coats, and never apply in direct sun or when rain is expected within 24 hours. Two thin coats always outperform one thick coat.

The general application process looks like this:

  1. Read the product data sheet. Every sealer has specific coverage rates, recoat windows and temperature requirements. Follow them. The data sheet is not a suggestion.
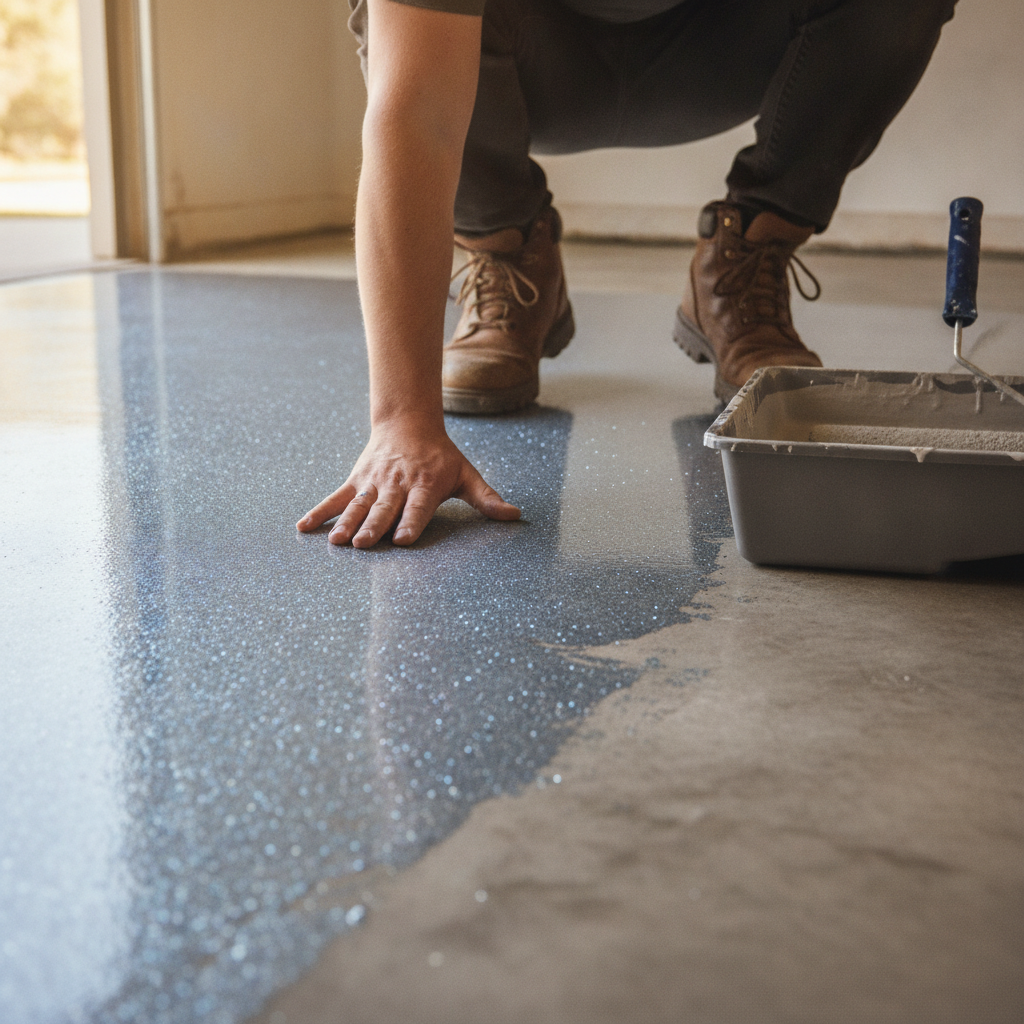
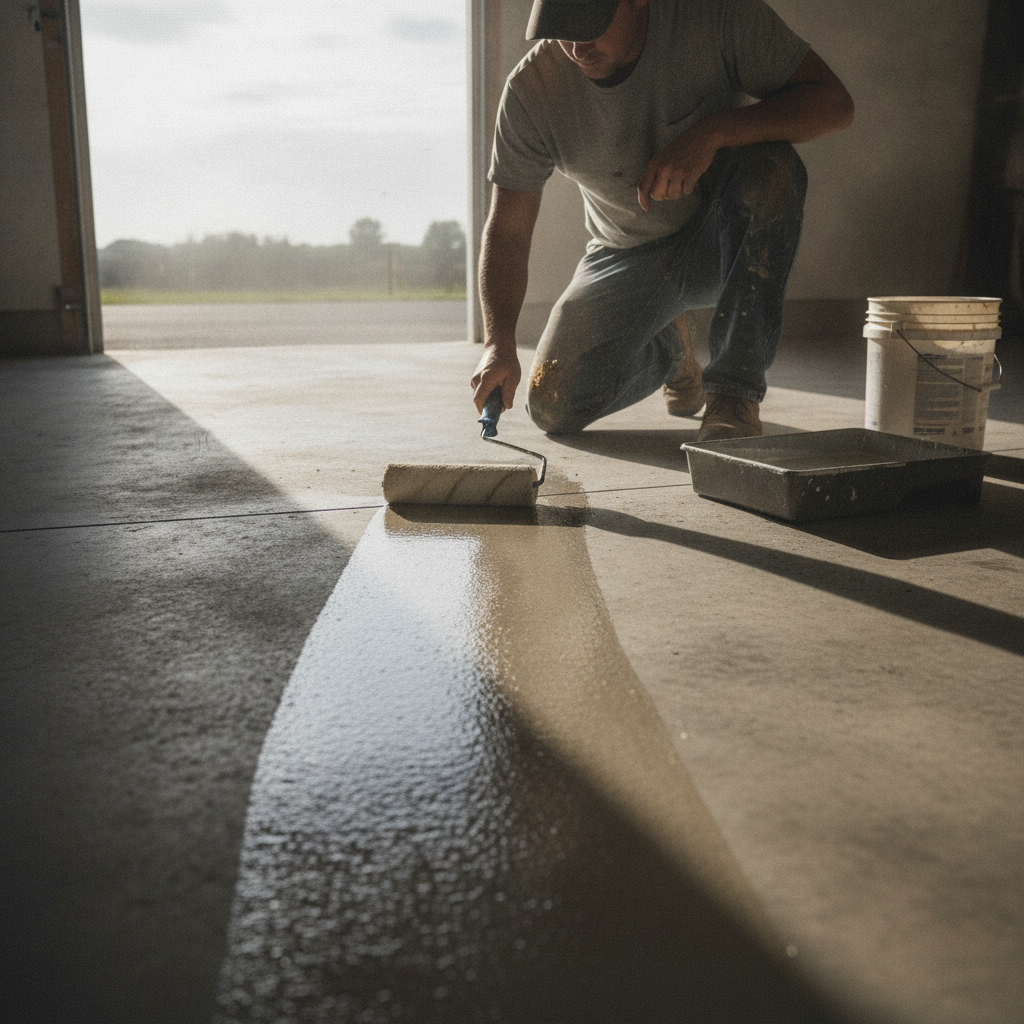
  2. Choose the right applicator. Solvent-based acrylics and penetrating sealers typically go on with a short-nap roller (6mm to 10mm) or a pump sprayer. Epoxy coatings use a squeegee to spread the material, followed by a roller to back-roll and release air.
  3. Apply the first coat. Work in sections. Keep a wet edge. Do not go back over areas that have started to tack up or you will leave marks.
  4. Allow the recoat window. For most acrylics this is one to two hours. For epoxy systems it can be four to eight hours between coats. Check the label.
  5. Apply the second coat. Run it in the opposite direction to the first coat to get even coverage.
  6. Observe cure times. Light foot traffic is often possible after 24 hours but full cure for vehicle traffic on an epoxy floor typically takes five to seven days. Do not rush this.

Temperature matters more than most people expect. Most sealers should be applied when the slab and air temperature are between 10°C and 30°C. Melbourne mornings in autumn and winter can drop below that quickly, so start mid-morning and plan to finish before late afternoon.

What are the most common mistakes when sealing a concrete floor?

The most common mistakes when sealing a concrete floor are applying to a damp or poorly prepped surface, using too thick a coat, choosing the wrong product for the conditions, and not allowing full cure before loading the floor. Each of these leads to peeling, bubbling, whitening or premature wear that requires stripping and starting again.

A few worth calling out specifically:

  • Sealing new concrete too early. Freshly poured concrete needs to cure for at least 28 days before most sealers are applied. Sealing earlier traps moisture and weakens the slab surface.
  • Applying in full sun. Direct summer sun heats the slab surface rapidly, causing solvent-based sealers to flash off before they can properly penetrate. Apply in shade or on cooler days.
  • Skipping the moisture test. Even in Melbourne’s drier months, slabs can have moisture pushing up from the ground. Sealing over a wet slab is probably the single biggest cause of epoxy and acrylic delamination.
  • Using a brush on large areas. Brushes leave streaks and lap marks. Use a roller or sprayer for anything bigger than a step or tight corner.
  • Mixing product types. Applying a solvent-based sealer over a water-based one (or vice versa) without stripping the old coat first will almost always cause adhesion problems.

When does sealing cross into professional epoxy coating territory?

Sealing a concrete floor with a basic acrylic or penetrating sealer is manageable as a DIY job on a prepared surface. But when the goal is a durable, good-looking floor in a garage, workshop, commercial space or showroom, a professional epoxy or polyurethane floor coating system delivers results that a DIY sealer simply cannot match in terms of hardness, chemical resistance, longevity and finish quality.

Professional applicators like the team at Metal and Flake use diamond grinding equipment to get the surface profile exactly right, apply moisture-tolerant primer coats where needed, and use commercial-grade two-part epoxy systems with broadcast flake or metallic pigment for a finish that holds up under vehicle traffic and looks sharp doing it.

If your slab is in poor condition, has active moisture issues, or you want a floor that genuinely transforms the space rather than just protecting it, that is where a professional coating system earns its cost over a DIY sealer.

Get a professional concrete sealing quote

Epoxy Floor Prices in Melbourne: What Affects the Final Cost?

Epoxy Floors Price in Melbourne: What Affects the Final Cost?

Epoxy floors price in Melbourne typically ranges from $30 to $80 per square metre for a residential or commercial installation, depending on floor size, surface condition, finish type and the number of coats applied. A simple single-colour garage coat sits at the lower end, while a full metallic or decorative flake system with primer and topcoat sits higher. Getting multiple quotes for your specific slab is the only reliable way to nail down your number.

What is the average epoxy floors price per square metre in Melbourne?

For most Melbourne homeowners and business owners, a standard two-coat epoxy floor system lands between $40 and $60 per square metre fully installed. A basic single-broadcast flake floor in a double garage (roughly 36 sqm) typically comes in between $1,400 and $2,200. Decorative metallic finishes or high-build systems on larger warehouse floors can push past $70 per square metre once prep, primers and a polyurethane topcoat are factored in.

Those ballpark figures get thrown out the window pretty quickly once a few real-world variables kick in. Here is what actually moves the needle on your final quote.

How does floor size affect the epoxy floors price?

Larger floor areas cost less per square metre than small ones because the fixed costs of the job, including mobilisation, mixing equipment, primer materials and labour travel time, get spread across more ground. A 10 sqm laundry is going to cost you more per sqm than a 100 sqm workshop, even if the product and finish are identical. Most installers have a minimum call-out charge, so very small areas rarely benefit from economies of scale.

On the flip side, unusually large commercial floors can also carry extra costs if multiple pours, extra mixing batches or a second crew day are required. Square metreage is the starting point for any quote, but it is never the whole story.

Does the condition of the existing concrete change the price?

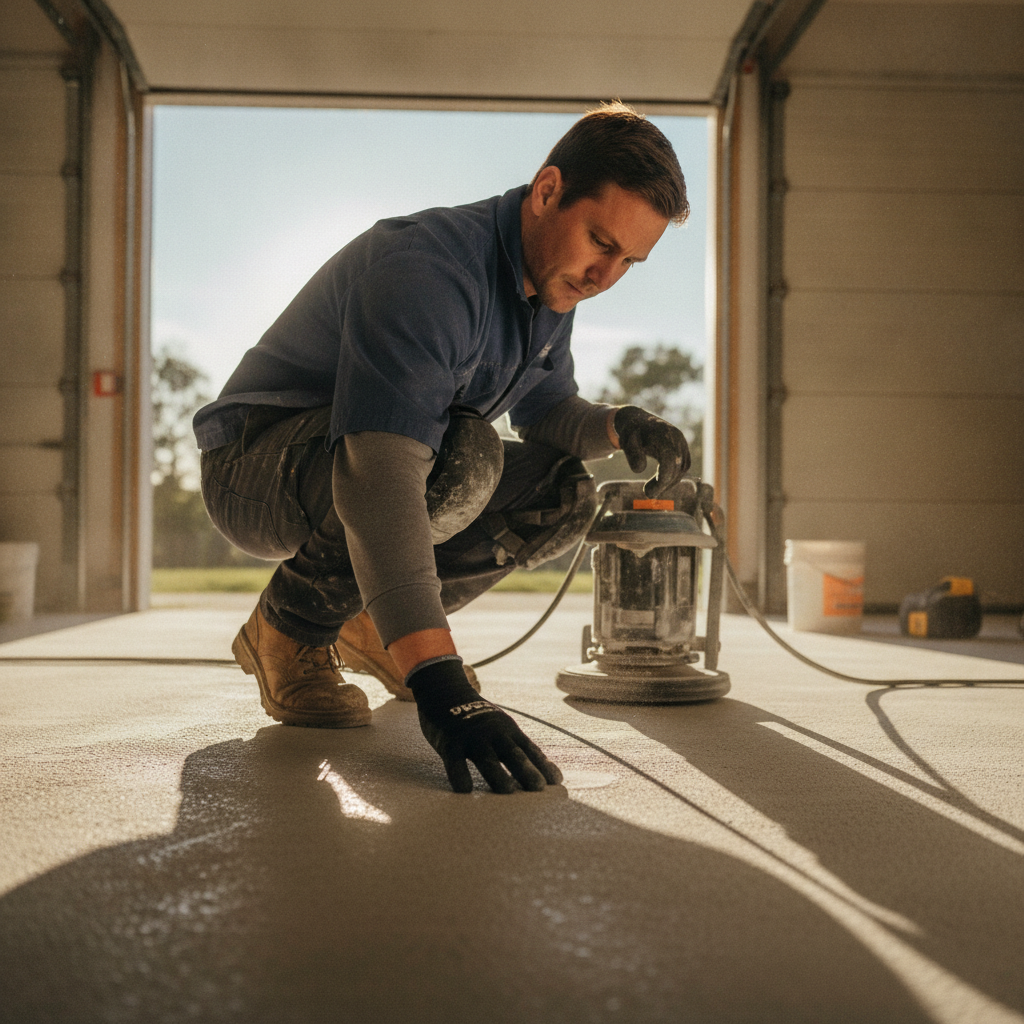
Yes, significantly. Surface preparation is the most labour-intensive part of any epoxy floor installation, and a concrete slab in poor condition can double the prep time. Diamond grinding is the industry standard for opening up the concrete profile so the epoxy bonds properly. If your slab has old paint, adhesive, oil contamination, cracks, spalling or moisture issues, each one adds time and materials before a single drop of epoxy goes down.

A moisture reading above about 75% relative humidity in the slab is a common problem in Melbourne, particularly in older homes and ground-level garages. Addressing that means applying a moisture-tolerant primer or a dedicated moisture barrier coat, which adds cost but protects the bond for the long term. Skipping that step is how you end up with bubbling and delamination six months later.

Crack repairs, control joint filling and patching are usually quoted as separate line items. If you have a heavily cracked or uneven slab, expect those items to add anywhere from a few hundred dollars to significantly more depending on the extent of the damage.

How does the finish type affect the epoxy floors price?

The finish you choose is one of the biggest levers on cost. Here is a rough breakdown of how common finishes stack up:

  • Single-colour solid epoxy: The most affordable option. Great for workshops, warehouses and utility areas. Usually a two-coat system: primer plus topcoat.
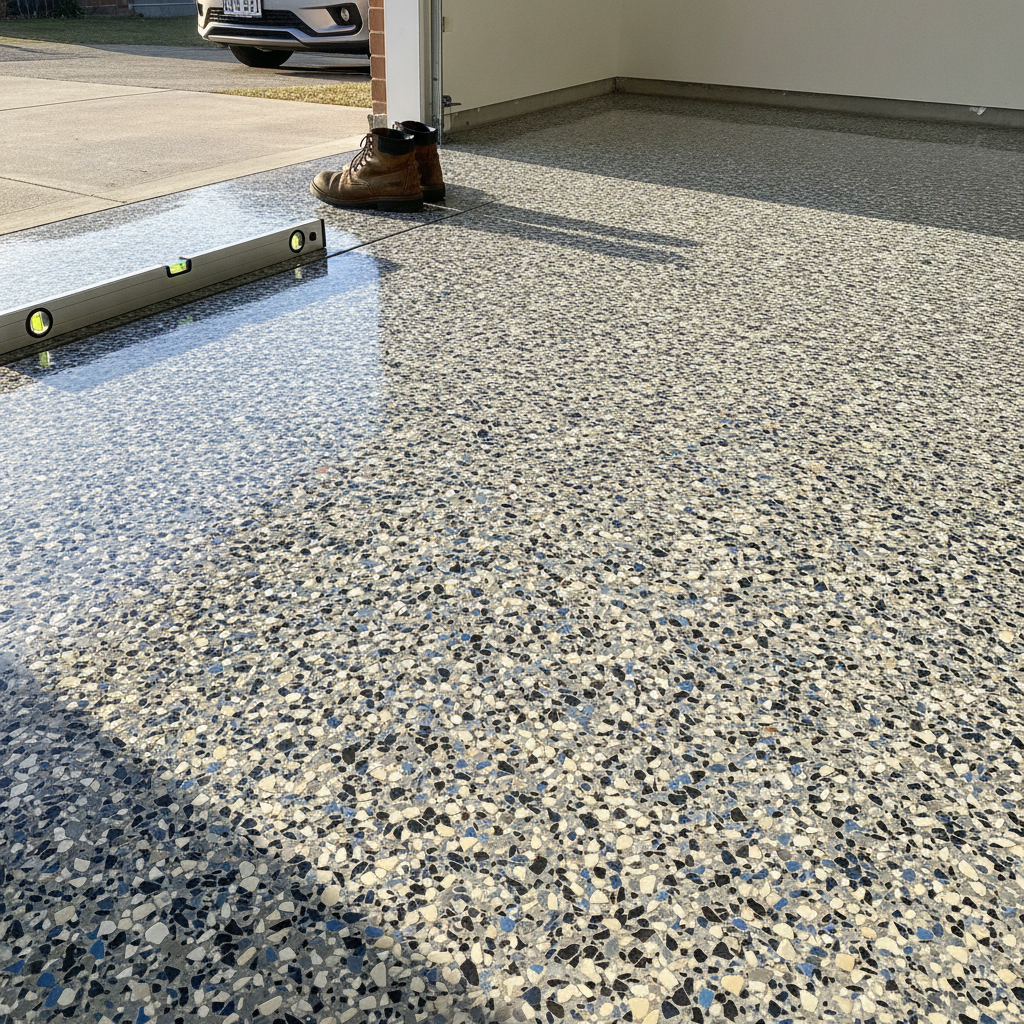
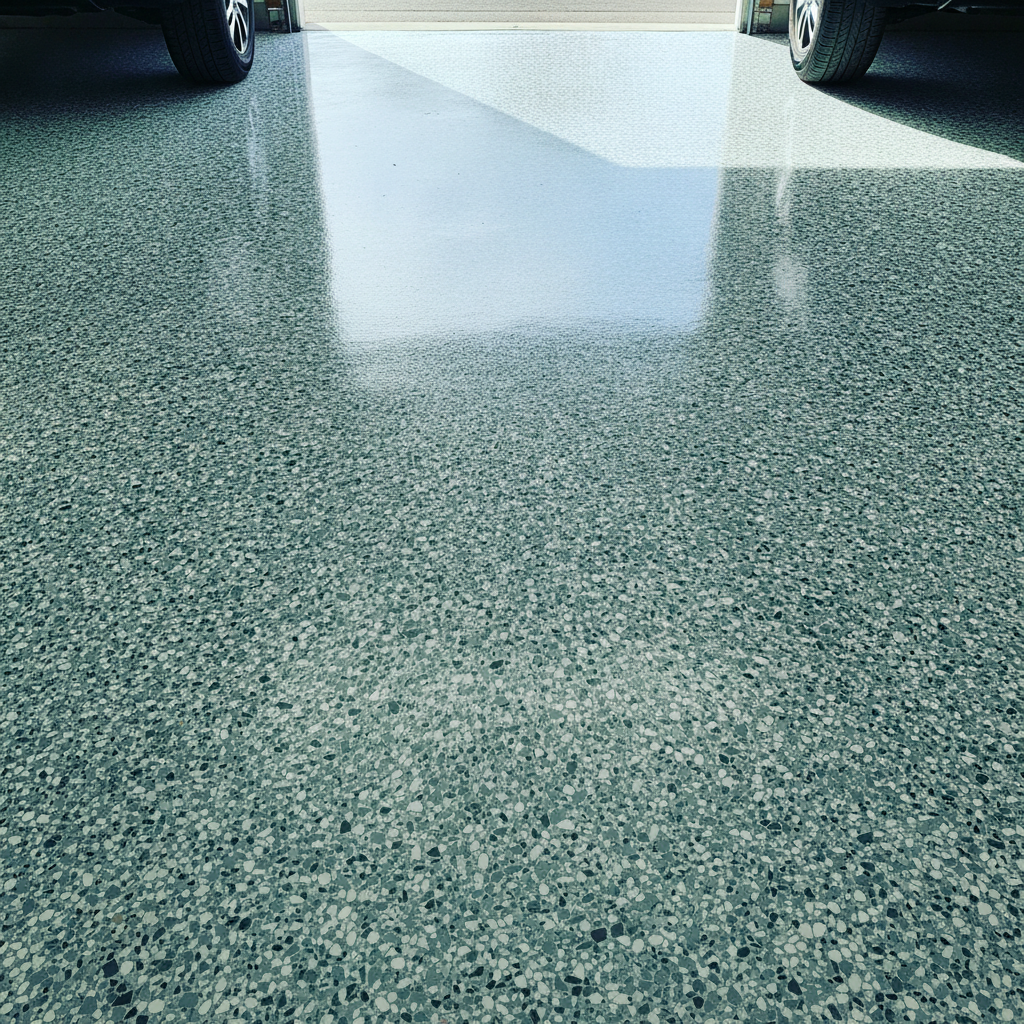
  • Decorative flake (also called broadcast chip): A coloured vinyl flake is broadcast into the wet epoxy base coat, then sealed with a clear polyurethane topcoat. This is one of the most popular residential finishes in Melbourne, particularly for garages. The flake adds texture, hides small imperfections and gives a clean, showroom look.
  • Metallic epoxy: A pigmented metallic powder is blended into the epoxy resin to create a swirled, three-dimensional effect. More material cost, more skill required, more time on site. Expect to pay a premium for this finish.
  • Quartz or aggregate systems: Common in commercial kitchens, food-processing facilities and wet areas where slip resistance is critical. The aggregate adds material cost and a more involved broadcast process.

The topcoat also matters. A standard epoxy topcoat is cheaper than a polyurethane or polyaspartic topcoat, but the latter two offer better UV stability and abrasion resistance, making them worth the extra spend in high-traffic areas or where the floor gets direct sunlight.

Does the number of coats change what you pay?

Every additional coat adds product and labour time, so yes, it adds to the price. A minimum viable system for a residential garage is usually a penetrating primer, a base coat and a clear topcoat: three coats total. Some installers quote a two-coat system to win on price, but thinner builds wear faster and can be harder to maintain.

For commercial or industrial floors, a four or five coat system is common to hit the required build thickness, typically measured in microns. A floor carrying forklift traffic needs a much heavier build than a home workshop. Always ask what the total dry film thickness (DFT) will be. That number tells you more about the quality of the job than the per-sqm price alone.

What other costs should Melbourne customers budget for?

A few line items regularly catch people off guard:

  • Concrete grinding: This should always be included in a professional quote, but confirm it. Some operators quote supply and application only, leaving grinding as a separate cost.
  • Move-out and move-back: The floor needs to be completely clear before grinding starts. If you need help moving heavy equipment or vehicles, factor that in.
  • Cure time downtime: Most epoxy systems require 24 hours of foot traffic cure time and up to 72 hours before you drive a vehicle on them. A polyaspartic topcoat can cut that to a few hours, which is worth paying for if downtime is a real issue.
  • Warranty terms: A reputable installer backs their work with a written warranty. Ask what it covers and for how long. A cheap job with no warranty is rarely a bargain.

Location within Melbourne also plays a small role. Travel time to outer suburbs like Pakenham, Sunbury or Mornington Peninsula can add a modest travel charge compared to inner-metro work. It is always worth asking upfront.

Is a cheaper quote always a worse job?

Not always, but it is worth understanding why a quote is lower. Common reasons a quote comes in cheap include: thinner product build, minimal surface preparation, cheaper product brands, no primer coat or a cut-rate topcoat. Any one of those shortcuts will show up within a year or two of use.

Ask every installer the same set of questions: How many coats? What products are you using? How do you prep the surface? What is the total DFT? A professional will answer those without hesitation. If someone cannot tell you the product they are applying or avoids the prep question, that is a red flag.

The best value job is not always the cheapest quote, and it is rarely the most expensive one either. It is the one where the prep is done properly, the build is appropriate for the use, and the installer stands behind their work.

Ready to see what your floor will actually cost? Get an epoxy floor price estimate

Garage Floor Covering Options: Why Epoxy Leads the Way

Garage Floor Covering Options: Why Epoxy Leads the Way

When comparing garage floor coverings, epoxy consistently comes out on top for durability, ease of cleaning, resistance to oil and chemicals, and long-term value. Unlike rubber mats, peel-and-stick tiles or floor paint, a properly applied epoxy coating bonds directly to the concrete slab and can last well over a decade with minimal upkeep. For Australian garages that deal with heat, moisture and heavy use, it is the most practical choice by a wide margin.

What are the most common garage floor covering options available today?

The main garage floor covering options are epoxy coatings, polyurea or polyaspartic coatings, interlocking floor tiles (rubber or PVC), garage floor mats or rolls, and concrete floor paint. Each sits at a different price point and delivers a different level of protection, so it pays to understand what you are actually getting before spending a cent.

Here is a plain-English breakdown of each option:

  • Epoxy coatings. A two-part resin system that chemically bonds to the concrete. Applied in layers, it creates a hard, seamless surface that resists oil, tyre marks, chemicals and heavy foot traffic.
  • Polyurea and polyaspartic coatings. A faster-curing cousin to epoxy, often used as a topcoat. Full cure can happen in as little as a few hours, which suits homeowners who cannot leave the garage empty for long. Often layered over an epoxy base for the best of both systems.
  • Interlocking rubber or PVC tiles. Modular, DIY-friendly and easy to replace in sections. They sit on top of the concrete rather than bonding to it, so moisture can get trapped underneath. Not a great fit for garages that see vehicle fluid spills.
  • Garage floor mats and rolls. The cheapest entry point. Simple to lay, simple to remove. They offer almost no real protection for the concrete underneath and tend to curl at the edges over time.
  • Concrete floor paint. Often confused with epoxy but very different. Single-component floor paint sits on the surface rather than penetrating the slab. It chips, peels and scuffs relatively quickly, especially under the heat of a parked car.

Why do garage floor coverings made from epoxy outperform the alternatives?

Epoxy garage floor coverings outperform alternatives because the coating chemically bonds to the concrete slab, forming a surface that is harder, denser and far more resistant to impacts, chemicals and moisture than anything that simply sits on top. A good epoxy system can handle the weight of a fully loaded ute, regular oil spills, and the abrasion of workshop trolleys without showing serious wear for ten years or more.

Let’s put the key differences side by side:

  • Adhesion vs. surface-laying. Rubber tiles, mats and paint do not bond to concrete. Epoxy does. That bond is what stops moisture migrating underneath and causing the covering to bubble, lift or peel.
  • Chemical resistance. Workshop chemicals, brake fluid, petrol drips and pool chemicals can all stain or eat into unsealed concrete and painted surfaces. An epoxy coating shrugs most of these off. A quick wipe and the surface is clean again.
  • Heat tolerance. Hot tyre pick-up is a real problem with some floor paints and cheaper coatings. You park the car, the hot tyres sit on the surface, and when you drive away chunks of the coating come with them. A properly catalysed epoxy system resists this.
  • Longevity and cost per year. A quality epoxy job applied by a professional typically lasts ten to fifteen years. Budget-friendly mats or paint may need replacing or reapplying every two to three years. Spread the cost over a decade and epoxy is usually the more economical option.
  • Aesthetics. Decorative flake systems and metallic finishes turn a plain concrete garage into a space that looks as good as the inside of the house. Rubber tiles and mats never quite manage that.

What should you think about before choosing a garage floor covering?

Before choosing a garage floor covering, consider how the garage is used day-to-day, the condition of the existing concrete, how long you plan to stay in the property, and whether you want a DIY result or a professional finish that adds real value to the home. Each of these factors points you toward a different solution on the cost and durability spectrum.

A few practical questions worth asking yourself:

  • How is the concrete right now? Cracked, pitted or moisture-affected concrete needs preparation before any covering goes down. Epoxy installers grind the surface to open the pores and ensure proper adhesion. Tiles and mats hide problems without fixing them, which often makes things worse over time.
  • Do vehicles park in here, or is it a workshop space? Workshop environments with heavy machinery, dropped tools and chemical spills need a harder, more chemical-resistant surface. A decorative rubber tile is not going to cut it.
  • How much downtime can you handle? Solvent-based epoxy systems often need 24 to 72 hours before you can walk on them and up to seven days before vehicles go back in. Polyaspartic topcoats can get you back in on the same day. Your installer should match the system to your schedule.
  • Are you planning to sell? A well-finished epoxy floor is a genuine selling point. It photographs well and signals to buyers that the previous owner looked after the property. A cracked concrete floor with a worn-out mat does the opposite.

How does the flake finish work with epoxy garage floor coverings?

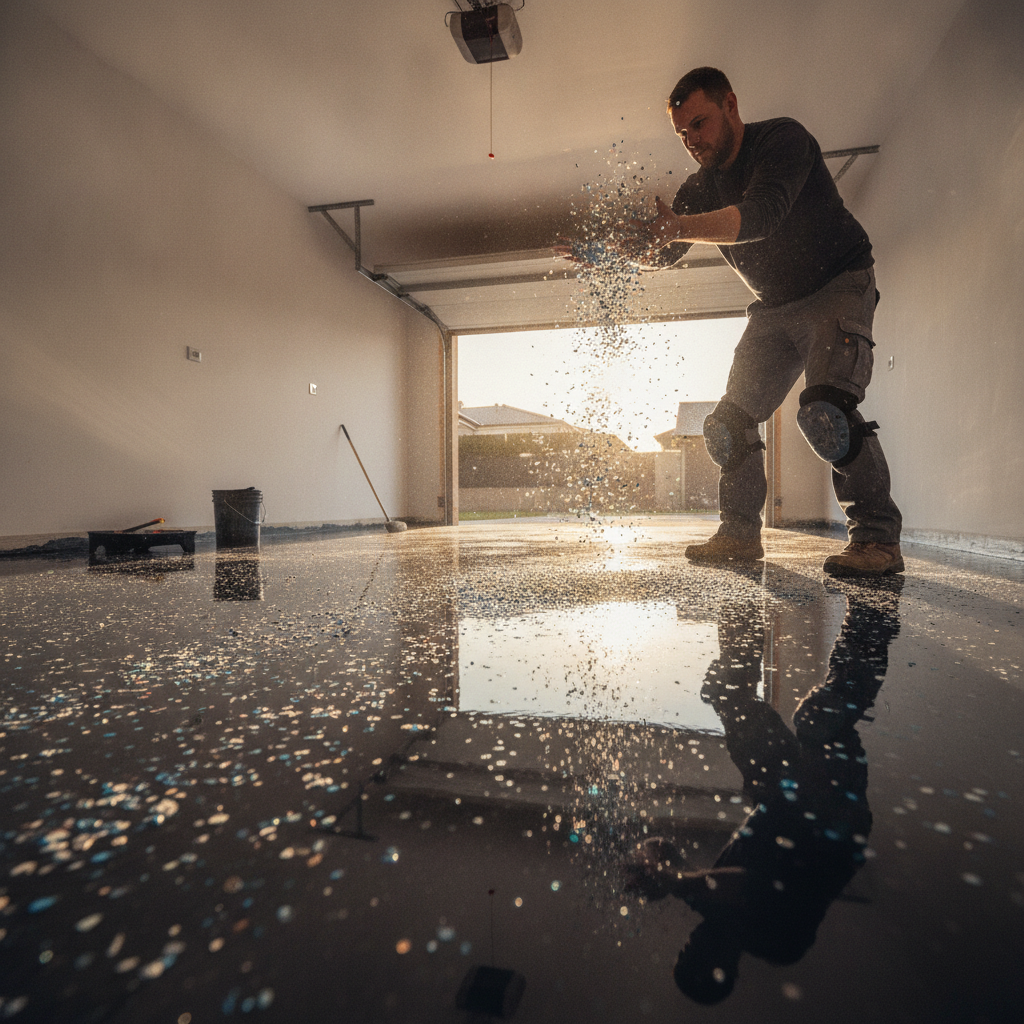
A flake finish involves broadcasting small coloured vinyl chips into the wet epoxy base coat before it cures. The chips create a textured, slip-resistant surface that also hides minor imperfections in the concrete below. A clear topcoat is then applied to lock the flakes in, creating a surface that is hard, grippy and easy to clean all at once.

Decorative flake systems have become very popular in Melbourne garages for a few good reasons. The texture from the chips adds meaningful grip, which matters when you are stepping out of a car with wet shoes or moving around a workshop in boots. The pattern also breaks up any visual unevenness in the concrete, so minor surface patches or old cracks that were filled during prep become essentially invisible once the floor is done. You get to choose the chip colour and broadcast density, from a subtle salt-and-pepper look all the way through to a full broadcast where virtually no base colour shows through.

Metallic epoxy finishes are the other popular choice for homeowners who want something that genuinely stands out. Metallic pigments mixed into the epoxy create a swirling, three-dimensional effect that looks very different from the standard speckled floor. No two metallic floors look identical, which suits people who want a feature floor rather than just a practical one.

What makes professional installation worth it compared to a DIY epoxy kit?

Professional epoxy installation is worth the extra cost because surface preparation is the single biggest factor in whether a coating sticks or fails, and that preparation requires commercial diamond grinding equipment and trained judgment that a weekend kit simply cannot replicate. A coating applied over a poorly prepared slab will peel within months, no matter how good the product is.

DIY epoxy kits from the hardware store are usually single-component or low-ratio two-component products that look similar to the professional systems on the tin but perform very differently in practice. The resin content is lower, the bond strength is weaker, and they are far more sensitive to temperature and moisture at the time of application. Melbourne’s weather adds an extra layer of complexity: high summer temperatures can accelerate cure times and cause problems with self-levelling, while winter moisture in a slab can cause adhesion failure if the installer does not test and manage it first.

A professional crew arrives with a grinder, moisture meters, the right primer for the conditions, and product that is formulated for commercial-grade adhesion. The finish is seamless, properly topcoated, and backed by a workmanship guarantee. That peace of mind is worth paying for when you are coating a surface you will be walking on and parking on for the next ten-plus years.

Ready to see which system suits your garage? Book a garage floor coating consult.

Concrete Floor Sealant Options: Which One Is Best for You?

Concrete Floor Sealant Options: Which One Is Best for You?

The best floor sealant for concrete depends on where the slab is, how much traffic it takes, and the finish you want. Penetrating sealers suit bare outdoor slabs, acrylic sealers work for light indoor use, polyurethane suits commercial floors, and epoxy coatings deliver the toughest, best-looking result for garages, warehouses and living spaces.

Why does choosing the right floor sealant for concrete matter so much?

Get the wrong sealer on a concrete slab and you are either recoating within twelve months or peeling up a film that bubbled because moisture had nowhere to go. The right product protects the slab, holds its look under real-world conditions, and saves you money because you are not doing the job twice. Concrete is porous by nature. Every litre of rain, every oil drip, every cleaning chemical that soaks in is quietly breaking the slab down from the inside. A matched sealer stops that process before it starts.

It also pays to understand that “sealer” is used loosely in the trade. Some products sit on top of the concrete and form a film. Others soak in and chemically react with the concrete itself. Those two categories behave completely differently under foot traffic, UV light and moisture, so knowing which category you are buying matters before you spend a cent.

What are the main types of concrete sealer and what does each one do?

There are four main types of floor sealant for concrete: penetrating sealers, acrylic sealers, polyurethane topcoats, and epoxy coatings. Each fills a different role. Penetrating sealers soak into the slab and repel moisture without changing the surface look. Acrylics form a thin film and are fast and cheap. Polyurethane is tougher and more chemical-resistant. Epoxy coatings bond tightly to the slab and deliver a hard, seamless surface that can handle serious punishment.

Penetrating sealers (silane and siloxane). These go below the surface, react with the concrete and leave nothing sitting on top. That means no peeling, no film to scuff, and no change to the way the floor looks. They are ideal for driveways, exposed aggregate paths and outdoor entertaining areas where you want weather protection without a shiny finish. The trade-off: they offer zero resistance to oil stains or heavy abrasion. A penetrating sealer on a garage floor will still let a transmission oil spill soak straight in.

Acrylic sealers. Water-based or solvent-based, these are the most common sealers sold at hardware stores. They are easy to roll on, dry fast and give concrete a mild sheen or a wet look depending on the product. Acrylic is fine for a shed floor, a lightly used workshop, or a covered outdoor area. The problem is durability. In a garage with vehicle traffic, a good acrylic sealer is typically worn through within two to three years, sometimes less if you park hot tyres on it regularly.

Polyurethane topcoats. A step up from acrylic in every measurable way. Polyurethane is more flexible, handles UV exposure better and resists chemicals including petrol, brake fluid and most cleaning agents. It is often used as a clear topcoat over a coloured base on commercial floors. On its own it bonds reasonably well to concrete, but surface prep is still critical. Skip the grind and the poly will lift. Expect a lifespan of five to eight years in a busy commercial setting if the prep was done properly.

Epoxy floor coatings. Epoxy is a two-part product: a resin and a hardener that you mix together just before application. Once cured, it chemically bonds to the concrete and produces a surface that is dense, seamless and genuinely hard. Correctly applied epoxy can handle forklift traffic, heavy vehicle use, chemical spills and constant foot traffic for well over a decade. It can also be finished with colour flakes (often called flake or chip systems), metallic pigments, or left as a solid colour. That versatility makes it the most popular choice for garage floors, warehouses, showrooms and increasingly for residential living areas where people want a polished, low-maintenance floor.

Which floor sealant for concrete suits different spaces?

Matching the sealer to the space is the most important call you make. For outdoor driveways and paths, a penetrating silane-siloxane sealer is usually the most practical option because it handles freeze-thaw cycles and UV without peeling. For light-duty indoor slabs like a storage room or laundry, a quality water-based acrylic does the job without the cost or complexity of a two-part system. For anything that takes regular vehicle traffic, chemical exposure or needs to look sharp for years, epoxy is the clear frontrunner.

Garages are a good example. A standard single-car garage floor is roughly 25 to 30 square metres. Roll an acrylic on that and you might get two decent years before hot tyre pickup starts lifting the film in patches near the door. Lay a proper epoxy system with a prepared substrate and you are looking at a floor that holds up for ten-plus years and still looks good. The upfront cost is higher but the cost per year works out lower, and you are not tearing the floor back to bare concrete every couple of years to start again.

Showrooms, gyms, retail spaces and open-plan living areas often lean toward metallic epoxy or flake finishes because they deliver the durability of an industrial coating with a finish that actually looks intentional. A metallic epoxy floor in a home gym or a renovated garage workshop shifts the whole feel of the space. That is the gap between a sealer that just protects and a coating system that protects and improves.

What surface preparation is needed before applying a concrete sealer?

Surface preparation is the step that determines whether your floor sealant for concrete lasts or fails. At minimum, the slab needs to be clean, dry and free of any previous coatings, oil contamination or laitance (that weak, dusty surface layer that forms during concrete curing). For penetrating sealers, a thorough clean is usually enough. For acrylic and polyurethane, the surface should be lightly abraded. For epoxy, diamond grinding or shot blasting to open the concrete profile is not optional. It is the difference between a floor that bonds and a floor that peels.

Moisture is the other prep issue that catches people out. Concrete that holds moisture below the surface will push that moisture up through a film sealer over time, causing bubbles and delamination. A simple plastic sheet tape test left for 24 hours will show you whether moisture is an issue. If condensation forms under the sheet, the slab needs more drying time or a moisture-tolerant primer before any coating goes on.

How do you know when a concrete floor needs resealing?

The clearest sign is water absorption. Splash a small amount of water on the floor. If it beads up and sits on the surface, the sealer is still doing its job. If it soaks in within a few seconds, the sealer has worn through and the concrete is exposed. Other signs include visible scuffing or peeling of a film sealer, staining that will not clean off, or a dull patchy appearance where the floor used to have a consistent sheen.

For epoxy-coated floors, wear typically shows first in the highest-traffic zones: near entry points, under workbenches and along vehicle paths. A topcoat recoat over a sound epoxy base can extend the floor’s life considerably without the need to start from scratch, as long as the base coat is still well adhered.

Get advice on the best floor sealer for your space

Concrete Repair for Floors and Driveways: A Melbourne Guide

Concrete Repair for Floors and Driveways: A Melbourne Guide

Concrete repair covers everything from filling hairline cracks and patching spalled surfaces to grinding down trip hazards and stabilising sunken slabs. In Melbourne, variable soil movement and wet winters accelerate damage, so the right repair method depends on the crack type, the cause and what the surface will be used for once it is fixed.

Why does concrete crack and deteriorate in the first place?

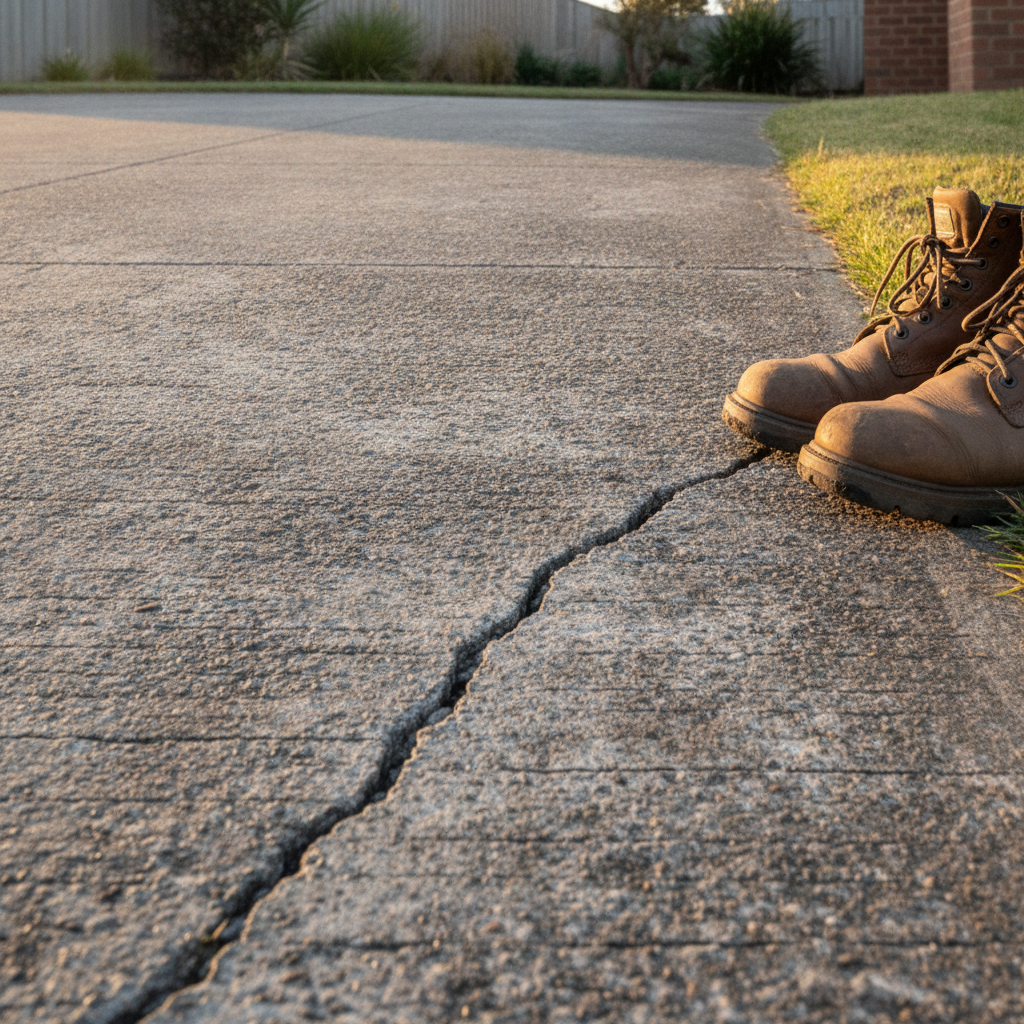
Concrete cracks and deteriorates because of shrinkage during curing, ground movement beneath the slab, freeze-thaw cycles, tree root intrusion and surface wear over time. Melbourne’s reactive clay soils are a major culprit: they swell when wet and shrink when dry, putting constant stress on slabs from below, which leads to cracks, lifting and settlement that worsen every year without intervention.

Understanding the cause matters because treating the symptom without fixing the source is a waste of money. A crack caused by a tree root three metres away will reopen within a season if the root is still active. A sunken driveway panel caused by washed-out sub-base fill will sink again if the void underneath is not addressed before patching the surface.

The most common damage types you will see on Melbourne driveways and garage floors include:

  • Hairline cracks. Usually cosmetic. Common in new slabs as the concrete cures and shrinks.
  • Structural cracks. Wide, deep or actively moving cracks that signal slab movement or base failure.
  • Spalling. Flaking or pitting on the surface, often caused by moisture getting in and corroding the reinforcing steel below.
  • Settlement. One panel sitting lower than the next, creating a lip that is both a trip hazard and a water trap.
  • Delamination. A thin top layer separating from the body of the slab, producing a hollow sound when tapped.

What are the most common concrete repair methods?

The most common concrete repair methods are epoxy injection for structural cracks, polyurethane foam lifting for sunken slabs, grinding for surface lips and trip hazards, and polymer-modified patching compounds for spalling and surface damage. Each method suits a different problem, and mixing them up leads to repairs that fail within a year or two.

Here is a plain-English rundown of the main approaches:

Crack injection

Low-viscosity epoxy or polyurethane resin is injected under pressure into the crack. Epoxy bonds the two faces together and restores structural strength. Polyurethane foam expands to fill the void and is better for wet or actively leaking cracks. This is the right call for any crack wider than about 0.3 mm that has not been caused by active slab movement.

Polymer-modified patching

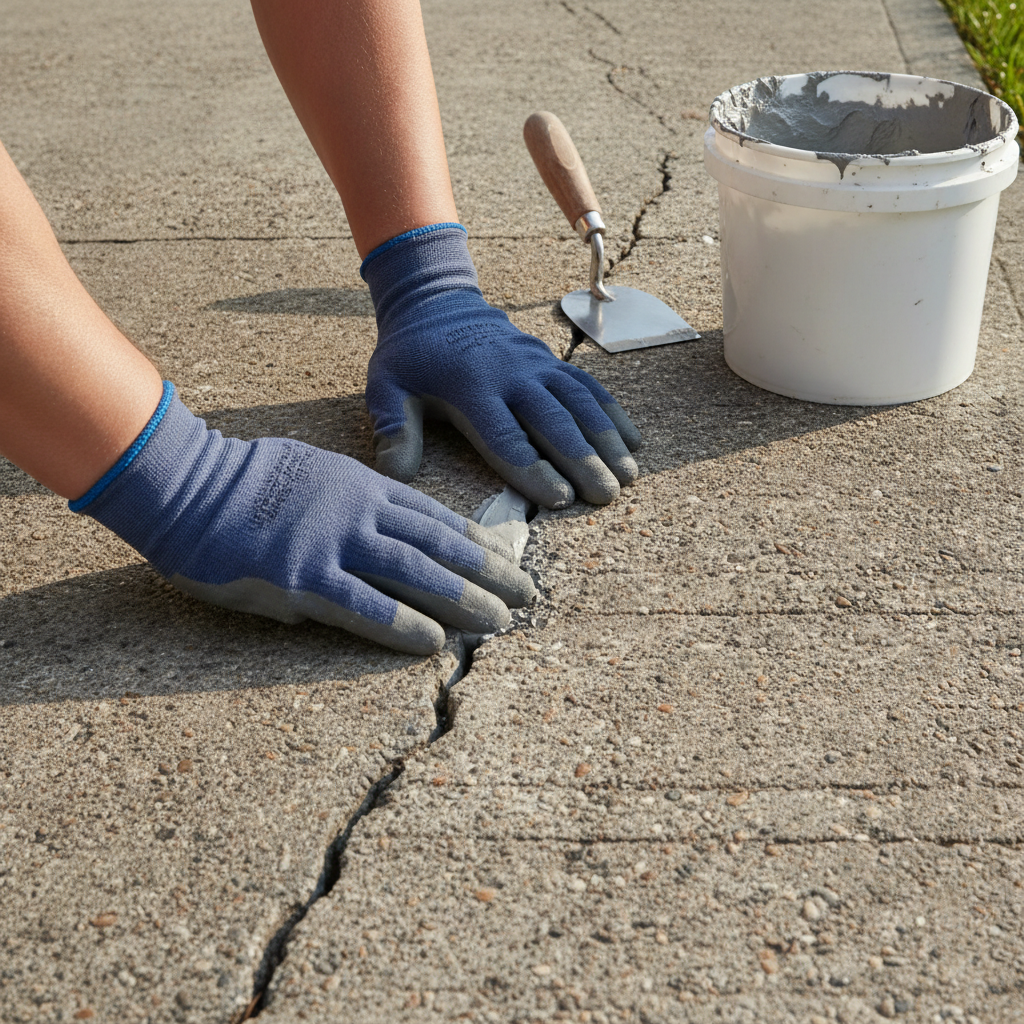
A Portland cement base mixed with polymer additives bonds far better to existing concrete than plain cement does. The patch is applied in layers, keyed into the surrounding slab and finished to match the surrounding surface. It is the standard fix for spalling, potholes and shallow surface defects on driveways and garage floors.

Slab lifting (poly-jacking)

Expanding polyurethane foam is injected through small drilled holes to fill voids and lift a sunken slab back to level. It is faster and less invasive than replacing the panel entirely, and the foam cures in minutes rather than the 28 days a new slab needs. It works best when the surrounding panels are still structurally sound.

Grinding and levelling

Where two adjacent panels have differential settlement of less than about 20 mm, a concrete grinder can feather the high edge down to remove the trip hazard. It is a quick, cost-effective fix for paths and driveways where replacing the whole panel would be overkill.

Full panel replacement

Sometimes the damage is too extensive to patch economically. A panel that is heavily reinforced with multiple cracks, significant settlement or badly corroded steel is often cheaper to break out and repour. The new concrete needs a proper sub-base and at least four weeks before heavy vehicle traffic.

How much does concrete repair cost in Melbourne?

Concrete repair in Melbourne typically ranges from around $200 to $300 for minor crack injection on a single panel up to $3,000 or more for full panel replacement on a residential driveway. Slab lifting sits in the middle, averaging $500 to $1,500 depending on how many holes are needed and how much lift is required. Surface grinding for a trip hazard is usually the most affordable fix, often under $300 for a single edge.

Those figures move based on access, the thickness of the slab, the extent of the damage and whether any reinforcing steel needs treatment. Always get a quote that specifies the repair method, not just a lump sum, so you can compare apples with apples. A cheap patch that uses a non-bonding compound on a spalled surface will delaminate in the next frost and cost you again.

One concrete detail worth knowing: Australian Standard AS 3600 specifies a minimum 20 MPa compressive strength for residential slabs, and most reputable patching products are rated to match or exceed that. If a contractor is mixing up a general-purpose bag-mix cement to fill a structural crack, that is a flag to ask questions.

Should you repair concrete yourself or hire a professional?

You can repair concrete yourself for small cosmetic cracks and minor surface spalling using off-the-shelf patching compounds, but anything structural, sunken or larger than a few square metres is best left to a professional. DIY repairs on structural cracks or settled slabs often fail quickly because surface-level products cannot address the movement or void causing the damage in the first place.

The honest answer for most homeowners is: DIY is fine for a hairline crack on a garden path that is purely cosmetic. Once the crack is wider than a couple of millimetres, the slab is rocking underfoot, there is rust staining pointing to corroded reo, or the surface is delaminating in chunks, you are into professional territory. Getting it wrong on a driveway or garage floor costs more to fix a second time than just calling a pro on the first pass.

When choosing a contractor, look for someone who starts with a proper diagnosis rather than a quote. A good concretor will check whether the crack is active (still moving) or dormant, test for hollow spots, assess the sub-base and only then recommend a method. If someone quotes you before they have looked at the cause, that is worth pausing on.

How does concrete repair work with epoxy floor coatings?

Concrete repair is the essential first step before applying any epoxy floor coating. Epoxy is a thin-film material that conforms to the surface below it, meaning every crack, pit and hollow spot will telegraph through to the finished coat if not filled and levelled first. A properly repaired and prepared slab gives epoxy the flat, sound base it needs to bond and perform for the long haul.

This is especially relevant for garage floors and internal warehouse slabs in Melbourne where owners want a metallic or flake epoxy finish. The surface prep stage, which includes grinding, patching and sometimes moisture testing, is what separates a coating that lasts a decade from one that peels in two years. Skipping or rushing the repair work is the single most common reason epoxy coatings fail prematurely.

If your floor or driveway has cracks, spalling or settlement that you want addressed before a coating goes down, starting with a proper concrete repair assessment is the right order of operations. Get a concrete repair quote

Concrete Driveway Repair in Melbourne: Options and Costs

Concrete Driveway Repair in Melbourne: Options and Costs

Concrete driveway repair in Melbourne typically costs between $300 and $3,500 depending on the extent of the damage, the repair method chosen, and the size of the affected area. Minor crack filling sits at the cheaper end, while full resurfacing with a protective coating pushes toward the higher end. Catching problems early almost always saves money in the long run.

Why do concrete driveways crack and deteriorate in Melbourne?

Melbourne’s notorious four-seasons-in-one-day weather is the main culprit. Concrete expands in summer heat and contracts overnight or during cold snaps, and that constant movement opens hairline cracks over time. Clay-heavy soils common across Melbourne’s suburbs shift with moisture, pushing unevenly on slabs from below. Add regular vehicle loads and tree roots looking for water, and surface damage becomes almost inevitable after ten to fifteen years of use.

Other common causes include:

  • Poor installation with insufficient sub-base compaction
  • Control joints that were spaced too far apart during the original pour
  • Oil and chemical spills that break down the surface binder
  • Water pooling that freezes or erodes the edges over time

Understanding why the damage happened matters before you choose a repair method. Patch a symptom without fixing the underlying cause and you will be back doing it again in a year or two.

What are the main concrete driveway repair options available?

The right repair depends on how deep the damage goes. Surface cracks and spalling call for different solutions than sunken or structurally compromised slabs. There are four practical options most Melbourne homeowners will consider: crack injection, concrete patching, resurfacing, and full slab replacement. Each has a different cost range and a different expected lifespan.

Crack injection and sealing

Hairline cracks up to about 5 mm wide are typically filled with a polyurethane or epoxy injection resin. The material is forced into the crack under low pressure, bonds to both faces, and stops water getting in and making things worse. This is the most affordable fix, usually sitting between $10 and $30 per linear metre for a contractor to complete properly. Done right, it adds years to a slab that is otherwise still sound.

Concrete patching

Where chunks have broken away, corners have spalled, or shallow craters have formed, a polymer-modified concrete patch mix is the standard approach. The damaged area is cut back to clean edges, primed, and filled flush. A decent patch should last five to ten years if the sub-base is stable. Budget roughly $150 to $600 for a typical residential repair depending on how many spots need attention.

Concrete resurfacing

Resurfacing means applying a fresh layer over the existing slab. It suits driveways that are structurally sound but look worn, pitted, or stained. A concrete overlay or skim coat, typically 5 to 15 mm thick, bonds to the old surface and gives you a clean slate. Costs generally run between $30 and $70 per square metre for a plain finish. Decorative finishes push that figure higher. A standard double driveway of around 40 square metres might cost $1,200 to $2,800 all up.

Full slab replacement

When the slab has significant settlement, deep structural cracks, or has broken into multiple sections, replacement is the honest answer. Demolition, disposal, sub-base prep, and a new pour typically start around $100 to $150 per square metre in Melbourne. It is a bigger upfront cost but delivers a fresh twenty-to-thirty-year lifespan when paired with proper sub-base work.

How do you know which concrete driveway repair method is right for your situation?

The deciding factor is whether the slab is structurally sound. Tap the concrete with a hammer: a hollow sound means the material has delaminated underneath and a surface patch will not hold. Measure crack widths with a feeler gauge: anything wider than 5 mm or cracks that are moving (widening on one side) usually signal deeper movement. If slabs have settled unevenly by more than 20 mm, tripping hazards become a liability issue and replacement should be on the table.

A practical checklist before getting quotes:

  • Note where water pools after rain, because that area needs either levelling or drainage work alongside the repair
  • Check whether any cracks run through to the underside of the slab
  • Look for tree roots within 2 metres of the cracked area
  • Find out the slab age if you can. Slabs older than thirty years may have lower cement content and take patches less reliably

Getting two or three quotes from experienced local concreters and asking them to explain what is causing the damage will quickly tell you whether their diagnosis lines up. If they all point to the same root cause, you can be reasonably confident in the recommended fix.

What can you do to protect a repaired driveway and extend its life?

A penetrating concrete sealer is the single best thing you can do after any repair work. Sealers block moisture ingress, resist oil stains, and slow the UV degradation that bleaches and dries out the surface. Plan to reseal every three to five years. Many homeowners skip this step and wonder why their patched areas look tired again within a couple of seasons.

Beyond sealing, a few habits make a real difference:

  • Avoid parking heavy vehicles like trailers and skips on the edges of slabs, where the concrete is thinnest
  • Clean oil spills promptly with a degreaser before they penetrate
  • Keep control joints clear of debris so they can do their job of directing crack movement
  • Trim trees with aggressive root systems that are planted close to the driveway

If the repair involved resurfacing or an overlay, some homeowners take the opportunity to apply a decorative epoxy or flake coating over the top. This adds a durable, easy-to-clean finish that also makes future staining and surface wear far less noticeable. It is worth factoring into your planning from the start rather than treating it as an afterthought.

How do you get an accurate quote for concrete driveway repair in Melbourne?

Getting an accurate quote means giving contractors enough information to assess the job properly. Photos help, but an on-site assessment is the only way to confirm soil conditions, slab thickness, and whether any drainage issues need addressing at the same time. Be specific about what you want: a patch to make it functional, a resurface to make it look new, or a full replacement for long-term peace of mind.

Ask each contractor to break down their quote into materials, labour, and any sub-base or drainage work. That makes it straightforward to compare quotes that might otherwise look similar on the total but differ significantly in scope. A contractor who includes proper surface prep in their pricing is nearly always worth more than one who skips it to win on price.

For Melbourne homeowners looking at their driveway and unsure where to start, the best first step is a professional eye on the problem before committing to any repair method. Book a concrete repair assessment.

Epoxy Driveway Coatings in Melbourne: Are They Worth It?

Epoxy Driveway Coatings in Melbourne: Are They Worth It?

An epoxy driveway coating is worth it for most Melbourne homeowners who want a hard-wearing, low-maintenance surface that handles oil, tyre marks and UV exposure better than bare concrete. Properly applied over a prepared slab, a quality epoxy system can last 10 to 15 years before needing a recoat, making the upfront cost reasonable over its lifetime.

What exactly is an epoxy driveway coating?

An epoxy driveway coating is a two-part resin system, a base resin and a hardener, that bonds chemically to a concrete substrate and cures into a rigid, seamless surface. Unlike paint, which sits on top of the concrete, epoxy penetrates the surface pores and locks in, giving you a coating that won’t peel or flake under normal vehicle traffic and weather conditions.

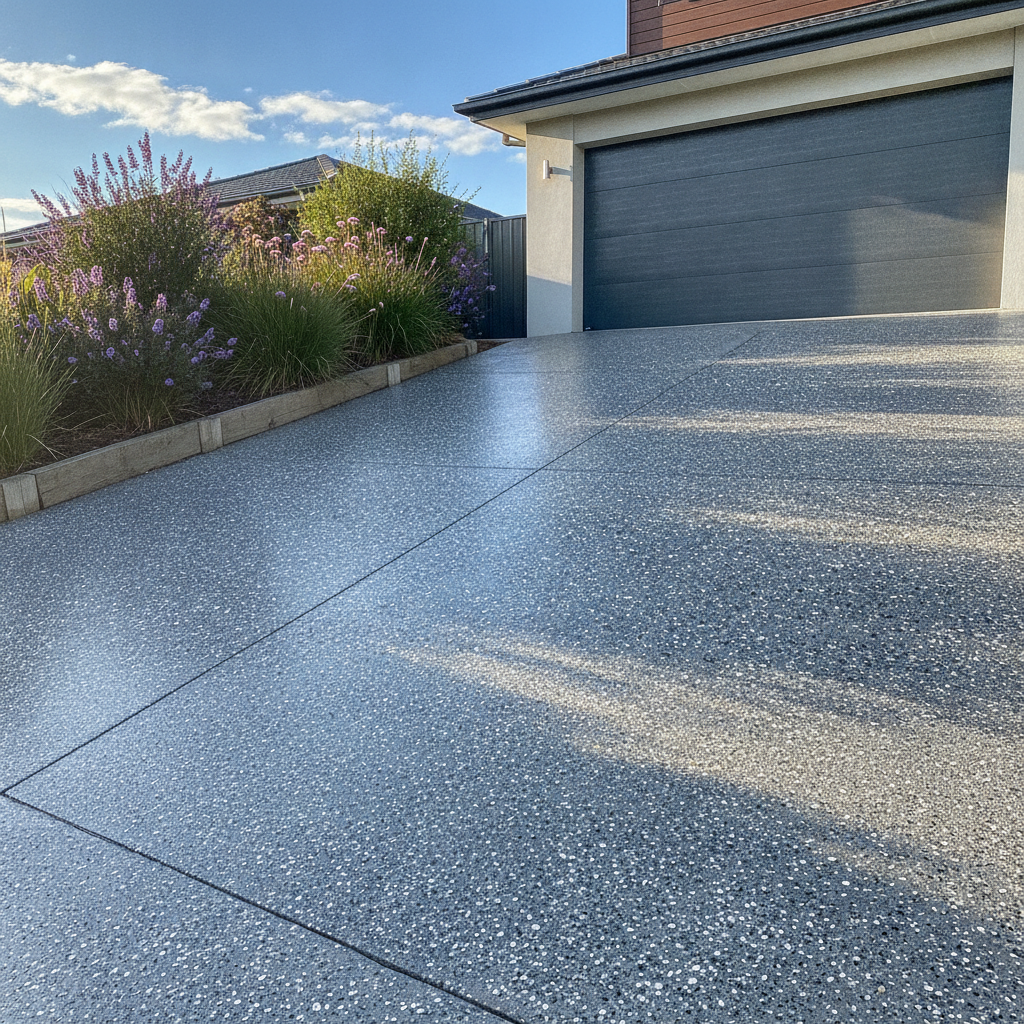
The system typically includes a penetrating primer coat, a pigmented body coat and a clear topcoat sealer. Decorative flake or metallic pigments are broadcast into the wet body coat before the topcoat goes down, which is exactly the kind of finish Metal and Flake specialise in for Melbourne garages and floors. The same product chemistry applies to driveways, though the formulation needs to be chosen with outdoor UV stability in mind.

One key distinction worth knowing: not all epoxies are created equal for outdoor use. Standard solvent-based epoxies can amber and chalk under direct Melbourne sun. Polyaspartic or polyurethane topcoats are often specified over an epoxy base on driveways precisely because they hold their colour and gloss far longer outdoors.

How does an epoxy driveway hold up in Melbourne’s climate?

Melbourne’s climate, with its wide temperature swings, occasional heatwaves pushing past 40°C and UV index regularly hitting 11 or 12 in summer, is genuinely tough on surface coatings. A well-specified epoxy driveway system handles these conditions well, provided the concrete substrate is properly prepared and an aliphatic (UV-stable) topcoat is used rather than a basic aromatic epoxy clear.

Concrete driveways expand and contract with temperature changes. Any existing cracks in the slab will need to be chased out and filled with a flexible filler before coating, because epoxy is rigid and will telegraph movement straight through a thin film if the prep work is skipped. This is the single most common cause of premature failure on driveway epoxy jobs, not the product itself but cutting corners on surface preparation.

On the positive side, epoxy is chemically resistant. Petrol, oil, brake fluid and fertiliser runoff from the garden all wipe off a cured epoxy surface without staining, which is a genuine advantage over exposed aggregate or plain concrete that soaks up every drip. In a city where cars sit on driveways for years, that matters.

What does an epoxy driveway cost in Melbourne?

Pricing for an epoxy driveway in Melbourne generally sits between $40 and $80 per square metre for a quality two-to-three coat system, depending on the size of the area, the condition of the existing concrete and the finish chosen. A standard double-car driveway of around 40 square metres would typically come to somewhere between $1,600 and $3,200 fully installed.

That range sounds wide, but the variables are real. A slab with significant cracking, oil contamination or a previous coating that needs grinding off will take more labour hours before a single drop of epoxy goes down. Shot-blasting or diamond-grinding the surface to the right profile (typically a CSP 3 to 4 profile, meaning it feels like coarse sandpaper to the touch) is non-negotiable for proper adhesion, and that equipment hire and labour cost shows up in the quote.

Compare that against resurfacing with plain concrete (roughly $50 to $80 per square metre just for the pour) or exposed aggregate (often $100 per square metre or more), and a properly installed epoxy driveway starts to look like reasonable value, especially when you factor in how little maintenance it needs afterwards.

How long does an epoxy driveway last before it needs attention?

A quality epoxy driveway system installed on a properly prepared slab typically lasts 10 to 15 years under normal residential use before the topcoat needs refreshing. The base coat can often remain sound for much longer. Regular maintenance is straightforward: a rinse with a garden hose, an occasional scrub with a mild detergent and a pressure wash once or twice a year is all that’s needed.

The finish will show fine surface scratches over time, particularly from gravel dragged under tyres, which is completely normal for any hard coating. A light recoat of the topcoat layer every seven to ten years will keep the surface looking sharp without the expense of stripping and starting again from scratch.

One practical tip: avoid parking a hot vehicle on fresh epoxy during the first week of cure. The resin is still reaching full hardness and tyre marks can imprint under concentrated heat loads. After a full cure, that concern disappears entirely.

Is an epoxy driveway slippery when wet?

A plain gloss epoxy surface can be slippery when wet, which is a legitimate concern for a driveway where people are walking. The straightforward fix is to broadcast a small quantity of aluminium oxide anti-slip aggregate into the topcoat before it cures. This creates a micro-texture that is barely visible to the eye but noticeably improves grip underfoot, even in Melbourne’s rainy winters.

A broadcast flake finish, where colour flakes are scattered across the surface, also adds natural texture that reduces slip risk compared to a flat gloss coat. Most professional epoxy applicators will offer anti-slip options as a standard part of a driveway specification. If a quote doesn’t mention it, ask about it.

What should you look for in an epoxy driveway installer?

The quality of the installation determines the outcome far more than the brand of product used. When getting quotes, ask every installer three specific questions. First, how will they prepare the surface (the answer should involve mechanical grinding or shot-blasting, not acid etching alone, which is insufficient for driveways). Second, what is the total dry film thickness of the system they are applying (a driveway system should be at least 300 to 500 microns total). Third, what topcoat chemistry are they using and is it UV-stable for outdoor use.

If an installer can’t answer those questions clearly, that tells you something important about their process. A good installer will also inspect the slab for moisture before quoting, because high moisture vapour transmission through a concrete slab is one of the leading causes of delamination on any epoxy coating job.

Metal and Flake work across Melbourne and surrounds, applying decorative epoxy systems to residential and commercial floors. If you’re weighing up whether your driveway is a good candidate for a coating, the best starting point is getting a site-specific quote so you know exactly what you’re working with.

Get a driveway epoxy quote

Garage Epoxy Floor Cost in Melbourne: What to Budget For

Garage Epoxy Floor Cost in Melbourne: What to Budget For

Garage epoxy floor cost in Melbourne typically ranges from $30 to $80 per square metre for a professionally installed system, depending on the condition of the slab, the number of coats, and the finish you choose. A standard double garage of around 36 sqm will usually land somewhere between $1,100 and $2,900 all-in. The gap between those two numbers is where the real decisions happen.

What does garage epoxy floor cost actually include?

Garage epoxy floor cost covers more than just the paint-like material going onto the slab. A proper quote should include surface preparation (usually diamond grinding), a primer or base coat, the coloured epoxy body coat, decorative flake or metallic pigment if you want it, and a clear polyurethane or polyaspartic topcoat for durability and sheen. Labour, waste disposal and any minor crack filling are also part of a complete job.

When you see a rock-bottom price advertised online, it almost always means one or more of those steps has been dropped. The most common cut corner is surface preparation. Skipping the grind and going straight over a dusty or contaminated slab is the single biggest reason epoxy floors peel within a year or two. A quality installer will spend as much time prepping the concrete as they do applying the product.

Here is a rough breakdown of what each element contributes to cost on a typical double garage:

  • Surface prep (diamond grinding and vacuuming): $200 to $500
  • Primer coat: $150 to $300
  • Epoxy base and colour coat: $400 to $900
  • Decorative flake broadcast: $100 to $300 (optional but popular)
  • Clear polyurethane topcoat: $250 to $600

Those numbers stack differently depending on the installer, the products used and what your slab actually needs.

What factors push the garage epoxy floor cost higher?

Several things can move the final number up from the base rate. The biggest ones are slab condition, floor size and finish complexity. A slab with deep cracks, oil staining, previous paint or a moisture problem takes more prep time and sometimes specialist products. Each of those adds real dollars to the quote.

Finish choice matters a lot too. A plain solid colour coat is the most affordable option. Broadcast flake systems (where vinyl flake chips are scattered over the wet epoxy) sit in the mid-range and are the most popular for garages because they hide tyre marks and minor scuffs well. Metallic epoxy finishes, which use pigment powders to create a swirling, three-dimensional look, sit at the top of the price range because they require more skill and more coats to achieve the effect.

Access and working conditions also play a role. A garage crammed with shelving, a workbench bolted to the floor, or a lift pit that needs masking all add time. If the installer needs to work around cabinetry or machinery, expect to pay for that extra labour.

Finally, topcoat choice affects cost and longevity. A standard polyurethane topcoat is solid for most domestic garages. Polyaspartic coatings cure faster and are harder-wearing, which makes them preferred for workshop floors or anywhere with heavy traffic. Polyaspartic typically adds $5 to $15 per square metre over a standard poly topcoat.

Is a cheap DIY kit a genuine alternative?

DIY epoxy kits sold at hardware chains cost roughly $150 to $350 for a double-garage kit. On the surface that looks like a saving of over $1,000. The catch is that most of those kits are water-based epoxy paints with a low solids content, not the two-part high-build systems used by professional installers. They are thinner, bond less aggressively, and are far more prone to peeling under hot tyres, which is the most common failure point in any garage floor coating.

The other practical reality is surface preparation. Professionals use commercial-grade diamond grinders with dust extraction systems that open up the concrete surface properly. A homeowner hiring a small floor grinder for the weekend rarely achieves the same result, and the coating adhesion suffers for it. Most professional epoxy systems carry a product and workmanship warranty of several years precisely because the prep and product are done to spec. A hardware kit carries none of that.

For a small laundry or utility room, a DIY kit might be fine. For a garage floor that gets driven on daily and sees oil drips, brake fluid and temperature swings, the professional system is worth the money.

How do you get a fair garage epoxy floor quote in Melbourne?

Getting an accurate quote starts with giving the installer clear information: the size of the slab in square metres, any known issues like cracks, damp patches or previous coatings, and the finish style you are after. Photos help enormously. A good installer will still want to inspect in person before committing to a final price, particularly if slab moisture is a potential issue.

When comparing quotes, look at what is actually included. Two quotes that both say “$45 per sqm” can be completely different jobs if one includes diamond grinding and a polyaspartic topcoat and the other uses a single brush-applied coat over a swept floor. Ask each installer to list the steps and the specific products used. Reputable installers are happy to answer those questions.

Timing can also affect price. Like most trade work in Melbourne, scheduling during quieter periods rather than peak summer demand can sometimes get you a better rate or a faster start date. It is worth asking.

One more thing: a cured epoxy floor needs 24 hours before foot traffic and typically 72 hours before you drive on it. Plan for the garage to be out of action for a few days. That is a small inconvenience for a floor that, done properly, can last 10 to 20 years without needing attention beyond a mop and an occasional recoat of the topcoat layer.

Ready to find out exactly what your garage will cost? Get a garage epoxy floor quote

How to Choose Epoxy Flooring Installers in Melbourne

How to Choose Epoxy Flooring Installers in Melbourne

Choosing epoxy flooring installers in Melbourne comes down to four things: proper surface preparation, quality two-part epoxy products, a clear written warranty, and a local installer who will still be around if something goes wrong. Ask about all four before you sign anything, and you will avoid most of the common horror stories homeowners and business owners run into.

Why does surface preparation matter so much when hiring epoxy flooring installers?

Surface preparation is the single biggest factor in whether an epoxy floor lasts five years or twenty. Proper prep involves grinding or shot-blasting the concrete to open the surface profile, removing any oil, moisture or old adhesive, and patching cracks before a single drop of epoxy goes down. Skip or rush that step, and the coating will peel within months regardless of how expensive the product is.

A good rule of thumb: if an installer quotes you a price over the phone without asking about the age of your slab, whether it has any existing coatings, or whether there is under-slab moisture, treat that as a yellow flag. Experienced epoxy flooring installers will want to see the floor first. Diamond grinding is the industry-standard method for achieving a concrete surface profile (CSP) of around 2 to 3, which is the sweet spot for most residential and light-commercial epoxy systems. Ask your installer directly: “What method do you use to prep the concrete, and how do you check for moisture?” Their answer will tell you a lot.

How do you compare epoxy flooring products and systems across different installers?

Not all epoxy is the same. You want a genuine two-part, 100% solids or high-solids epoxy system, not a single-part water-based paint that happens to have the word “epoxy” on the label. A quality system typically includes a penetrating primer coat, a pigmented base coat, a decorative layer (such as colour flake or metallic pigment), and a clear polyurethane or polyaspartic topcoat for UV stability and abrasion resistance.

When you are comparing quotes, ask each installer to name the specific product system they use and whether it meets Australian standards for your application. For garage floors, you want a system rated for vehicle traffic and hot tyre pick-up resistance. For a commercial kitchen or warehouse, slip resistance and chemical resistance matter more. Metallic and decorative flake finishes add a visual layer but the structural performance still comes from the base system underneath. Do not be afraid to Google the product brand they mention: reputable suppliers like Rust-Oleum, Duraamen or local Australian commercial-grade brands will have clear technical data sheets available online.

What should you look for in an epoxy flooring installer’s quote and warranty?

A trustworthy quote will be itemised. It should list surface preparation, primer, base coat, decorative layer and topcoat as separate line items, not just a single lump sum per square metre. That transparency lets you compare apples with apples when you have multiple quotes in hand. Anything that just says “supply and install epoxy floor” with no further detail is worth questioning.

On warranties: a quality residential epoxy floor should carry at least a two to five year workmanship warranty from the installer, separate from any product warranty offered by the manufacturer. Ask whether the warranty covers peeling, delamination and colour fade. Get it in writing. Some installers will offer a warranty verbally but go quiet when you follow up. If a company has been operating in Melbourne for several years and has a physical contact address (not just a mobile number and a Gmail address), that is a reasonable sign they intend to be around to honour their commitments.

What red flags should you watch out for with epoxy flooring installers in Melbourne?

There are a handful of patterns that show up again and again with substandard jobs. Watch for these before you hand over a deposit.

The first is no site visit. As mentioned above, quoting without seeing the slab is a shortcut that almost always leads to problems, either during installation or when the floor starts failing early.

The second is a very low price with no explanation. Epoxy flooring involves real material costs: a commercial-grade two-part system alone can run to $15 to $30 per litre before labour. If a quote is dramatically cheaper than others, something is being cut, usually prep time, product quality or both.

The third is no portfolio or references. Any installer who has been laying epoxy floors in Melbourne for a reasonable period will have photos of completed jobs and happy customers willing to talk. Ask for both. A quick drive past a finished garage or warehouse floor is worth more than any brochure.

The fourth is pressure to decide immediately. “This price is only good today” is a sales tactic, not a sign of a good tradesperson. A confident installer with a full schedule does not need to pressure you.

How do local Melbourne epoxy flooring installers differ from national franchise operators?

Local, owner-operated businesses tend to live or die by their reputation in a specific area. For Melbourne homeowners and small business owners, that usually means more accountability: the person quoting the job is often the same person laying the floor. They rely on word of mouth in suburbs like Dandenong, Frankston, Geelong and across the inner metro, so they have a strong incentive to get it right.

National franchise models are not automatically bad, but the quality can vary significantly from one franchisee to the next, and the head office warranty means little if the local operator closes down. When you are investing in a floor that is meant to last a decade or more, knowing who to call if something goes wrong is genuinely important.

Also worth noting: local installers are more familiar with Melbourne’s variable climate. Concrete in coastal suburbs can hold more moisture than slabs further inland, and hot summer days can affect pot life (the working time of mixed epoxy) significantly. An experienced local operator will adjust their process accordingly, whereas someone following a generic national script may not.

What questions should you ask before hiring epoxy flooring installers?

Here is a practical shortlist you can use on any installer you speak to. Write down the answers so you can compare them side by side.

  • Do you do a site visit before quoting?
  • What method do you use for surface preparation, and how do you test for moisture?
  • What specific product system do you use, and can you share the technical data sheet?
  • Is your quote itemised, and what is included in the prep stage?
  • What warranty do you offer, and is it in writing?
  • Can I see photos of similar jobs you have completed in Melbourne?
  • How long have you been installing epoxy floors, and are you fully insured?

Any installer worth hiring will answer all of those questions confidently and without hesitation. If you get vague answers or pushback, that tells you something useful too.

Taking thirty minutes to ask the right questions before you book can be the difference between a floor that looks sharp and holds up for years, and one that starts bubbling or peeling before the first winter is out. Do the homework, get at least three quotes, and trust your gut about who communicates clearly and treats you as a real person rather than just a job number.

Get a quote from a local epoxy installer