What Is a Waterproofing Membrane and Do You Need One?

What Is a Waterproofing Membrane and Do You Need One?

A waterproofing membrane is a thin, continuous barrier applied to a surface to stop water from passing through it. It sits between the substrate (the concrete or structural slab beneath your feet) and whatever finish goes on top. It prevents moisture from penetrating downward into the structure or creeping back upward from below, protecting both the building and the floor coating above it.

What exactly does a waterproofing membrane do?

A waterproofing membrane seals the surface it is applied to so that liquid water and water vapour cannot pass through. It bridges hairline cracks, covers porous concrete, and creates a continuous film that channels any water toward drains rather than into the slab or the layers beneath. Without one in the right setting, water finds its way through and causes damage over time.

Think of concrete as a sponge. It looks solid, but it is full of tiny pores and microcracks that water is happy to travel through. In a garage, a laundry, a bathroom, or any outdoor-to-indoor transition area, moisture moves constantly. It comes from cleaning, spills, rain, rising damp, and even the humidity in the air. A membrane stops that movement at the point where it matters most.

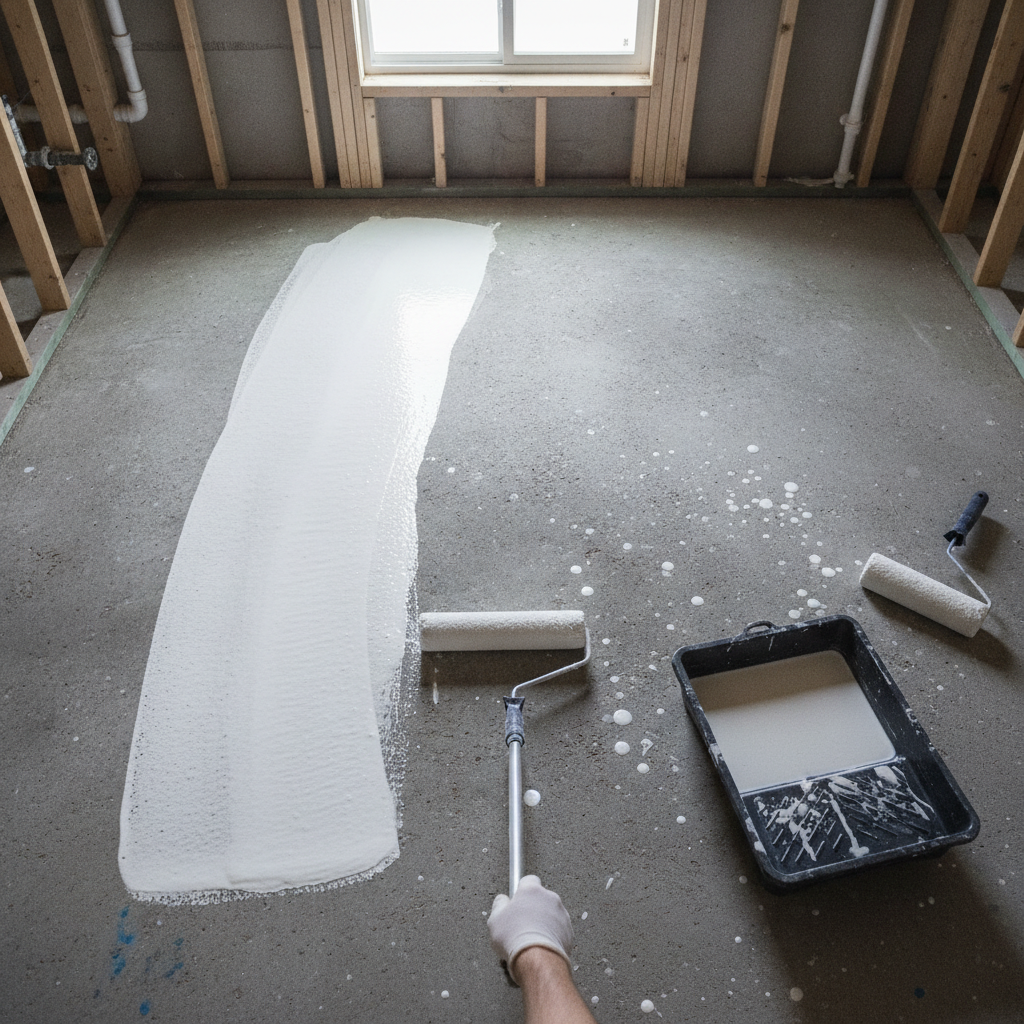
There are two main categories worth knowing about. Sheet membranes come as rolls of flexible material, often polyethylene or bitumen-based, that are laid over the substrate and overlapped at the joins. Liquid-applied membranes are brushed, rolled, or sprayed onto the surface and cure into a seamless, rubbery film. Both do the same job. The choice between them comes down to the complexity of the area, the substrate condition, and what coating is going on top.

Where are waterproofing membranes most commonly needed?

Waterproofing membranes are most commonly needed in wet areas like bathrooms, laundries, balconies, and pool surrounds, and in any space where a floor coating sits directly on concrete that is exposed to moisture from above or below. Australian Standards (AS 3740) specifically require membrane waterproofing in wet areas of residential buildings, so this is not just a best-practice recommendation in those spaces. It is a code requirement.

In a domestic bathroom or laundry, the membrane goes on before the tiles. On a balcony or podium deck, it goes under the decking or tiles to stop water from penetrating into the structure below. In a basement or below-grade slab, it may go on the underside or be applied as a negative-side treatment to push back against rising groundwater.

For epoxy flooring specifically, the relationship with membranes is worth understanding. Moisture vapour rising through a concrete slab is one of the most common reasons an epoxy floor fails prematurely. When vapour pressure builds beneath an impermeable epoxy coating, it can cause bubbling, blistering, and delamination. A moisture vapour barrier or membrane applied before the epoxy coating addresses this problem at the source. This is why proper substrate assessment, including a calcium chloride test or relative humidity probe test on the slab, is a normal part of any professional epoxy installation.

How do you know if your concrete needs a waterproofing membrane before coating?

You know your concrete likely needs a waterproofing membrane before coating if the slab is newly poured (concrete continues to release moisture for months after placement), sits on or below grade, shows visible damp patches or efflorescence, or if the space is exposed to regular water such as a garage floor that gets hosed down. A simple plastic sheet test can reveal a lot: tape a square of plastic sheeting to the slab overnight and check for condensation under it the next morning.

Newly poured slabs are a common issue. Concrete needs a minimum cure time before an epoxy coating will bond reliably. Industry guidance typically points to 28 days as a minimum cure period, though slab thickness, ambient temperature, and drainage conditions all affect the actual moisture content. Rushing this step is one of the leading causes of premature epoxy failure.

Older slabs can also hold moisture from years of groundwater movement or poor drainage around the building’s perimeter. If you are seeing white, chalky deposits on the surface (that is efflorescence, caused by soluble salts being carried to the surface by water), moisture is already moving through your slab. Any coating applied over that without addressing the root cause will not last.

Does a waterproofing membrane affect how an epoxy floor looks or performs?

A waterproofing membrane applied correctly under an epoxy floor has no negative effect on the final appearance. The membrane is a foundation layer that sits beneath the epoxy system and is not visible once the floor is finished. What it does affect, positively, is how long the epoxy coating lasts: a floor laid over a properly prepared, moisture-controlled substrate will outlast one laid directly over a damp slab by years.

For decorative epoxy systems like metallic floors or flake floors, the stakes are higher because the visual finish is the whole point. Bubbles or delamination in a decorative epoxy floor are not just a structural problem. They ruin the look entirely. Getting the substrate right before a single drop of epoxy goes down is not an optional extra. It is the foundation of a result you will still be happy with five or ten years from now.

The other thing worth noting is that not every job needs a membrane. A dry, well-aged, above-grade residential garage slab with low ambient humidity may need nothing more than thorough diamond grinding and cleaning before epoxy application. The point is to assess first, not assume. A professional applicator will check moisture levels before they quote and tell you honestly whether a membrane or vapour barrier is part of the scope.

What should you ask a contractor about waterproofing before your floor is installed?

Before your floor is installed, ask the contractor whether they will test the slab for moisture, what moisture reading they consider acceptable before proceeding, and whether their quote includes any membrane or vapour barrier work if readings come back high. A contractor who cannot answer those questions clearly is worth being cautious about, because moisture is the number one reason floor coatings fail ahead of schedule.

Other practical questions worth raising: how will the membrane or vapour barrier be joined at walls and penetrations (pipes, drains), how long does it need to cure before the topcoat goes on, and does the product they are using carry a warranty. These are not difficult questions. A good installer will answer them without hesitation because they ask themselves the same questions on every job.

If you are dealing with a wet area like a laundry or bathroom, also check whether the work needs to comply with AS 3740 and whether the installer is across those requirements. In Victoria, waterproofing in wet areas is regulated under the National Construction Code, and using the right product applied by someone who understands the standard matters for both performance and insurance purposes.

At Metal and Flake, every epoxy floor installation starts with a proper assessment of the substrate, including moisture. If your slab needs attention before the coating goes down, we will tell you upfront. Get a quote for waterproofing services
How to Seal Concrete Floors: A Melbourne Homeowner’s Guide

How to Seal Concrete Floors: A Melbourne Homeowner’s Guide

Sealing concrete is the process of applying a protective coating to bare or polished concrete so it resists moisture, staining, and surface wear. For Melbourne homeowners, the right sealer stops water ingress, keeps oil and grime from soaking in, and makes the floor far easier to clean. Done correctly, a sealed concrete floor can last a decade or more before it needs attention again.

Why is sealing concrete important for Melbourne homes?

Sealing concrete matters in Melbourne because the city’s variable climate puts floors through real punishment. Wet winters push moisture up through slabs, summer heat causes expansion and contraction, and indoor-outdoor living areas cop foot traffic, furniture scuffs and the odd spilled red wine. An unsealed slab absorbs all of that and degrades quickly. A sealed surface sheds it.

Concrete is porous by nature. Left bare, it acts like a sponge. Dust, cooking grease, motor oil, pet mess and water all work their way into the surface and either stain it permanently or accelerate surface breakdown. In Melbourne garages and alfresco areas especially, moisture wicking up through the slab is a constant issue. A quality sealer creates a barrier that keeps the slab stable and makes routine maintenance a matter of a quick mop rather than an afternoon of scrubbing.

There is also a practical resale point worth mentioning. Real estate agents in Melbourne’s competitive market consistently note that polished or well-sealed concrete floors lift the presentation of a home, particularly in open-plan living areas and renovated garages.

What types of concrete sealer are available, and which one suits your floor?

The main sealer categories are penetrating sealers, acrylic sealers, polyurethane sealers, and epoxy coatings. Penetrating sealers soak into the concrete and repel water without changing the look of the surface. Acrylic sealers sit on top, dry quickly and add a low-cost protective film. Polyurethane sealers are tougher than acrylics and handle foot traffic well. Epoxy coatings are the most durable option and bond chemically to the slab for a hard, long-lasting finish.

Penetrating sealers (silanes and siloxanes are the most common types) are a solid choice for external concrete like driveways, paths and pool surrounds. They let the slab breathe while blocking liquid intrusion. They do not change the colour or sheen of the concrete, which suits homeowners who want a natural look.

Acrylic sealers are inexpensive and easy to apply with a roller, but they wear faster. In a busy Melbourne household, plan on recoating every two to three years in high-traffic areas.

Polyurethane sealers are a step up in toughness and work well on internal floors, particularly in kitchens, hallways and living rooms. They come in matte, satin and gloss finishes, so you have flexibility over the final look.

Epoxy coatings sit in a category of their own. Rather than just sealing the surface, an epoxy bonds to the concrete and forms a hard shell that handles heavy loads, chemical spills and serious foot traffic. Epoxy is widely used in garages, workshops and commercial spaces for exactly this reason. It is also the base system used in decorative finishes like metallic and colour-flake floors.

How do you prepare concrete before sealing?

Surface preparation is the single step that determines whether a sealer sticks or peels. Before sealing concrete, the slab must be clean, structurally sound, and free of any existing coating, oil contamination or laitance (the weak, chalky top layer that forms during the original concrete pour). Skipping prep is the most common reason DIY sealer jobs fail within the first year.

Start by sweeping and vacuuming thoroughly, then degrease any oil or grease spots with an alkaline cleaner. If the slab has an old coating, it needs to come off. For small areas, chemical strippers work. For anything larger, mechanical grinding or shot blasting is the reliable approach because it opens the pores of the concrete and gives the sealer a proper surface to grip.

Once clean, check for cracks. Hairline cracks in a slab are normal and generally cosmetic, but wider structural cracks should be filled with a flexible polyurethane filler before any sealer goes down. Trying to seal over an active crack will result in the sealer lifting at that point within months.

Moisture testing is often overlooked. Place a piece of plastic sheeting on the slab, tape all four edges and leave it for 24 hours. If condensation forms underneath, the slab is too damp to seal. Sealing over a wet slab traps moisture and causes the coating to bubble and delaminate. In Melbourne’s cooler months, this is a real risk with older slabs on ground level.

What does the sealing concrete process actually involve?

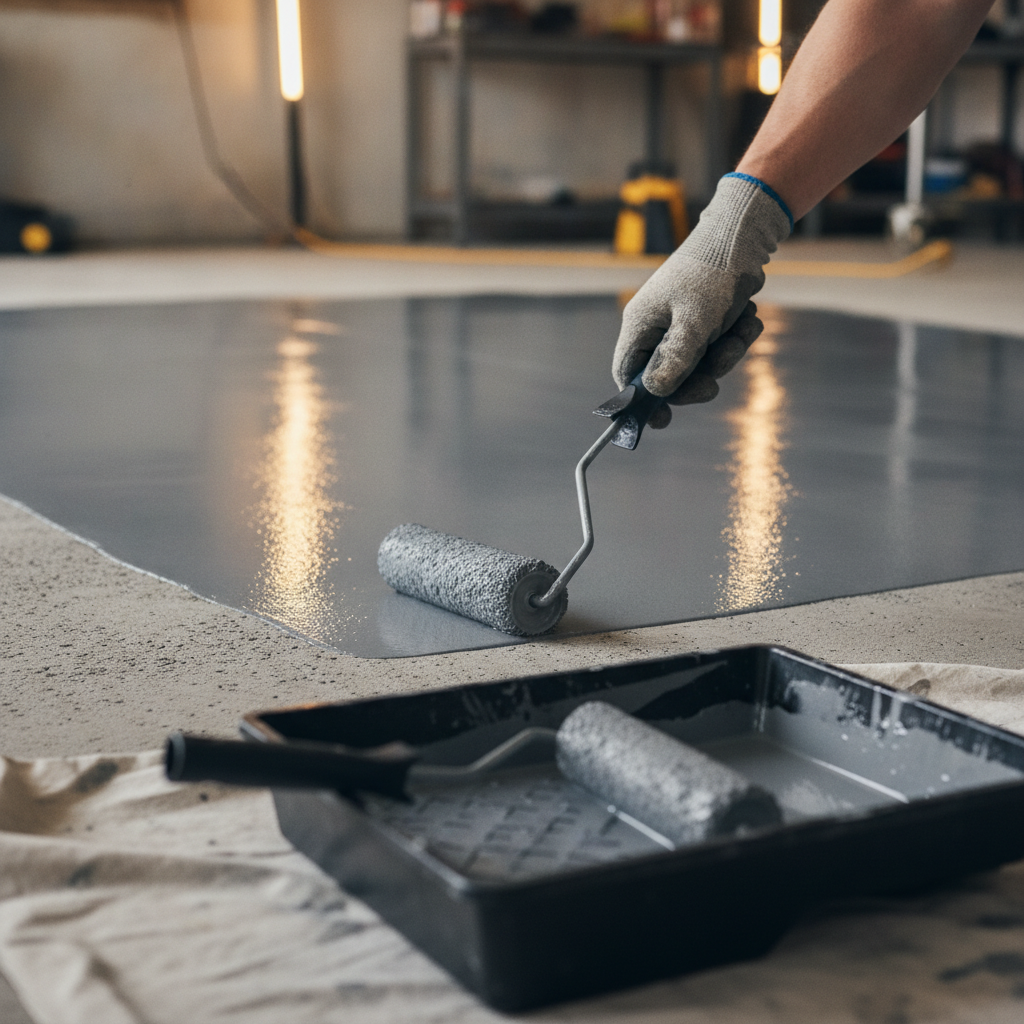
Once the slab is prepared and dry, application is straightforward for most sealers. Penetrating sealers are typically applied with a pump sprayer, allowed to soak in for 10 to 15 minutes, then the excess is spread or wiped off before it dries on the surface. Film-forming sealers like acrylics and polyurethanes go on with a short-nap roller in thin, even coats. Most products require two coats, with a light sand between coats for adhesion.

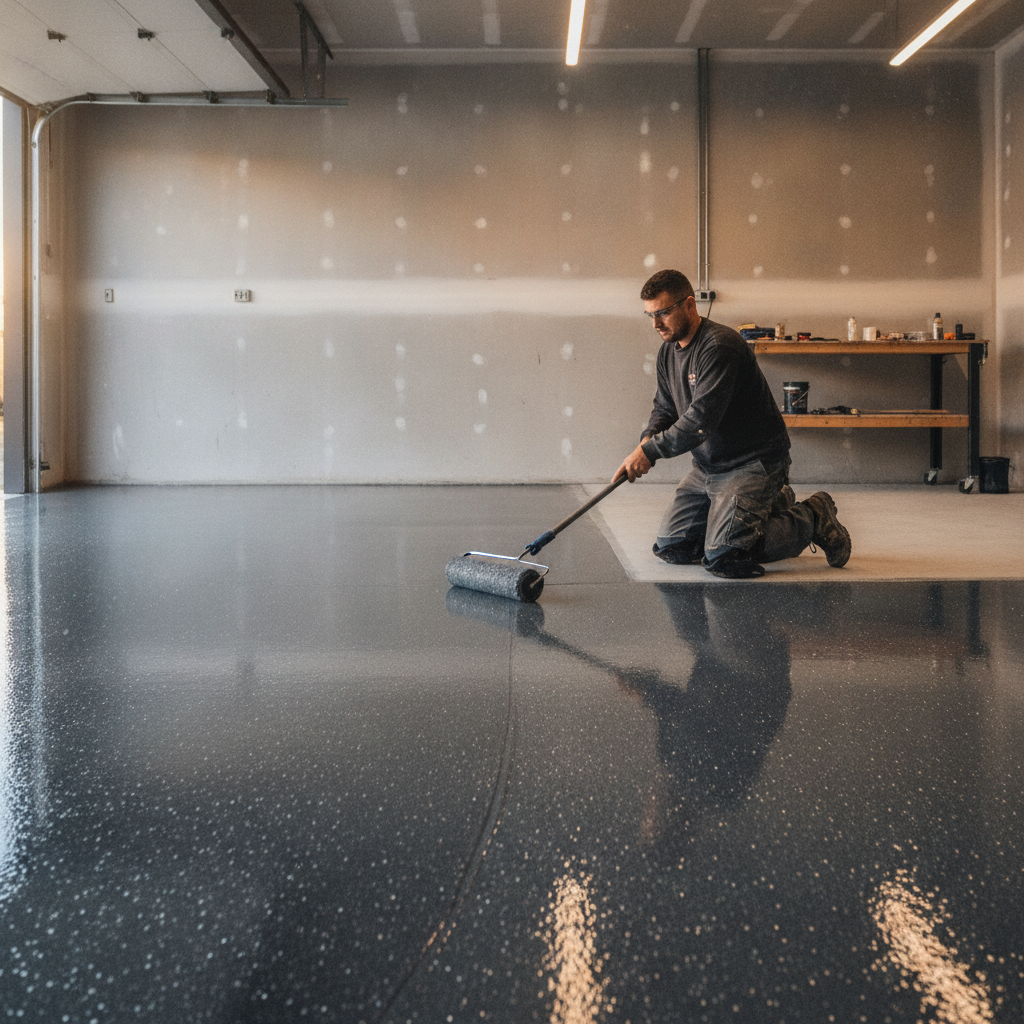
Epoxy systems are two-part products: a resin and a hardener that are mixed together immediately before application. The pot life (the working time before the mix starts to set) is typically 30 to 45 minutes depending on ambient temperature. Melbourne summers can shorten that window considerably, so planning application for cooler parts of the day matters. Epoxy is applied by squeegee and back-rolled for an even finish.

Curing time varies by product. Most film-forming sealers are dry to foot traffic within 24 hours, but they should not be subjected to heavy loads or furniture for at least 72 hours. Epoxy coatings typically reach full chemical cure after seven days, though they feel hard well before that.

When does sealing concrete call for a professional?

Sealing concrete calls for a professional when the area is large, the slab needs mechanical preparation, or the homeowner wants a decorative finish that goes beyond a clear protective coat. DIY sealer jobs on small patios or laundry floors are perfectly manageable, but grinding a garage slab, mixing and applying a two-part epoxy system across 60 to 80 square metres, or laying a metallic or colour-flake decorative finish is a different proposition entirely.

Professional applicators bring diamond-grinding equipment that opens the slab profile correctly, which is something a hired floor polisher or a hired shot blaster can approximate but rarely match for a large decorative job. They also carry commercial-grade coatings that are not available at the hardware store, and they understand how Melbourne’s climate affects product performance at each stage of application.

If the goal is a floor that looks as good as it performs. think polished concrete with a metallic shimmer, or a garage floor with a full colour-flake system that hides tyre marks and cleans up with a hose. those results come from professional surface prep and professional-grade materials. No amount of hardware store primer and roller work gets you there.

The cost of a professional epoxy or sealed concrete job varies with slab condition, floor area and finish choice. Getting a proper site assessment and written quote before committing is always the right move. It takes the guesswork out of what prep is actually needed and what the finished result will look like.

If you have a Melbourne slab that needs protection or a decorative upgrade, Book a concrete sealing consult

Concrete Resurfacing in Melbourne: Costs, Options & Process

Concrete Resurfacing in Melbourne: Costs, Options & Process

Concrete resurfacing is the process of applying a new coating or overlay to an existing concrete slab to repair surface damage, improve its look or add a protective finish. In Melbourne, it typically costs between $30 and $80 per square metre depending on the system used, the condition of the existing slab and the site prep required.

What does concrete resurfacing actually cost in Melbourne?

For most Melbourne homes and commercial sites, concrete resurfacing runs anywhere from $30 per square metre for a basic decorative overlay up to $80 or more per square metre for a full epoxy or polyurethane system with thorough prep work. The single biggest cost driver is surface preparation, not the coating itself. A slab with oil stains, cracks or previous coatings needs more grinding and priming before anything new goes down, and cutting corners at that stage is the reason most DIY jobs fail within a year.

To give that some real context: a standard double garage of around 36 square metres might sit between $1,100 and $2,900 all up, depending on which system you choose and how much prep the slab needs. A warehouse floor or large commercial area will generally attract a lower per-square-metre rate because setup costs are spread across more area.

A few things that push prices up:

  • Significant cracking or spalling that needs patching before coating
  • Previous paint or sealer that must be mechanically removed
  • Tight access, odd shapes or lots of obstacle cutting around
  • Premium finishes like metallic epoxy or full colour-flake broadcast systems

What are the main concrete resurfacing options available?

The most common concrete resurfacing options in Melbourne are decorative overlays, epoxy coatings, polyurethane (polyaspartic) topcoats and colour-flake broadcast systems. Each suits different budgets, uses and desired looks. Epoxy and polyaspartic systems are the most durable for residential garages and commercial floors, while thin overlays work well for outdoor areas and light foot-traffic spaces.

Here is a plain-English breakdown of what each system actually is:

Decorative overlays. A thin cement-based product trowelled or sprayed over the old surface. Good for patios, driveways and pool surrounds where you want a refreshed look without big spend. Typically 2 to 4 mm thick. Not as tough underfoot as a resin system, but it breathes well outdoors and handles temperature changes better than epoxy in exposed areas.

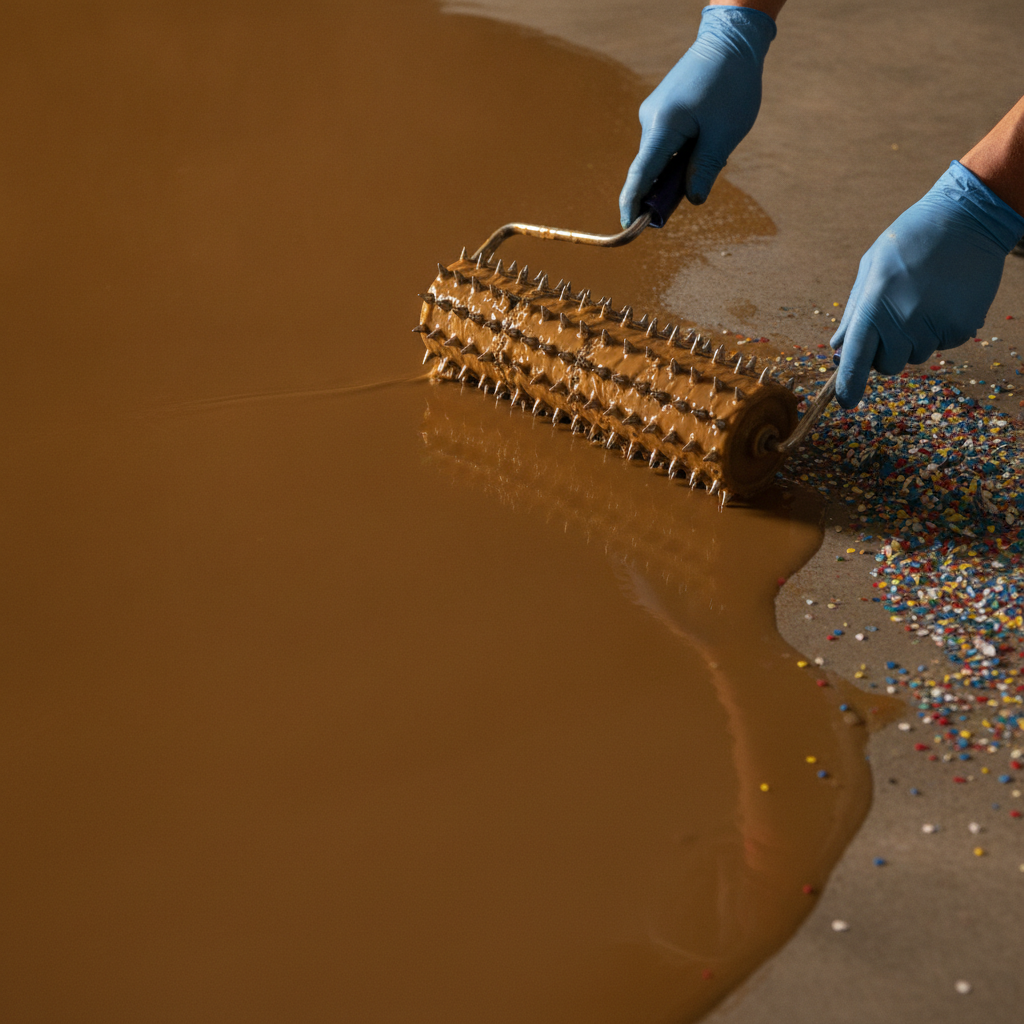
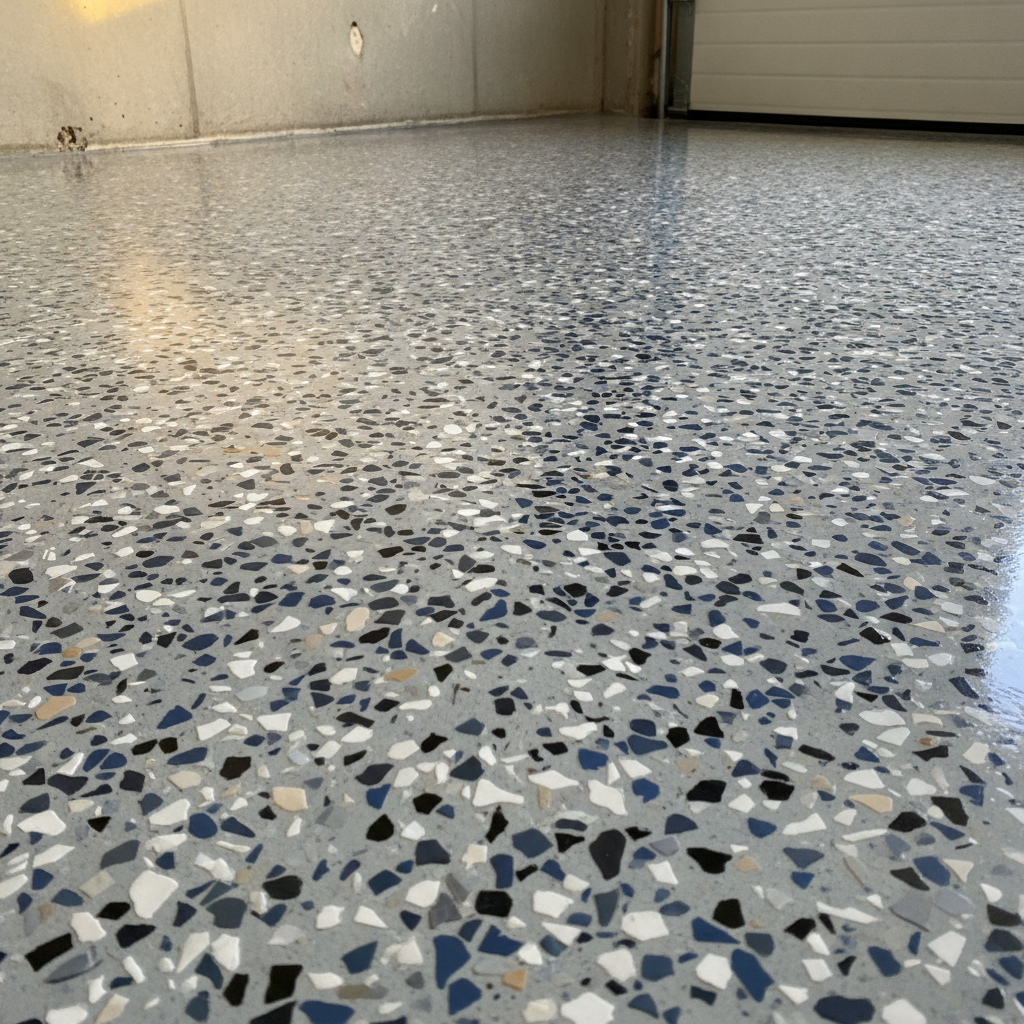
Epoxy floor coatings. A two-part resin system that bonds hard to the concrete and creates a seamless, chemical-resistant surface. Very popular for garages, workshops and warehouse floors. You can add a colour-flake broadcast to this system, which is exactly what Metal and Flake specialises in: vinyl flakes are scattered into the wet epoxy and then sealed with a clear topcoat, giving you a surface that hides tyre marks, resists oil and looks sharp for years.

Polyaspartic coatings. A faster-curing version of polyurethane that can go down in a single day and is ready to drive on within 24 hours. UV stable from the start, so it won’t yellow in direct sunlight the way standard epoxy can over time. Ideal for Melbourne’s variable weather and for jobs where minimal downtime matters.

Metallic epoxy. A specialty finish where metallic pigments are blended into the epoxy to create a flowing, three-dimensional look. Very popular in showrooms, retail spaces and high-end residential interiors. Each pour is unique, which is part of the appeal.

What happens during the concrete resurfacing process?

A professional concrete resurfacing job follows four stages: surface preparation, crack and defect repair, primer or base coat application, and the finish coat or broadcast system. Skipping or rushing any of these stages compromises the end result. On a standard Melbourne garage, the full process typically takes one to two days, with a further day of curing before light foot traffic and up to five days before parking a vehicle.

Here is what each stage looks like on a real job:

Stage 1: Surface prep. This is where most of the time goes. The slab is diamond-ground or shot-blasted to open the surface profile so the coating has something to grip. Any oil contamination is treated with a degreaser and re-ground. The concrete surface profile (CSP) needs to reach a certain roughness, usually CSP 3 to 4 for an epoxy system, before anything gets applied. Skipping this is the number one reason coatings peel.

Stage 2: Crack and defect repair. Cracks are routed out and filled with a polyurea or epoxy filler. Control joints are either filled or left open depending on whether they are live movement joints. Spalled edges and pitting get patched back to level. The floor won’t be perfect, but it should be structurally sound before any coating goes on top.

Stage 3: Primer or base coat. A penetrating epoxy primer is rolled over the prepped slab. This bonds to the concrete and creates the foundation for the build coats. On damp or green slabs, a moisture-tolerant primer is used to avoid adhesion failure further down the track.

Stage 4: Finish system. For a colour-flake epoxy job, a pigmented mid-coat goes down, flakes are broadcast to rejection (meaning you throw them until the surface is fully covered), excess is scraped back, then one or two clear polyaspartic or polyurethane topcoats seal everything in. For a plain epoxy or metallic finish, the process varies slightly but the principle is the same: build in layers, seal at the top.

How long does a resurfaced concrete floor last?

A professionally installed concrete resurfacing system in Melbourne will typically last 10 to 20 years in a residential garage with normal use. Commercial floors under forklift traffic or heavy chemical exposure will see more wear, but a quality polyaspartic topcoat can be refreshed with a new clear coat rather than a full strip and redo, which extends the life of the system considerably.

The honest answer is that longevity comes down to three things. First, how well the surface was prepared. Second, which system was specified for the actual use of the space. Third, basic maintenance: keeping the floor clean, wiping up chemical spills promptly and not dragging sharp metal across it. A concrete resurfacing job treated well will outlast a cheap replacement slab any day.

Epoxy and polyaspartic systems are non-porous, so a mop or a leaf blower keeps them clean. That low maintenance load is one of the main reasons Melbourne homeowners and workshop operators choose a resin system over exposed concrete or tiles.

Is concrete resurfacing the right choice for your slab?

Concrete resurfacing is the right choice when the existing slab is structurally sound but surface-damaged, stained or simply tired-looking. If the slab has major structural cracks, significant heave or is crumbling more than 20 mm deep in patches, a full replacement may be the better call, though that is a decision best made after a proper on-site assessment rather than guesswork.

For the vast majority of Melbourne garages, driveways, warehouses and indoor commercial spaces, the slab underneath is fine. It just needs the right prep and the right coating system. Resurfacing costs a fraction of a full replacement and is typically complete in one to two days, meaning minimal disruption to your home or business.

If you are weighing up whether your slab is a good candidate, the practical checklist is: no structural movement, no rising damp that hasn’t been addressed, no delaminating topping layer, and a surface that can be ground back to sound concrete. Tick those boxes and resurfacing is almost always the smarter and more cost-effective path.

Metal and Flake installs epoxy and colour-flake floor systems across Melbourne and surrounds, including residential garages, commercial warehouses and everything in between. Get a quote for concrete resurfacing near you

Garage Floor Paint vs Epoxy Coating: Which One Lasts?

Garage Floor Paint vs Epoxy Coating: Which One Lasts?

Garage floor paint is a water- or oil-based product brushed or rolled directly onto bare concrete. Epoxy coating is a two-part chemical system that bonds into the concrete surface and cures hard. Paint typically starts peeling within one to three years under vehicle traffic. A properly applied epoxy coating lasts ten to twenty years in the same conditions, making it the far more durable long-term option for most Australian garages.

What exactly is garage floor paint, and why do people choose it?

Garage floor paint is a single-component coating, usually acrylic or latex, that you buy off the shelf at any hardware store. It sits on top of the concrete rather than bonding chemically into it. Most homeowners choose it because the upfront cost is low, the application is straightforward, and it can be rolled on over a weekend without specialist gear. For a low-traffic storage shed or a rarely used second garage, it does the job well enough in the short term.

The appeal is real. A ten-litre tin of concrete floor paint covers around twenty-five square metres and costs somewhere between $60 and $120. You clean the slab, let it dry, roll on two coats and you are done by Sunday afternoon. For renters, or anyone planning to sell within a year or two, that logic stacks up.

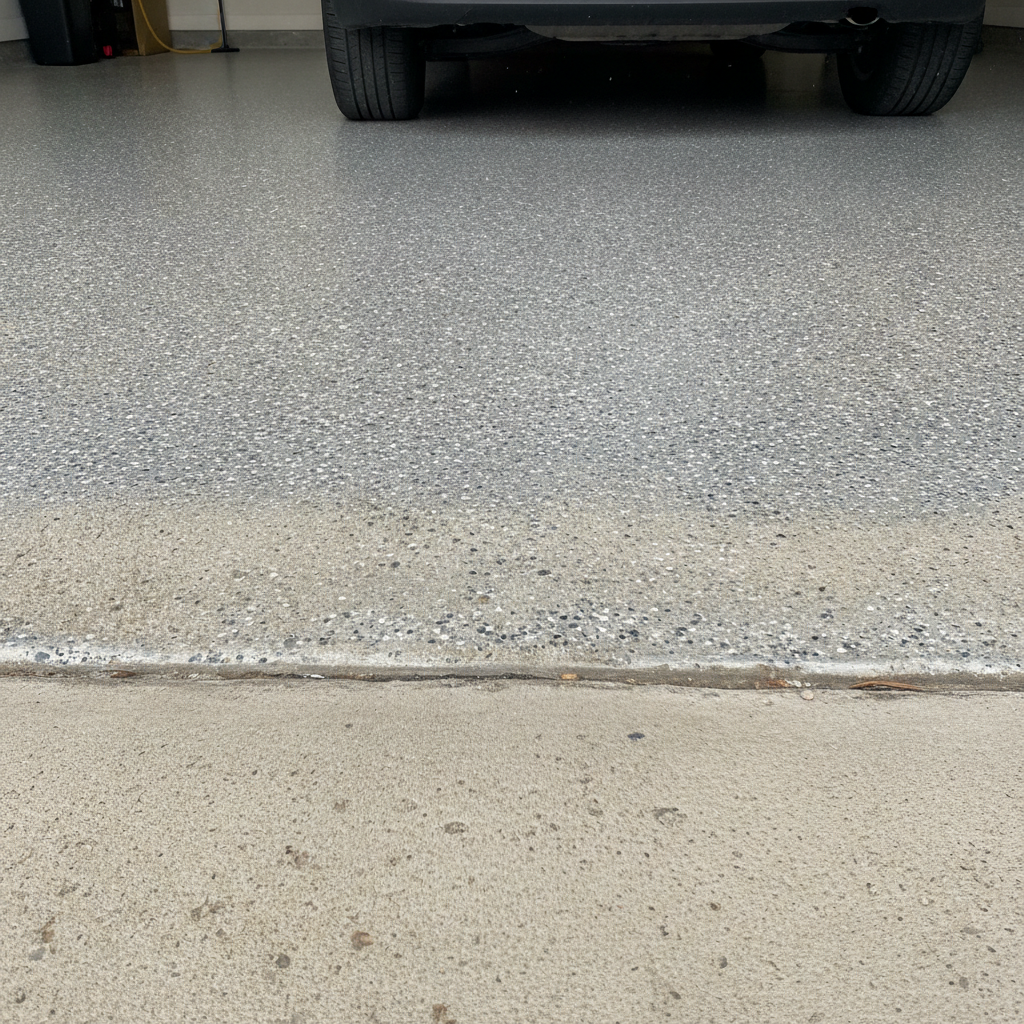
The problem is that concrete is alkaline and slightly porous. Paint bonds to the surface layer only. The moment moisture migrates up through the slab (which happens constantly in Melbourne’s variable climate), that bond breaks from underneath. Tyre heat compounds the problem: a hot tyre parked on painted concrete creates a suction effect as it cools, pulling the paint clean off in sheets. Most floor paint installations in active garages show lifting and bubbling within eighteen months.

How does garage floor paint compare to epoxy in terms of durability?

Garage floor paint and epoxy coating are not the same category of product, even though both end up as a coloured surface on your garage floor. Epoxy is a two-part resin system where a base and a hardener react together to form a rigid, cross-linked layer that penetrates and mechanically keys into the concrete. The result is closer to a hard plastic shell than a paint film, and it resists tyre wear, chemical spills, impact and moisture far better than any single-component paint.

The durability gap is significant. A quality two-part epoxy coating applied over a properly prepared concrete slab (diamond ground to an open surface profile) will comfortably handle daily vehicle traffic, oil drips, brake fluid, petrol splashes and power-washing for a decade or more. Paint begins to fail under those same conditions within one to three years, often sooner.

Surface preparation is the single biggest factor in how long either product lasts. Paint applied over a dusty, unground slab will fail faster still. Epoxy applied over a diamond-ground slab with the right primer coat has the mechanical grip it needs to go the distance. That preparation step is where professional installers earn their fee: grinding the concrete opens up the pores so the epoxy can actually bond rather than just sit on top.

What about cost: is garage floor paint worth the savings?

At first glance, garage floor paint looks like the budget-friendly option. But the maths shifts when you factor in how often you redo it. A double garage (around forty square metres) might cost $150 in paint and a weekend of your time. Do that every two to three years and over a ten-year period you have spent $500 to $750 in materials alone, plus four or five lost weekends stripping and repainting. You also deal with the mess, the fumes and the frustration each time.

A professionally installed epoxy coating for the same double garage sits at a higher upfront investment, but it is typically a once-per-decade job. There is no stripping, no recoating cycle and no weekend lost to a floor that peeled again. When you spread the cost over the life of the product, epoxy almost always works out cheaper per year of useful service.

There is also the resale angle. A fresh epoxy garage floor with a flake or metallic finish is a visible upgrade that buyers notice. A patchy, peeling painted floor does the opposite: it signals deferred maintenance before they have even walked through the door.

Are there situations where garage floor paint still makes sense?

Honest answer: yes, in a narrow set of circumstances. If you are renting a property and want to tidy up a rough slab without a landlord’s approval for permanent work, a tin of concrete paint is a practical short-term fix. The same applies to a temporary workshop or a structure you plan to demolish or heavily renovate within a couple of years. In those cases, the lower commitment of paint aligns with the timeline.

Paint also works acceptably in spaces that see very little vehicle traffic: a garden shed, a back workshop used only for light hobby work, or a carport that stays dry year-round. Without hot tyres and regular wet weather, the main failure modes simply occur less often.

Outside those specific situations, though, the case for paint over epoxy is mostly about deferring the real decision. You end up doing the epoxy job eventually anyway, often after a messy paint removal process that adds cost and effort to the project. Getting the prep and coating done properly from the start is almost always the cleaner path.

What should you look for in a quality garage floor coating?

Whether you are comparing products or getting quotes from installers, a few markers separate a durable result from a future headache. First, look at the preparation method: diamond grinding is the industry standard for opening up the concrete surface profile. Acid etching is a lesser alternative that leaves residue and produces an inconsistent profile. If a quote does not mention grinding, ask about it directly.

Second, check the system build. A properly layered epoxy installation includes a penetrating primer, a body coat and a clear topcoat (often polyurethane or polyaspartic) for UV stability and scratch resistance. Single-coat systems cut corners on build thickness and wear through faster, especially near the entry where you drive in and out.

Third, look at what is in the coating itself. Broadcast vinyl flake systems add grip, hide minor concrete imperfections and give a consistent finish that holds colour well under UV. Metallic pigment systems create a more visual, showroom-style result. Both are valid choices depending on the look you want, the key is that the flake or pigment is locked under a clear topcoat rather than on the surface where it can abrade away.

Finally, ask about cure time. A quality epoxy system needs at least twenty-four hours before foot traffic and seventy-two hours before vehicle traffic. Anyone promising you can park your car on it the same day is cutting the cure time short, which compromises the hardness of the final surface.

Getting the right product and the right prep is everything. A cheap two-pack epoxy rolled onto an unground slab will outlast paint but will still fail within a few years. A professional-grade system applied over a properly prepared surface is what delivers that ten-plus year service life.

Ready to stop repainting and get a floor that actually holds up? Get a quote for garage floor coating

Epoxy Flooring Explained: Types, Costs & What to Expect

Epoxy Flooring Explained: Types, Costs and What to Expect

Epoxy flooring is a hard-wearing, resin-based coating applied directly over a concrete slab. It bonds chemically to the substrate, creating a seamless surface that resists oil, abrasion and heavy foot traffic. Most residential and commercial installs in Melbourne cost between $50 and $120 per square metre, depending on the system chosen and the condition of the existing concrete.

What are the main types of epoxy flooring available?

The most common epoxy flooring systems are solid-colour epoxy, metallic epoxy, decorative flake (also called broadcast flake or chip), quartz-broadcast and self-levelling epoxy. Each system suits different environments and budgets. Flake systems are popular in garages and workshops because the texture adds slip resistance. Metallic epoxy suits showrooms and living spaces where appearance matters most.

Here is a quick breakdown of the four systems you will see quoted most often in Melbourne:

  • Solid-colour epoxy. A straightforward two-coat system using a pigmented epoxy topcoat. Clean, affordable and very practical for warehouses and commercial kitchens.
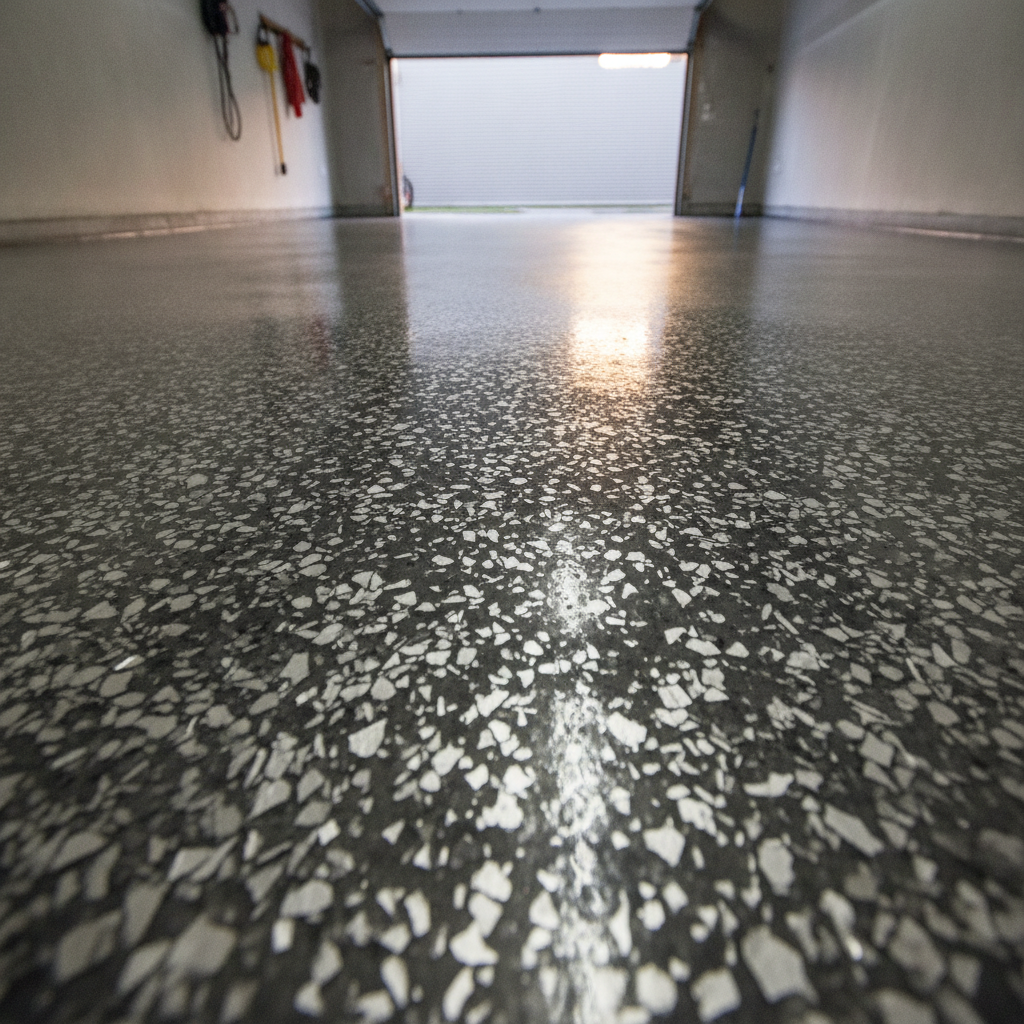
  • Decorative flake (broadcast flake). Vinyl flakes are scattered into a wet base coat, then sealed with a clear polyurethane or epoxy topcoat. The result hides minor surface imperfections and adds texture underfoot. This is one of the most popular residential choices in Melbourne garages.
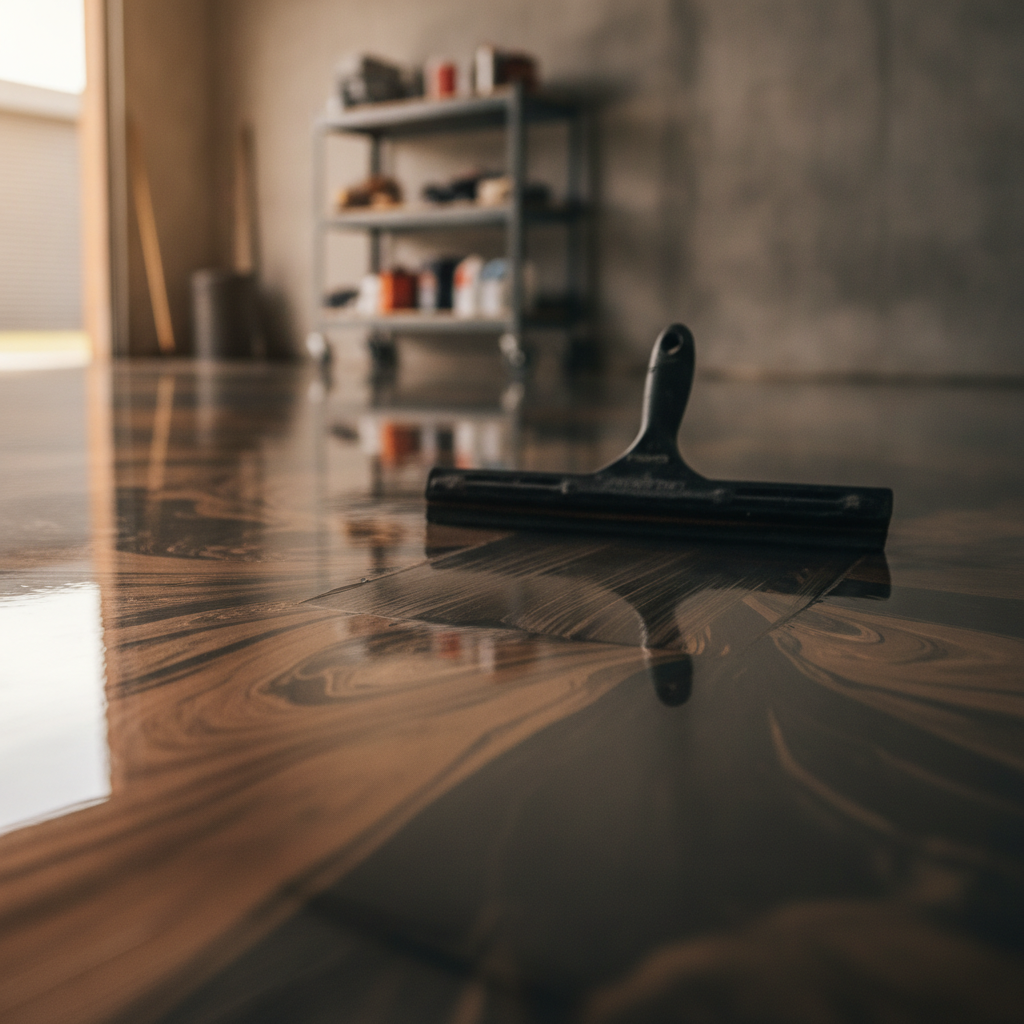
  • Metallic epoxy. Metallic pigment powders are mixed into a translucent resin base. The installer manipulates the wet coat with air and squeegees to create flowing, three-dimensional patterns. No two floors look alike. Common in cafes, boutiques and high-end home interiors.
  • Self-levelling epoxy. A low-viscosity system that flows across the slab and settles flat under its own weight. Ideal for heavily trafficked commercial and industrial floors where a perfectly smooth, easy-to-clean surface is the priority.

Choosing the right system comes down to three things: how the space is used, how much wear the floor will see, and what finish suits the look you are after. A garage floor that parks two cars and stores a ride-on mower has very different needs from a showroom floor that customers walk through daily.

How much does epoxy flooring cost per square metre in Melbourne?

In Melbourne, epoxy flooring typically costs between $50 and $120 per square metre fully installed, with metallic and designer systems sitting at the higher end. The biggest variable is not the product itself but the concrete preparation required before a single litre of resin hits the slab. Diamond grinding, crack repairs and moisture testing all add time and cost.

Several factors push a quote up or down:

  • Concrete condition. A slab with existing coatings, contamination, cracks or moisture issues needs more prep. Proper diamond grinding alone can account for 30 to 40 per cent of the total job cost on a problem slab.
  • System complexity. A single-colour base coat and topcoat is faster to install than a full metallic system that requires multiple layers and technique work.
  • Square metrage. Smaller jobs (under 30 square metres) often carry a minimum call-out charge that pushes the per-metre rate up. Larger slabs benefit from economies of scale.
  • Topcoat choice. Polyurethane and polyaspartic topcoats cost more than standard epoxy clears but offer better UV stability and scratch resistance, which matters for driveways and outdoor-facing spaces.

As a rough guide, a standard residential garage of around 36 square metres with a broadcast flake system and polyurethane topcoat typically lands between $2,000 and $3,200 in the Melbourne metro area. That figure shifts once a tradesperson actually looks at the slab.

What does the epoxy flooring installation process actually involve?

Epoxy flooring installation has three main phases: surface preparation, product application and curing. Preparation is the most important of the three. A coat of epoxy applied to a poorly prepped slab will peel, bubble or delaminate within months. A properly ground, clean and dry slab can hold an epoxy system for well over a decade under normal residential use.

Here is what a professional install looks like from start to finish:

  1. Site assessment. The installer checks the slab for moisture, existing coatings, cracks and levelness. A concrete moisture test is critical because moisture vapour transmission (MVT) above accepted thresholds will cause adhesion failure. The acceptable limit for most standard epoxy systems is around 75 per cent relative humidity measured in the slab.
  2. Diamond grinding. A walk-behind or hand grinder with diamond tooling opens up the concrete surface, removes laitance (the weak top layer) and creates a mechanical profile for the epoxy to bond into. This step cannot be skipped or shortcut.
  3. Crack and joint repair. Cracks are routed out and filled with a semi-rigid polyurea or epoxy filler. Movement joints are typically left open or bridged with a flexible filler to avoid reflective cracking through the coating.
  4. Primer coat. A low-viscosity penetrating primer is rolled or squeegeed into the prepared slab. This seals the concrete and locks out any residual moisture at the surface.
  5. Base coat and decorative layer. For a flake system, the pigmented base coat goes down first and flakes are broadcast to saturation while it is still wet. For metallic, the pigment is worked into the resin and manipulated before it sets.
  6. Topcoat. One or two clear topcoat layers seal and protect everything below. Polyurethane and polyaspartic topcoats cure faster and hold up better under UV than standard epoxy clears.
  7. Cure time. Light foot traffic is usually possible within 24 hours. Full cure, meaning the floor can handle vehicle tyres and heavy loads without risk of impressioning, takes around five to seven days depending on temperature and humidity.

How long does epoxy flooring last and how do you maintain it?

A professionally installed epoxy floor on a well-prepared slab typically lasts 10 to 20 years in residential settings before it needs a topcoat refresh or full recoat. Commercial and industrial floors under heavy forklift or chemical exposure will show wear sooner, often requiring a topcoat maintenance coat every five to seven years. Correct installation is by far the biggest factor in longevity.

Day-to-day maintenance is genuinely simple. Sweep or blower-vac regularly to remove grit, because fine abrasive particles tracked across the surface act like sandpaper underfoot over time. Mop with a pH-neutral cleaner diluted in warm water. Avoid bleach, ammonia-based products and acidic cleaners, all of which will dull a polyurethane or epoxy topcoat if used repeatedly. Place felt pads under heavy furniture legs and avoid dragging metal objects across the surface.

For garage floors, the main enemies are hot tyre pickup (where a hot tyre bonds briefly to the surface and lifts the coating on departure) and road salts in wet weather. A quality polyaspartic topcoat handles both of these better than a standard epoxy clear, which is one reason polyaspartic systems have become the preferred choice for residential garages over the past several years.

Is epoxy flooring a good choice for Melbourne homes and businesses?

For most Melbourne concrete slabs, epoxy flooring is a practical, cost-effective and visually sharp solution. It suits garages, workshops, commercial kitchens, showrooms, warehouses and living areas laid on slab. The main limitations are that it does not suit timber subfloors, it can be slippery when wet if a smooth finish is chosen without anti-slip additive, and the surface will eventually need maintenance like any other flooring material.

Melbourne’s climate adds one consideration worth knowing. Temperature swings between summer and winter cause concrete slabs to expand and contract slightly. A quality epoxy system applied at the right film thickness with a flexible topcoat handles this movement without cracking. Cheap single-pack floor paints sold at hardware stores do not have the same flexibility or adhesion, which is why they peel and chip within a year or two while a proper epoxy system keeps going.

If you are weighing up epoxy against polished concrete or tile, the main advantage epoxy has is seamlessness. There are no grout lines to harbour bacteria or grime, no joints to trip on, and the surface can be customised to a degree that polished concrete cannot match. The main advantage polished concrete has over epoxy is that it is the concrete itself, so there is no coating to eventually wear through. For a high-traffic commercial floor, the right choice depends on budget, aesthetics and how much downtime you can afford during installation.

Ready to get a straight answer on what system suits your slab and what it will actually cost? Book a consult for epoxy flooring in Melbourne

Garage Floor Epoxy Coating: Is It Worth It in Melbourne?

Garage Floor Epoxy Coating: Is It Worth It in Melbourne?

Garage floor epoxy coating is worth it for most Melbourne homeowners. A properly applied epoxy system seals bare concrete against oil, moisture and tyre scuff, adds decades to the floor’s life, and turns a dull slab into something that actually looks the part. The upfront cost is real, but it pays for itself by protecting a surface that would otherwise cost far more to repair or replace.

What does garage floor epoxy coating actually do to bare concrete?

Garage floor epoxy coating chemically bonds to the concrete surface, filling the pores and creating a hard, seamless shell that resists almost everything a busy garage throws at it. Oil drips, brake fluid, water pooling from wet cars, heavy foot traffic and the weight of vehicles all become a non-issue once the coating has fully cured. Without that protection, bare concrete absorbs every spill, stains permanently, and slowly dusts and flakes under the pressure of daily use.

The chemistry is straightforward. A two-part epoxy, a resin and a hardener, are mixed together and applied to the concrete. As they cure they cross-link into a rigid polymer matrix. That matrix is far harder and less porous than the concrete beneath it. Most quality systems used in residential garages cure to a surface hardness around 80 to 85 Shore D, which is harder than most timber flooring. The result is a floor that feels solid underfoot, reflects light beautifully, and sweeps clean in seconds.

Melbourne’s climate adds an extra layer of reason to coat. The city swings between cold, damp winters and hot, dry summers. That constant expansion and contraction gradually opens up micro-cracks in untreated concrete. An epoxy coating bridges those fine cracks, keeps moisture from working its way in, and slows the whole deterioration process significantly.

How much does garage floor epoxy coating cost in Melbourne?

For a standard single or double garage in Melbourne, professionally applied garage floor epoxy coating typically runs between $50 and $100 per square metre, depending on the system chosen and the condition of the existing slab. A double garage of around 36 square metres generally lands somewhere between $1,800 and $3,600 all in. That figure shifts up if the concrete needs significant grinding, crack repair or moisture remediation before coating can begin.

It sounds like a fair chunk of money, and it is. But compare it against the alternative. A full concrete replacement in Melbourne can cost upwards of $100 per square metre just for the pour, before demolition, disposal or any finishing. A DIY paint-and-seal job from a hardware store will look fine for a year or two, then peel, bubble and flake because most consumer products are water-based and don’t form the same chemical bond as a true two-part epoxy. Peeling paint is harder to strip than bare concrete, so you end up paying more to fix it later.

The practical lifespan of a well-applied professional epoxy system in a residential garage is typically 10 to 20 years with basic maintenance. That works out to less than a cup of coffee a week over the life of the floor. When you frame it that way, the value proposition is hard to argue with.

Does the concrete preparation really matter that much?

Yes, concrete preparation is the single most important step in any garage floor epoxy coating job. A coating is only as good as the bond it forms with the substrate beneath it, and that bond depends entirely on how well the concrete surface has been opened up and cleaned before the epoxy goes down. Skipping or skimping on prep is the number one reason epoxy floors fail.

Professional applicators use diamond grinding or shot blasting to abrade the surface to a profile roughly equivalent to 60-grit sandpaper. That texture gives the epoxy something to grip. Any oil contamination, existing sealers, laitance (the weak dusty layer on top of cured concrete) or moisture sitting in the slab has to be dealt with before the first coat goes on. Oil in particular is invisible once it has soaked in, and it will cause adhesion failure even if everything else is done correctly.

Moisture is worth calling out separately, because Melbourne garages can sit on slabs with high relative humidity coming up from below. A simple plastic sheet test, taping a 500mm square of plastic to the floor overnight and checking for condensation underneath, will tell you whether moisture is an issue. If it is, the right primer or a moisture-tolerant system needs to go down first. A professional will assess this before they quote.

What finishes are available for a garage epoxy floor?

The finish choice is where garage floor epoxy coating gets genuinely fun. The most popular option in Melbourne right now is a flake or chip system, where coloured vinyl flakes are broadcast into the wet base coat and then sealed under a clear topcoat. Flake floors hide everyday dirt and minor scratches well, provide a bit of texture underfoot (useful in a garage where things get wet), and come in a huge range of colour blends to suit any aesthetic.

Metallic epoxy is another option that has grown in popularity. A metallic pigment creates a deep, reflective, almost liquid-looking surface that photographs beautifully and makes a garage look more like a showroom. It is a more technical application and typically sits at the higher end of the price range, but for someone who genuinely uses their garage as a display or workshop space, the result is striking.

Solid colour systems are the most straightforward. One or two coats of pigmented epoxy, finished with a clear sealer. They clean up easily, look sharp, and cost a little less than flake or metallic systems because there are fewer steps involved. Grey and slate tones are popular in Melbourne, though almost any colour can be achieved.

All systems can be finished with a matte, satin or gloss topcoat, and anti-slip aggregates can be broadcast into the final coat for extra grip in wet conditions. It’s worth thinking about how you actually use the space before you commit to a finish. A high-gloss metallic floor looks incredible but will show every piece of grit tracked in from outside. A full broadcast flake in a mid-tone blend is far more forgiving day to day.

Is garage floor epoxy coating a DIY job or do you need a professional?

Garage floor epoxy coating can be a DIY project, but the results are rarely comparable to a professional application, and the margin for error is narrow. The biggest challenge for a homeowner is surface preparation. Hiring a diamond grinder for a day, learning to use it safely, and achieving a consistent profile across the whole floor is harder than it looks. Miss a section and you will see it when the coating starts to lift three years later.

Consumer-grade epoxy kits from hardware stores are also generally water-based or thin solvent-based products rather than true 100 percent solids two-part systems. They look similar in the tin but cure to a much thinner, softer film. They can work in low-traffic applications, but in a working garage with a car, tools and foot traffic, most will start showing wear within a couple of years.

The sweet spot for DIY is a garage that sees very light use, where the concrete is in excellent condition, and where the owner is prepared to invest in proper prep equipment and a quality product. For everyone else, a professional application pays for itself in longevity. A good installer will also spot problems, like a crack that needs routing and filling, or a section with high moisture, before they become your problem after the job is done.

If you’re weighing up the options for your Melbourne garage, the best first step is getting a proper assessment and a straight-up quote. Get a quote for garage floor epoxy coating

Garage Floor Epoxy Coat: How Many Coats Do You Actually Need?

Garage Floor Epoxy Coat: How Many Coats Do You Actually Need?

A proper garage floor epoxy coat system needs a minimum of three layers: a penetrating primer, a pigmented base coat and a clear protective topcoat. Most quality installs run to four coats when a decorative flake or metallic layer is added between the base and the top. Fewer coats means thinner build, faster wear and a floor that won’t handle real Australian garage traffic for long.

Why does the number of garage floor epoxy coats matter so much?

The number of coats directly controls total film thickness, which is what stands between your concrete and everything that gets dropped, driven or spilled on it. A single coat of epoxy sits at roughly 100 to 150 microns dry film thickness. Three to four coats stacked correctly brings you to 400 microns or more, which is the threshold where a residential garage floor genuinely resists abrasion, hot tyre pick-up and chemical staining over the long term.

Think of it like painting a fence. One coat looks fine on the day, but by the following summer the timber is showing through. Two coats holds longer. Three coats on bare timber with a proper primer underneath and you won’t be back for years. Epoxy is no different, except the consequences of going thin are harder to reverse. Stripping an under-built epoxy floor and starting again costs more time and money than doing it right the first time.

The other thing coat count controls is adhesion between layers. Each coat bonds chemically to the one beneath it when applied within the correct recoat window, typically four to twelve hours depending on temperature and humidity. Miss that window on a Melbourne autumn day when conditions swing, and you’re relying on mechanical adhesion alone, which is noticeably weaker. Multiple planned coats give you multiple opportunities to build a genuinely fused system rather than a stack of separate films.

What does each individual garage floor epoxy coat actually do?

Each coat in a proper system serves a distinct purpose. The primer soaks into the concrete and locks down porosity. The base coat carries colour and builds film thickness. A decorative broadcast layer, such as vinyl flake or metallic pigment, adds slip resistance and appearance. The topcoat seals everything and provides the hard, chemical-resistant wearing surface that faces daily use.

Here is how each layer works in practice:

  • Primer coat. Often a low-viscosity epoxy or moisture-tolerant formulation, this penetrates open concrete pores and creates a mechanical key. Skipping it is the single most common reason DIY floors delaminate within twelve months.
  • Base coat. A full-bodied, pigmented epoxy that delivers the bulk of the system’s thickness. This is where the colour lives, and where the first real protection against impact and abrasion is established.
  • Broadcast or decorative layer. On a flake floor, colour chips are scattered into the wet base coat and allowed to cure before the excess is scraped back. On a metallic floor, pigmented epoxy is manipulated while wet to create movement and depth. This layer also adds meaningful texture underfoot.
  • Topcoat. A clear polyurethane or polyaspartic topcoat goes over the decorative layer. This is the coat that takes the punishment. Polyaspartic topcoats, for example, cure faster than standard epoxy and offer excellent UV stability, which matters if your garage gets afternoon sun through an open door.

Some premium systems add a second topcoat for high-traffic or commercial-grade installs. If you’re parking a heavy vehicle daily, running a home workshop, or the garage doubles as a gym, a second clear coat is a straightforward way to extend service life without a full extra base layer.

Can you get away with just one or two coats on a garage floor?

Technically yes, but the trade-offs are significant. A single seal coat protects against light dust and moisture, but it won’t handle repeated traffic, dropped tools or pooled brake fluid. Two coats with no primer is better than one, but adhesion to bare concrete remains a weak point. For a garage that sees real use, one or two coats is a short-term fix that typically needs recoating or replacing within two to three years.

There are specific situations where a thinner build is a reasonable short-term choice: a storage shed with foot traffic only, a temporary workshop before a slab replacement, or a rental property where budget is the primary constraint. Outside those scenarios, cutting coats to save money rarely works out cheaper over a five to ten year period.

It is also worth knowing that concrete condition affects how many coats you actually need. A freshly poured, well-cured slab with low porosity might take a primer and two coats well. An older slab with surface contamination, previous sealer residue, or acid etching damage may need a second primer coat before the base coat can grip properly. Grinding the surface mechanically to a concrete surface profile (CSP) of 2 to 3, the standard recommended by most epoxy manufacturers, is the preparation step that lets every subsequent coat do its job.

How does the type of epoxy affect how many coats you need?

The formulation of the product changes the coat count equation. Water-based epoxy, common in hardware store DIY kits, has a much lower solids content, often around 40 to 50 percent solids by volume. That means a significant portion of the applied wet film evaporates, leaving a thinner dry film behind. To reach the same total thickness as a 100 percent solids, two-part epoxy, you might need five or six coats of a water-based product versus three or four of the professional grade.

Solvent-based epoxies fall somewhere in between and carry their own ventilation and application challenges. The professional epoxy systems used by trained installers are typically 100 percent solids, meaning what goes on wet is essentially what stays behind as a cured film. That higher build per coat is one of the main reasons professional results look and last differently from DIY attempts using over-the-counter products.

Polyaspartic coatings, often used as the topcoat in a modern system, can be applied thicker per coat than standard epoxy without sagging, and they cure fast enough in Melbourne’s variable conditions to allow same-day topcoating in some installs. That speed is practical for homeowners who can’t leave the garage out of action for multiple days.

What is the right coat count for a Melbourne garage floor?

For a typical Melbourne residential garage, the sweet spot is four coats: primer, base coat, decorative broadcast layer and a single clear topcoat. That build handles the full range of what a busy Australian household throws at a garage floor. Five coats, adding a second clear, suits home workshops, gym spaces or anyone parking a heavier vehicle like a ute or SUV regularly.

Melbourne’s climate is worth factoring in. Humidity and temperature swings between seasons affect cure times and the recoat window on each layer. A professional installer will adjust product selection and timing to suit the conditions on the day, which is harder to do accurately without experience reading how a particular slab is behaving. Getting each coat down at the right thickness and within the right window is as important as the total coat count itself.

The other Melbourne-specific consideration is slab moisture. Many older homes in the suburbs have slabs without an adequate vapour barrier beneath them. High moisture vapour transmission can lift an epoxy system from the underside over time, especially if the primer coat isn’t chosen to tolerate moisture. A professional assessment of the slab before any coating goes down is the most reliable way to choose the right primer and avoid a costly failure.

If you want a floor built to the right spec from the first coat to the last, Book a multi-coat garage floor epoxy service.

Epoxy Resin for Floors: Benefits, Types and What to Expect

Epoxy Resin for Floors: Benefits, Types and What to Expect

Epoxy resin is a two-part coating system, made up of a resin and a hardener, that bonds chemically to concrete to create a hard, seamless surface. It resists oil, chemicals and heavy foot traffic, lasts well over a decade with proper care, and comes in a wide range of finishes from flat solid colours to metallic and decorative flake styles.

What exactly is epoxy resin and why is it used on floors?

Epoxy resin is a thermosetting polymer, meaning the resin and hardener react together to form a rigid, cross-linked material that is far harder and more chemically resistant than paint or standard concrete sealer. Once cured, the surface becomes essentially one continuous layer bonded to the substrate, which is why it performs so well in garages, warehouses and commercial spaces where spills, dropped tools and constant movement are everyday realities.

The chemistry behind it is straightforward: the two components are mixed in a specific ratio, spread across a prepared concrete slab, and then left to cure. That curing process is what gives epoxy resin floors their strength. You are not just coating the surface. You are creating a new surface that is mechanically and chemically locked into the concrete below.

This is also what separates a proper epoxy resin floor from a water-based epoxy paint you might pick up at a hardware store. Those single-pack products contain very little actual epoxy solids and tend to peel within a few years. A professional two-part system, applied correctly, is a different product entirely.

What are the main benefits of epoxy resin floors?

Epoxy resin floors offer durability, easy cleaning, chemical resistance and a professional finish that adds real value to a property. They are far more resistant to abrasion than bare concrete, they do not harbour dust or bacteria in the same way a textured surface does, and a quality installation can realistically last 15 to 20 years in a residential garage with minimal maintenance.

Here is a practical breakdown of the biggest advantages:

  • Hardness and abrasion resistance. Cured epoxy resin typically reaches a Shore D hardness of around 80 to 85, which means it holds up well under vehicle tyres, forklifts and heavy foot traffic without wearing through.
  • Chemical resistance. Oil, brake fluid, battery acid and most workshop chemicals sit on the surface rather than soaking into the concrete. A quick wipe and the stain is gone.
  • Seamless, non-porous surface. No grout lines, no cracks for grime to settle into. This makes epoxy resin floors popular in food production facilities and commercial kitchens where hygiene standards are strict.
  • Reflectivity. A gloss epoxy resin floor can significantly brighten a space by bouncing light around the room, which matters in workshops and garages where natural light is limited.
  • Customisation. Solid colours, metallic finishes, broadcast flake systems and quartz blends give you real design flexibility. A floor does not have to look industrial to perform like one.

What types of epoxy resin flooring are available?

The main types of epoxy resin flooring are solid colour systems, decorative flake (chip) systems, metallic epoxy, quartz broadcast systems and self-levelling epoxy. Each suits different settings and budgets, and the right choice depends on how the space is used, how much foot or vehicle traffic it sees, and the look you are after.

A quick rundown of each type:

Solid colour epoxy. The most straightforward option. A base coat and a clear topcoat give you a clean, uniform finish. Common in commercial settings where function is the priority.

Decorative flake (chip) systems. Coloured vinyl flakes are broadcast into a wet epoxy base and then sealed with a clear topcoat. The flakes add texture, hide minor surface imperfections and disguise dirt between cleans. This is one of the most popular residential and commercial options in Melbourne because it looks sharp and performs reliably.

Metallic epoxy. Pigment powders are mixed into the epoxy resin to create swirling, three-dimensional visual effects that resemble marble, lava or polished stone. Every metallic floor is unique because the pigments move as the epoxy levels out. These are striking in showrooms, cafes and upscale residential spaces.

Quartz broadcast systems. Coloured quartz granules are embedded into the epoxy for a surface with serious texture and grip. These are common in commercial kitchens, pool surrounds and anywhere that safety underfoot is a key requirement.

Self-levelling epoxy. A thicker, high-solids pour that flows out to a perfectly flat finish. Used in industrial and commercial settings where precision levelling matters.

How does the epoxy resin installation process work?

The epoxy resin installation process involves three main stages: surface preparation, application of the epoxy system, and curing. Surface preparation is the most critical step and typically accounts for around 70 percent of the work involved. Without it, even the best epoxy resin product will fail prematurely.

Here is what a professional installation looks like from start to finish:

1. Surface preparation. The concrete slab is ground or shot-blasted to open the pores and create a profile for the epoxy to bond to. Any cracks, expansion joints or surface damage are repaired. Moisture testing is done at this stage because high moisture vapour transmission is one of the most common reasons epoxy resin floors fail.

2. Primer coat. A penetrating epoxy primer is applied to seal the slab and improve adhesion. On porous or problem concrete, this step can involve multiple primer passes.

3. Base coat and broadcast (if applicable). The main epoxy resin layer is applied. For flake systems, the vinyl chips are broadcast across the wet surface until full coverage is achieved. For metallic systems, the pigment is worked into the epoxy as it is laid.

4. Topcoat. A clear polyurethane or epoxy topcoat is rolled over the cured base. This is what protects the finish from UV yellowing, scratches and chemical attack. Some systems use a two-coat clear finish for extra durability.

5. Cure time. Foot traffic is usually safe after 24 hours. Vehicle traffic generally needs at least 72 hours. Full chemical cure takes around 7 days, so it is worth holding off on parking heavy machinery or dropping anything sharp until that window has passed.

How long does epoxy resin flooring last and how do you maintain it?

A professionally installed epoxy resin floor in a residential garage or light commercial setting typically lasts between 10 and 20 years, depending on traffic levels, the quality of the system used and how well the concrete was prepared. Maintenance is straightforward: regular sweeping and occasional mopping with a pH-neutral cleaner is all that is needed for most floors.

A few practical maintenance tips worth knowing:

  • Avoid dragging sharp metal objects across the surface. Epoxy resin is hard but not immune to deep gouges from things like angle grinder discs or steel shelving feet.
  • Clean up chemical spills quickly. While epoxy resin is resistant to most workshop chemicals, prolonged exposure to strong solvents like acetone can dull the topcoat over time.
  • In high-UV areas, choose a topcoat that includes UV stabilisers. Standard epoxy resins can yellow under direct sunlight, so external or skylit areas need a UV-resistant clear coat or a polyaspartic topcoat instead.
  • If the surface does get scratched or dull in a small area after years of use, it can often be spot-repaired or re-coated rather than replaced entirely, which is a real cost advantage over tiles or polished concrete.

Is epoxy resin flooring right for your space?

Epoxy resin flooring suits most concrete slabs in garages, workshops, warehouses and commercial premises, but it is not the right answer for every situation. Concrete with very high moisture content, slabs that are already heavily contaminated with oil, or floors that experience extreme thermal cycling may need additional preparation or an alternative system. A proper site assessment before quoting is the only reliable way to know what your floor needs.

The good news is that most residential and light commercial concrete in Melbourne is a solid candidate for epoxy resin. The climate helps too. Melbourne does not get the extreme sustained heat that can stress epoxy in some parts of Australia, which means a quality installation here has every chance of hitting that 15 to 20-year mark.

Whether you are looking at a decorative flake finish for a home garage, a metallic pour for a showroom or a tough solid colour system for a workshop, the process starts the same way: getting someone out to look at the slab and give you a straight answer on what will work.

Get a quote for epoxy resin flooring in Melbourne

All-Purpose Coatings: What They Are and Where They Work Best

All-Purpose Coatings: What They Are and Where They Work Best

All-purpose coatings are surface treatments formulated to bond to a wide range of substrates and resist everyday wear, moisture and light chemical exposure. They suit low-to-medium demand environments where one product needs to cover multiple surfaces. For high-traffic or heavy-duty floors, a specialist coating almost always outlasts and outperforms them.

What exactly are all-purpose coatings?

All-purpose coatings are single-product formulations designed to work across different materials, including concrete, timber, metal and masonry, without needing a substrate-specific primer or topcoat. They offer broad adhesion, moderate durability and reasonable chemical resistance, making them a practical option when budget or time rules out a tailored system.

Think of them the way you’d think of a general-purpose silicone sealant. It will do a decent job around a kitchen sink or a window frame, but you would not use it to waterproof a wet-room floor that sees heavy daily use. Same principle applies to coatings.

Most all-purpose coatings on the market fall into one of a few chemistry families: acrylic-based, alkyd-based or water-based polyurethane blends. Each has different open times, cure windows and levels of hardness once set. Acrylics dry fast but can chalk outdoors over time. Alkyds take longer to cure but build a harder film. Water-based polyurethane blends sit somewhere in the middle and are popular for light commercial and residential use because they are low odour and easy to clean up.

Where do all-purpose coatings perform well?

All-purpose coatings perform well in environments that see light foot traffic, infrequent cleaning and no concentrated chemical spills. Typical applications include interior walls, lightly used storage rooms, garden sheds, hobby workshops and general maintenance touch-ups on fences or outdoor furniture. They are also a sensible choice when you need a protective layer across mixed substrates in a single pass.

A few situations where all-purpose coatings genuinely shine:

  • Rental property maintenance. A landlord doing a quick refresh between tenants can roll a single water-based all-purpose coating across a laundry floor, a small porch and a garden wall without switching products. It saves time and reduces the number of cans to manage.
  • DIY hobby spaces. A home workshop used a couple of evenings a week for light fabrication or timber work rarely puts enough stress on a floor to need a full epoxy system. An all-purpose coating can hold up fine for years in that setting.
  • Maintenance painting over existing coated surfaces. When a surface already has a sound, compatible base coat, an all-purpose product can refresh the top layer without full strip-back.

The key word in all of the above is “light.” The moment you introduce regular vehicle traffic, frequent chemical or oil exposure, heavy dropped loads or food-grade hygiene requirements, an all-purpose coating starts to struggle.

Where do all-purpose coatings fall short?

All-purpose coatings fall short in high-demand environments because their formulation is a compromise. To stick to everything, they sacrifice the depth of hardness, chemical resistance or flexibility that a purpose-built system provides. On a busy garage floor, warehouse bay or commercial kitchen, that compromise shows up quickly as peeling, pitting or premature discolouration.

Concrete is the surface where this limitation becomes most obvious. Concrete is porous and alkaline, it moves slightly with temperature changes, and it can hold moisture vapour that pushes up from below. A coating that is not specifically engineered to manage those conditions will delaminate. This is why the flooring industry developed dedicated epoxy systems, polyurethane floor coatings and polyaspartic finishes in the first place. Each is engineered around the actual demands of the substrate and the environment.

To give a concrete example: a standard all-purpose acrylic coating on a garage floor might start to peel within 12 to 18 months under regular vehicle use, especially if oil or brake fluid contacts the surface. A properly applied two-part epoxy with a broadcast flake finish, by contrast, is designed to take that punishment for a decade or more when correctly maintained.

Other areas where all-purpose coatings tend to underperform:

  • Commercial kitchens and food prep areas that need to withstand aggressive cleaning chemicals and hot water.
  • Warehouses and factories where forklifts, pallet jacks and heavy racking loads concentrate point stress on the floor.
  • Showrooms and retail spaces where the look needs to stay sharp and the floor needs to handle constant foot traffic without scuffing.
  • Driveways and car parks exposed to UV, vehicle loads and petroleum-based fluids.

How do all-purpose coatings compare to specialist epoxy floor coatings?

Compared to specialist epoxy floor coatings, all-purpose coatings are easier to apply and more forgiving during installation, but they provide significantly less hardness, chemical resistance and longevity under load. Epoxy systems bond directly to prepared concrete at a molecular level, reaching pencil hardness ratings well above most all-purpose products, and they can be built up in multiple layers to handle specific demands.

The preparation process is also different. A good epoxy floor installation starts with diamond grinding or shot blasting the concrete to open the surface profile, so the coating has somewhere to grip. All-purpose products are often applied over whatever surface exists, which is convenient but limits adhesion strength. That difference in prep is a large part of why the end results are so different in terms of durability.

Specialist coatings also give you finish options that all-purpose products cannot match. Metallic epoxy floors, vinyl flake systems and quartz broadcast finishes all create surfaces that are functional and genuinely good-looking. A decorative flake floor in a garage or a metallic pour in a showroom does a job that an all-purpose coating simply was not designed to do.

How do you choose the right coating for your surface?

Choosing the right coating comes down to three questions: What substrate are you coating? What will the surface have to withstand day to day? And how long do you need it to last? If the answers point to concrete floors under regular vehicle or industrial use, a specialist coating is worth the extra investment because re-coating a failed all-purpose product costs more in labour and materials than getting it right the first time.

A practical way to think about it: write down the worst day that floor will ever have. Is the worst day a garden hose and some foot traffic? An all-purpose coating can handle that. Is the worst day a chemical spill, a loaded forklift and a pressure wash? You need a system built for that, not a product that merely tolerates it.

For residential garage floors, domestic workshop slabs, home gym spaces and around pools, the sweet spot is usually a proper epoxy or polyurethane floor coating. The cost difference over a standard all-purpose product is real, but so is the gap in performance and lifespan. A quality floor coating applied correctly can last 10 to 15 years with basic maintenance, while a budget all-purpose coating on the same surface may need attention within a couple of seasons.

If you are weighing up options for a concrete floor in Melbourne and want a straight answer on what will actually work for your situation, the best move is to talk to someone who works with these surfaces every day.

Get a quote for surface coating in Melbourne

How Epoxy Coating Transforms a Garage Floor: Step-by-Step

How Epoxy Coating Transforms a Garage Floor: Step-by-Step

An epoxy coating garage floor transformation works by bonding a tough, resin-based coating directly to prepared concrete, sealing the surface and creating a finish that resists oil, impact, and moisture. The process typically spans one to two days on site, plus cure time, and the result is a surface that looks completely different to bare grey slab.

Why does surface preparation make or break an epoxy coating garage floor job?

Surface preparation is the single most important step in any epoxy coating garage floor project. Without it, the resin has nothing solid to grip and will peel within months. Proper prep removes contaminants, opens the concrete’s pores, and gives the epoxy a mechanical key. Skip this step and even the best product on the market will fail.

Concrete is deceptively porous. Oil from years of parking, tyre rubber, dust and old sealers all sit on and in the surface, blocking adhesion. Before a single drop of epoxy goes down, that concrete needs to be mechanically ground or shot-blasted. Grinding with a diamond-headed machine removes the top layer of the slab and exposes fresh aggregate. You end up with a surface that feels slightly rough, a bit like 80-grit sandpaper, which is exactly what you want.

Any existing cracks or spalling get filled with a polyurethane or epoxy repair mortar at this stage. Leaving cracks unrepaired doesn’t just look untidy. Moisture can travel up through them, pushing the coating off the slab from underneath over time. Patching is a five-minute job that saves a world of grief later.

Once grinding and patching are done, the floor gets a thorough vacuum and wipe-down. Only then is it ready for product.

What actually happens when the epoxy is applied to the garage floor?

Once the concrete is prepped, epoxy application follows a strict layering sequence. A penetrating primer coat goes down first, soaking into the open pores of the slab and chemically bonding to the concrete. The base coat follows while the primer is still within its recoat window, typically within a few hours, ensuring the two layers fuse rather than just sit on top of each other.

A standard garage epoxy system involves at least two coats: a pigmented base coat and a clear topcoat. Many installations in Melbourne also incorporate decorative colour flakes, broadcast by hand across the wet base coat so they embed into the resin. The flakes do more than look good. They add texture, which improves grip underfoot, and they hide minor surface imperfections that would otherwise telegraph through a plain gloss finish.

Once the flakes are down and the base coat has cured enough to walk on (usually overnight), any excess flake is scraped off and vacuumed up. The clear topcoat then goes over the top, locking everything in. This clear layer is what gives the finish its durability. A quality polyaspartic or urethane topcoat resists UV yellowing, petrol and oil spills, and the scuffing that comes from dragging a jack or rolling a bin across the floor.

Each coat needs to be rolled on quickly and evenly, because epoxy has a pot life, meaning it starts to cure once the two components are mixed. A trained applicator works systematically across the floor in sections, keeping a wet edge to avoid lap marks. This is not a job that rewards hesitation.

How long does an epoxy coating garage floor take to cure before you can use it?

A freshly coated garage floor is ready for foot traffic in roughly 24 hours and for vehicle traffic in 48 to 72 hours, depending on the products used and Melbourne’s ambient temperature. Full chemical cure, where the coating reaches its maximum hardness, takes around seven days. Driving on it before the 72-hour mark can leave tyre marks that won’t buff out.

Temperature matters here. Epoxy cures through a chemical reaction, and that reaction slows down in cold weather. On a winter day in Melbourne where the garage temperature sits around 10 degrees Celsius, cure times can stretch noticeably compared to a warm summer install. Polyaspartic topcoats cure faster than standard epoxy topcoats, which is one reason they’ve become popular for single-day installs where the homeowner needs the garage back quickly.

During the cure window, keep the garage doors closed to limit dust settling into the surface, and avoid dragging anything across the floor. Once fully cured, the surface is hard enough that a dropped spanner won’t chip it under normal circumstances.

What difference does an epoxy coating actually make to a garage floor long-term?

The practical difference is significant and lasting. Bare concrete is porous, so every oil drip, chemical spill and wet tyre leaves a stain that works its way into the slab permanently. An epoxy coating creates a non-porous barrier. Spills sit on the surface and wipe up cleanly with a mop. That alone changes how the garage functions as a workspace.

Dust is another factor that rarely gets mentioned. Uncoated concrete sheds a fine grey dust constantly, especially in older slabs. It settles on tools, cars and storage. A coated floor seals that dust in completely, keeping the space noticeably cleaner over time.

From a visual standpoint, a metallic or flake epoxy finish transforms what feels like a utility space into something that looks intentional and considered. Homeowners who’ve had it done consistently say the garage feels like an extension of the house rather than a shed attached to it. That perception shift matters when you’re spending time working or parking in the space.

On the durability side, a professionally installed epoxy system installed on well-prepped concrete routinely lasts 10 or more years in a residential garage before it needs any maintenance. Compared to painted concrete, which typically starts peeling within two to three years under regular vehicle use, that longevity makes epoxy the more cost-effective choice over a decade.

Is an epoxy coating garage floor a DIY job or does it need a professional?

DIY epoxy kits are available from hardware stores, but the results rarely match a professional install, and the reasons come down to preparation and product. Hardware store kits use water-based epoxy with a much lower solids content than trade-grade two-part systems. They rely on acid etching rather than mechanical grinding for prep, which opens fewer pores and leaves contaminants behind. The coating bonds poorly, and peeling becomes a matter of when, not if.

The grinding equipment alone is a significant barrier. A proper planetary grinder with diamond tooling is a large, heavy machine that requires experience to operate correctly. Running it unevenly leaves high and low spots that show up in the finished coating. Hiring the machine adds cost and still requires knowing how to use it safely.

A professional applicator brings calibrated equipment, trade-grade product and the experience to read the concrete, identify problem areas and adjust the process on the fly. They also handle the waste disposal from grinding and any hazardous material in old coatings. For a garage floor that you want to last the distance, professional application is the reliable path.

If you’re ready to see what a proper finish looks like in your own garage, Book a garage epoxy coating service in Melbourne.