Metallic Epoxy in Melbourne: Design Options and Local Costs

Metallic Epoxy in Melbourne: Design Options and Local Costs

Metallic epoxy Melbourne floors combine pigmented metallic powders with a clear epoxy resin to create flowing, three-dimensional effects that look like poured lava, ocean water or polished stone. They suit residential garages, showrooms and living areas. Installed by a skilled applicator, a quality metallic floor lasts well over a decade with minimal maintenance.

What design options are available with metallic epoxy flooring?

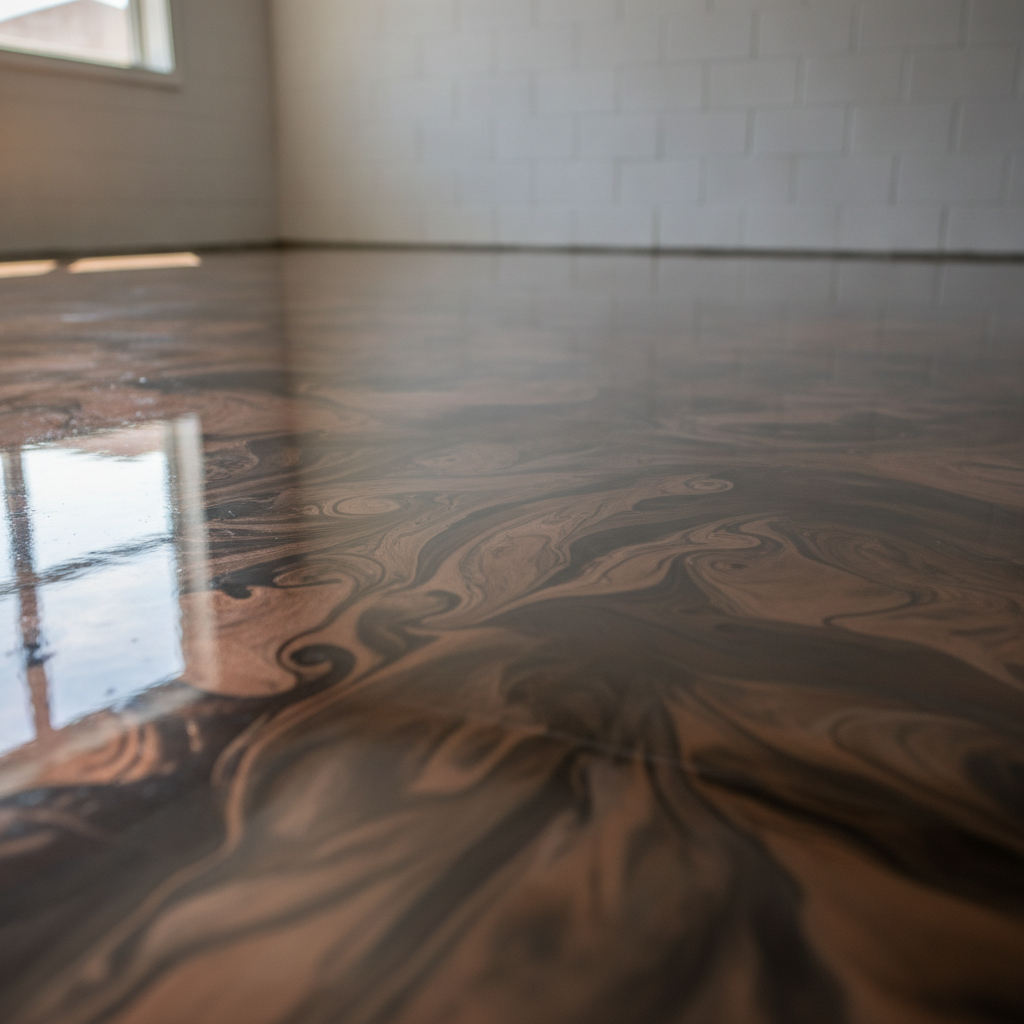
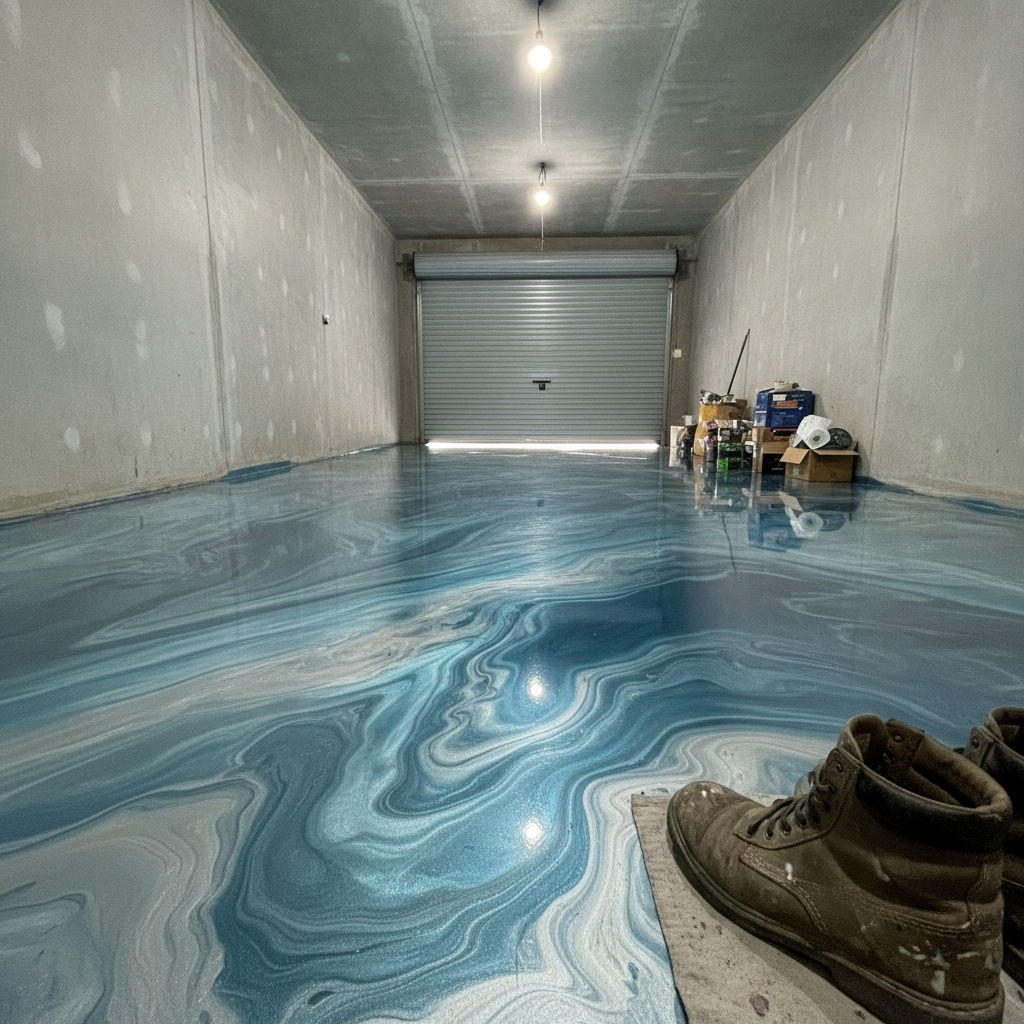
Metallic epoxy is available in dozens of base colours that can be blended, layered or manipulated with solvents and tools to produce unique swirl, wave or marble-style patterns. Because every pour is worked by hand, no two floors come out identical. Common single-colour options include pearl, champagne, charcoal and midnight blue, while two-colour blends open up effects like copper-and-black or silver-and-white. The finish is typically sealed with a gloss, satin or matte topcoat to suit the room’s style.

Here is a quick breakdown of the most popular looks Melbourne homeowners and business owners request:

  • Ocean or river pour. Two contrasting colours, usually a deep blue or teal with white or silver, manipulated while wet to create movement. Popular for living areas and showrooms.
  • Lava or smoke effect. Dark base with a lighter metallic drifted through using a heat gun and brush. Suits garages and man caves particularly well.
  • Single-colour reflective. One metallic pigment over a solid base coat. Clean, modern look that suits commercial spaces where you want shine without visual noise.
  • Marble replica. Multiple colours feathered to mimic natural stone veining. Works well on indoor floors where the owner wants a premium look without the cost of real marble.

Colour choice also interacts with the topcoat. A gloss seal amplifies the reflective depth, while a satin or matte seal tones it down for a more understated result. Most applicators will do a small sample board so you can see the finish before committing to the whole floor.

What does metallic epoxy flooring cost in Melbourne?

Metallic epoxy flooring in Melbourne typically costs between $80 and $150 per square metre for a standard residential installation, depending on floor preparation needs, the complexity of the colour effect chosen and the size of the area. Larger jobs bring the per-square-metre rate down. Commercial projects with tighter scheduling or after-hours work generally sit at the higher end of that range.

Those numbers cover the full process: grinding or shot-blasting the concrete, applying a primer coat, laying the metallic base, manipulating the design, and finishing with a polyurethane or polyaspartic topcoat. What pushes a job toward the top of the range is mostly preparation work. Concrete that has existing coatings, moisture issues, cracks or surface contamination takes more time to prep, and skipping proper prep is how floors fail early.

A few real factors that affect your final quote:

  • Concrete condition. Heavy grease staining in a garage or old tiles that need removal will add prep costs. Budget for it upfront rather than being surprised mid-job.
  • Access and logistics. A tight inner-city terrace with no vehicle access costs more to service than an open suburban garage. Material transport matters.
  • Topcoat choice. Polyaspartic topcoats cure faster (sometimes same-day) and are more UV-stable than standard polyurethane. They generally cost more but are worth considering for outdoor-adjacent areas or spaces that get direct sunlight.
  • Design complexity. A single-colour pour costs less labour than a detailed two-tone marble effect. If you want something intricate, factor in extra time.

For context, a standard 40-square-metre double garage in Melbourne’s eastern suburbs, in reasonable condition, would typically land somewhere between $3,200 and $4,800 fully installed. A 20-square-metre living area with a detailed ocean-pour effect and matte topcoat could run closer to $2,800 to $3,500. These are real-world ballpark figures, not guarantees. Get a site-specific quote every time.

How long does metallic epoxy flooring last in Melbourne’s climate?

A properly installed metallic epoxy floor in Melbourne will typically last 10 to 20 years before needing any significant maintenance, provided it is sealed with a quality topcoat and kept clean. Melbourne’s weather variability, including hot summers and cold, wet winters, puts thermal stress on coatings, so the preparation quality and topcoat choice matter more here than in a stable climate.

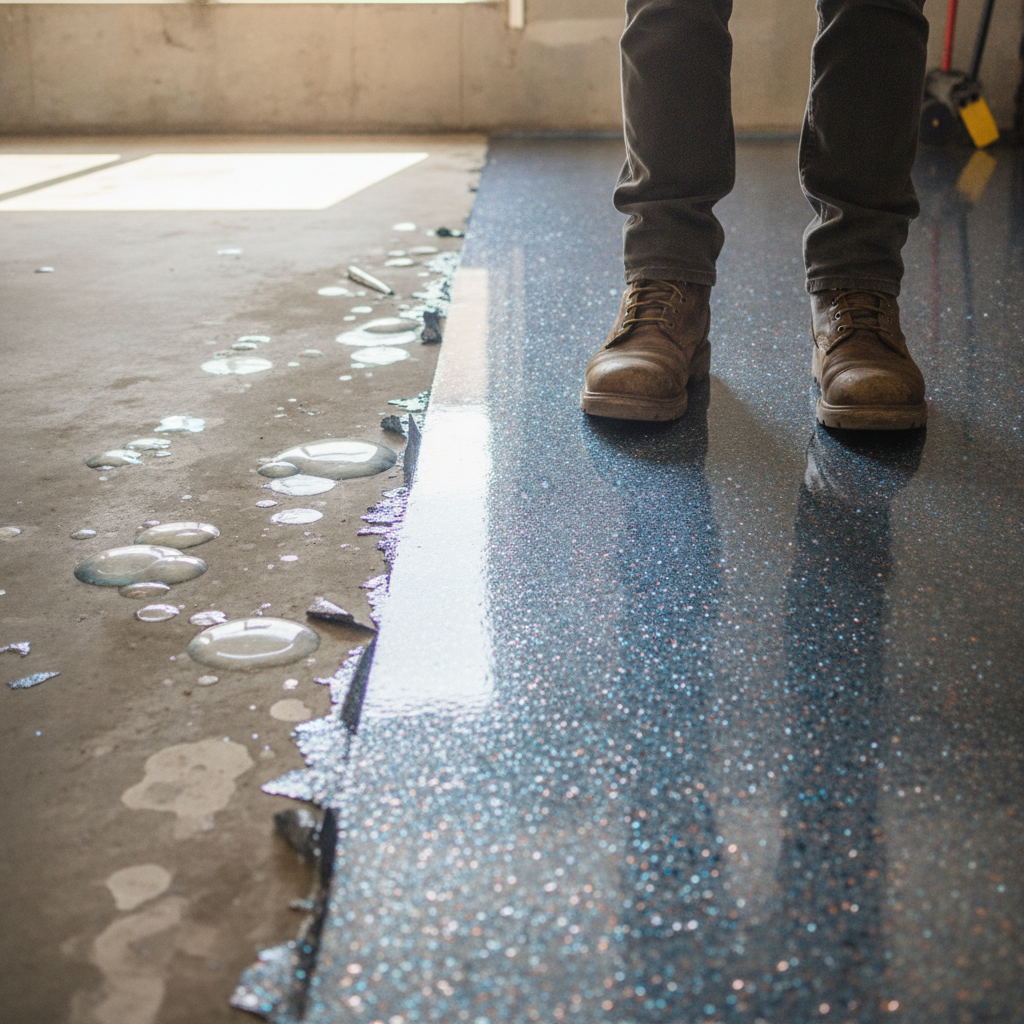
The biggest longevity factor is moisture in the concrete. Melbourne’s older residential stock often has slabs with no effective moisture barrier beneath them. If groundwater vapour pushes up through an improperly primed slab, it can cause bubbling and delamination within months. A good applicator will test moisture levels before they start and apply a moisture-tolerant primer where needed. That one step makes the difference between a floor that lasts five years and one that lasts twenty.

Day-to-day, metallic epoxy is straightforward to maintain. Sweep or vacuum regularly to remove grit, which is the main thing that scratches the topcoat over time. Mop with a pH-neutral cleaner, avoid bleach or strong solvents, and you are largely done. If the topcoat does dull after many years of heavy use, a topcoat refresh is possible without stripping the whole floor, which keeps the long-term cost of ownership low.

Is metallic epoxy suitable for garages as well as indoor living spaces?

Yes. Metallic epoxy suits both garages and indoor living spaces, but the topcoat and primer system should be chosen to match the environment. Garages need a harder, more chemical-resistant topcoat to handle tyre contact, oil drips and foot traffic, while indoor living areas can use a softer-sheen finish optimised for comfort underfoot and UV stability from nearby windows.

Garages are actually where metallic epoxy earns its strongest reputation in Melbourne. The floor transforms what is usually a drab, dusty slab into something that genuinely improves the look of the whole property. Real estate agents have noted that a quality garage floor finish is one of the few upgrades that buyers notice immediately and respond to positively, even if they cannot always articulate why.

For living areas, the main consideration is choosing the right sheen level. A high-gloss finish in a sun-filled room can create glare, while a satin finish gives you the depth and colour of the metallic effect without bouncing light into people’s eyes. Underfloor heating compatibility is also worth discussing with your applicator before the job starts, as the adhesion system may need to be adjusted for floors that cycle through temperature changes regularly.

What should you ask a metallic epoxy installer before booking?

Before booking any metallic epoxy Melbourne installer, ask these practical questions: Do you grind the concrete or just acid-etch? (Grinding is the professional standard.) Do you perform a moisture test? What topcoat do you use and what is its expected lifespan? Can you show me photos of recent local jobs? What does your warranty cover and for how long?

Acid etching was the old way of opening up the concrete surface. Grinding with a diamond-head machine removes more material, creates a better mechanical profile for the epoxy to grip, and removes surface contamination at the same time. Any installer who cannot give you a straight answer about their surface preparation method is worth pressing harder on. The prep is where the job is won or lost, full stop.

Ask to see local photos, not just international or generic portfolio images. Metallic epoxy applied in Melbourne’s conditions, on Melbourne’s typically older concrete slabs, by this particular team, is what you are evaluating. A solid local installer will have plenty of real, recent examples to share.

Finally, check whether the quote includes moving furniture and protecting adjacent surfaces, or whether that is your responsibility. Small scope gaps like this lead to misunderstandings on install day. Get everything in writing before work starts.

Get a metallic epoxy flooring quote from Metal and Flake in Melbourne
Epoxy Floor Cost for a Garage: What Melbourne Homeowners Pay

Epoxy Floor Cost for a Garage: What Melbourne Homeowners Pay

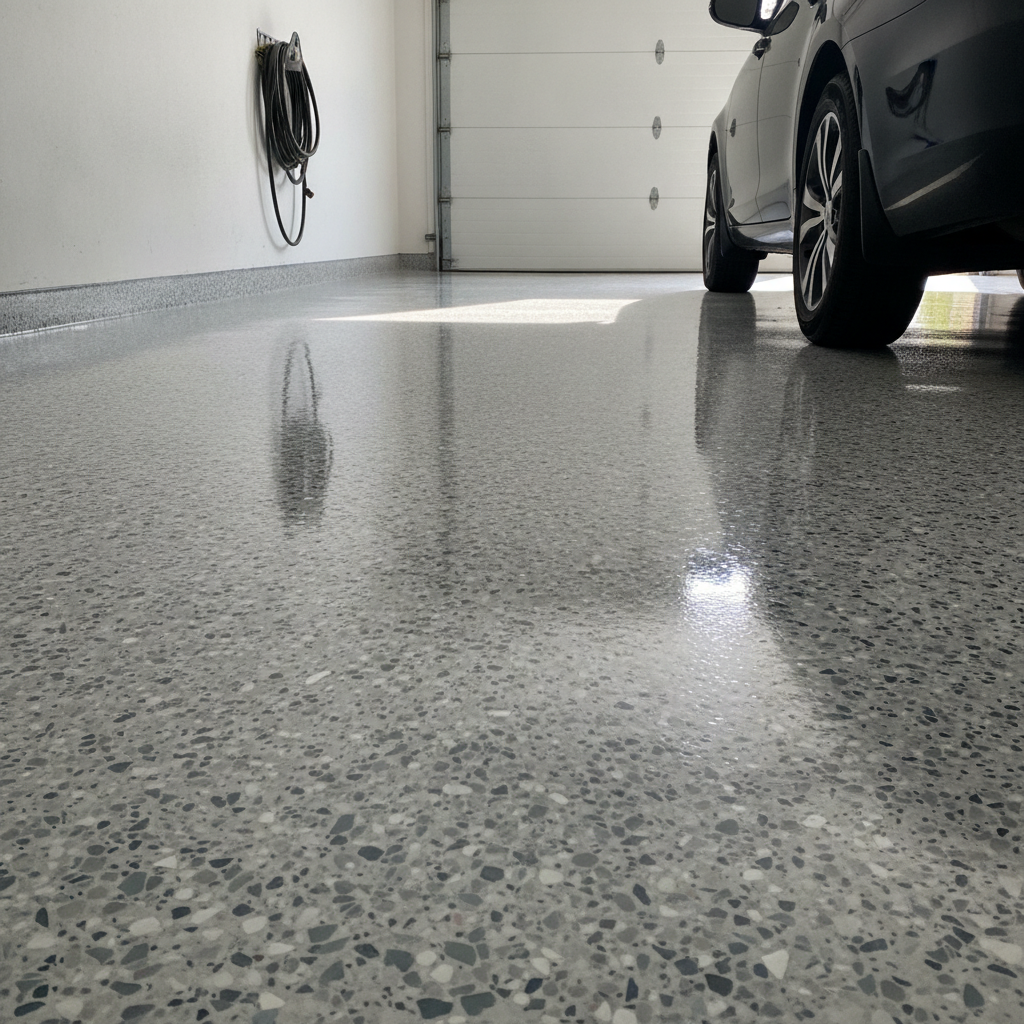
The epoxy floor cost for a garage in Melbourne typically ranges from $50 to $120 per square metre, depending on the system chosen, the condition of the existing concrete, and the size of the space. A standard single garage (around 18 m²) usually comes in between $900 and $2,200 fully installed, while a double garage (around 36 m²) runs from $1,800 to $4,300.

What does epoxy floor cost per square metre for a garage?

For a garage in Melbourne, epoxy floor cost per square metre sits between $50 and $120 for a professionally installed system. A basic single-colour solid epoxy coat sits at the lower end, while metallic or flake finishes with a clear topcoat push toward the higher end. Labour, primer coats, and surface prep are almost always included in a proper quote.

To put that in plain figures: a single garage of roughly 18 m² will cost somewhere between $900 and $2,200. A large double garage around 40 m² could reach $4,800 at the premium end. These are real-world Melbourne numbers, not theoretical averages pulled from interstate surveys.

It helps to know what you are actually paying for. A professional epoxy job is not just rolling paint on concrete. It typically involves diamond grinding the slab, applying a penetrating primer, laying one or two epoxy body coats, broadcasting decorative flake or pigment, and then sealing the whole thing with a polyurethane or polyaspartic topcoat. Each of those steps takes time and materials, which is where the cost comes from.

What factors push the epoxy floor cost for a garage higher or lower?

The biggest cost drivers for a garage epoxy floor are the size of the slab, the condition of the concrete, the type of epoxy system selected, and the number of coats applied. A damaged or contaminated slab that needs extensive grinding and patching before coating can add $10 to $20 per square metre to the final bill, because that prep work is labour-intensive and cannot be skipped without risking coating failure.

Here is a practical breakdown of the main variables:

  • Concrete condition. Fresh, clean slabs cost the least to prep. Old slabs with oil staining, cracks, or previous coatings take longer to grind back and may need crack filler, raising prep costs.
  • System type. A solid colour single-coat system is the most affordable. A full flake system (base coat, broadcast flake, lock coat, topcoat) adds more material and time. Metallic epoxy with its swirled, three-dimensional look sits at the premium end.
  • Number of coats. A two-coat system is standard for light residential use. High-traffic garages, or those used as workshops, benefit from three coats, which costs more but lasts significantly longer.
  • Topcoat choice. Polyurethane topcoats are common and cost-effective. Polyaspartic topcoats cure faster and resist UV yellowing better, but they add to the price.
  • Access and obstacles. If the garage is cluttered and requires clearing, or has fixed workbenches and cabinetry the installer has to work around, expect a small surcharge.

Is a cheap DIY epoxy kit a real alternative to a professional garage floor coating?

DIY epoxy kits for a garage typically cost between $150 and $400 for a single garage, but they use water-based epoxy at much lower solids content than professional-grade products. Most hardware store kits contain around 30 to 40 percent solids, compared to 70 to 100 percent solids in a commercial system. That difference in solids content translates directly into a thinner, weaker film that chips, peels and scuffs faster under tyre traffic.

The hidden cost of a DIY kit is the prep. Professional installers use diamond grinders or shot blasters to open the concrete surface so the epoxy bonds properly. Without that mechanical profile, even a decent epoxy product can delaminate within a year or two, especially in a Melbourne garage where summer slab temperatures regularly exceed 30°C. A failed DIY job then needs to be stripped before a proper coating can be applied, adding cost on top of cost.

For a purely decorative space that sees almost no traffic, a DIY kit can work fine. For a working garage that parks cars, stores tools, or doubles as a workshop, a professional system is the more economical choice over a five to ten year horizon.

How long does a professional epoxy garage floor last, and does that affect value for money?

A properly installed professional epoxy system in a residential garage will typically last 10 to 20 years before it needs significant attention, assuming normal use and occasional cleaning. The longevity depends heavily on the topcoat: a quality polyaspartic or polyurethane clear coat protects the decorative layer underneath from abrasion, chemicals and UV exposure. Without that topcoat, the colour coat can dull and scratch within a few years.

When you factor in that lifespan, the per-year cost of a professional garage floor is quite reasonable. A $3,000 job on a double garage that lasts 15 years works out to $200 a year. That is less than most households spend on garden maintenance annually, and the floor stays functional and good-looking the entire time.

Maintenance is straightforward: sweep regularly to remove grit (which is the main source of surface scratches), mop with a pH-neutral cleaner when needed, and avoid leaving harsh chemicals sitting on the surface. Tyre marks from hot tyres can occasionally stain lighter-coloured systems, so choosing a mid-tone or flake finish in a busy garage is practical advice worth taking.

What should a proper epoxy garage floor quote include?

A reliable quote for an epoxy garage floor should itemise surface preparation (type and extent of grinding), primer coat, body coat or coats with the specific product named, any decorative elements like flake broadcast, and the topcoat product. It should also state the expected dry-film thickness in microns, which tells you how much coating is actually going on the floor. Vague quotes that just say “epoxy floor, supply and install” are a red flag, because you have no way of knowing what system is being used or how many coats are included.

Ask the installer what happens if the concrete has hidden issues, like a moisture problem or deep oil contamination that only shows up once grinding starts. A reputable contractor will have a clear process for handling that rather than just asking for more money on the day.

Always check that the installer carries public liability insurance. Epoxy work involves grinders, chemicals and open slabs, and you want to know you are covered if something goes wrong on your property.

Getting at least two or three quotes is sensible. When you compare them, focus on the system specification, not just the bottom-line number. The cheapest quote often uses fewer coats or a thinner product, which is a short-term saving that costs more in the long run.

Get an accurate epoxy garage floor cost estimate from Metal and Flake.

Floor Coating for Concrete: Which System Gives the Best Result?

Floor Coating for Concrete: Which System Gives the Best Result?

The best floor coating for concrete depends on how you use the space. Epoxy delivers the hardest, most durable surface for garages and workshops. Polyaspartic cures faster and handles UV better outdoors. Polyurethane is flexible enough for areas that see temperature swings. Choosing correctly means matching the system to the traffic, moisture levels and look you want.

Why does the right floor coating for concrete matter so much?

Bare concrete is porous, dusty and surprisingly fragile under heavy traffic. A quality floor coating for concrete seals those pores, resists chemicals and oil, and turns a dull grey slab into something you actually want to look at. Without a proper coating, concrete stains permanently, flakes around edges and turns into a maintenance headache inside a year or two.

Think about a standard garage floor. Tyre rubber grinds in, brake fluid eats the surface, and engine oil soaks right through unprotected concrete. One good spill on a bare slab leaves a stain that no amount of scrubbing removes. A coated floor wipes clean in seconds. That is a practical difference you feel every single week.

There is also a structural argument. Concrete that is left exposed to moisture cycles. Water works its way in during wet weather, then the surface dries out and contracts. Over years, that repeated movement causes surface scaling and small cracks. A proper coating acts as a barrier that slows that process right down.

What are the main types of concrete floor coating available?

There are four systems you will realistically encounter for residential and light commercial work: epoxy, polyaspartic, polyurethane and penetrating sealers. Each has a different chemistry, a different cure time and a different performance profile.

Epoxy floor coatings are the industry workhorse. A two-part system, resin plus hardener, that chemically bonds to the concrete surface when properly prepared. When the mix ratio is right and the concrete has been ground back to open the profile, epoxy builds an extremely hard film, typically 2 to 4 millimetres thick in a full broadcast flake system. It handles heavy vehicles, foot traffic and most common chemicals without flinching. The limitation is UV. Standard epoxy yellows in direct sun over time, which is why it is better suited to indoor spaces like garages, workshops and commercial floors.

Polyaspartic coatings are a newer generation of aliphatic chemistry. They cure in a fraction of the time compared to epoxy (some systems are walkable within a few hours) and they do not yellow in UV light, making them suitable for covered outdoor areas, patios and pool surrounds. The trade-off is the working time. Because polyaspartic goes off quickly, it demands an experienced applicator. Rushing the broadcast or the topcoat on a warm Melbourne day can cause adhesion issues.

Polyurethane topcoats are rarely used alone as a full floor system but are commonly applied over epoxy as a finishing layer. They add flexibility, abrasion resistance and a harder gloss. In environments with significant temperature variation, like a shed that bakes in summer and sits cold in winter, a polyurethane topcoat helps the system flex slightly rather than crack.

Penetrating sealers are the budget option. They soak into the surface and reduce moisture absorption but do not build a film. You will not get a high-gloss finish, decorative flake or meaningful chemical resistance. They are fine for a warehouse floor you just want to keep dust-free, but they are not the right call for a garage or living space where appearance matters.

How does surface preparation affect the final result of a concrete floor coating?

Surface preparation is where most DIY attempts and cheap operators fall apart. No floor coating for concrete, regardless of brand or price, will perform well on a surface that has not been properly opened up. The concrete needs a mechanical profile, meaning tiny peaks and valleys for the coating to grip. The standard method for quality work is diamond grinding, not acid etching.

Acid etching was common practice for decades and you will still see it recommended on hardware store tins. The problem is that acid etching is inconsistent. It reacts differently across a slab depending on mix ratios, age and contamination. Diamond grinding removes the weak laitance layer, the powdery top skin of concrete, and creates a reproducible surface profile every time. The Concrete Surface Profile (CSP) scale, developed by the International Concrete Repair Institute, runs from 1 to 10. A CSP of 2 to 3 is the target for most thin-film floor coatings.

Any oil contamination also needs to come out before grinding, not after. Oil soaks down through the slab over time. If you grind first and then try to degrease, the grinding opens the pores and drives the contaminant deeper. The right order is degrease, then grind, then coat.

What finish options can you get with a concrete floor coating system?

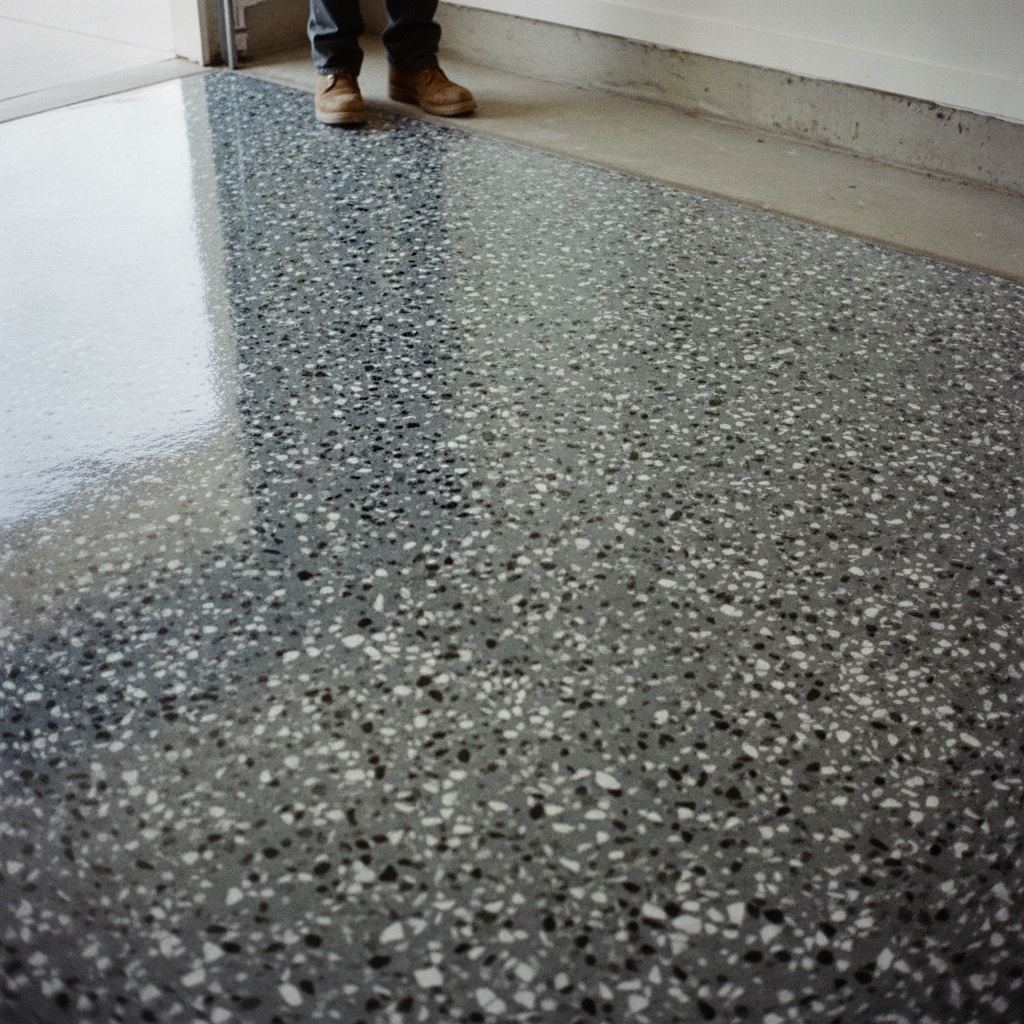
The most popular finish for residential garages and commercial spaces in Melbourne right now is the flake broadcast system. Coloured vinyl flakes are scattered into a wet epoxy base coat, allowed to cure, scraped back flat, and then sealed with a clear polyaspartic or polyurethane topcoat. The result is a surface with depth and texture, non-slip underfoot because the flakes create a subtle profile, and genuinely easy to clean because there are no grout lines or joints to trap dirt.

Solid colour epoxy is the other common choice. It gives a clean, single-tone look that suits workshops and industrial spaces. Metallic epoxy systems use metallic pigment powders that create a swirling, lava-lamp effect when worked into the wet coat. Each one turns out slightly different because the pigment moves as the installer manipulates it, so you get a floor that is genuinely one of a kind.

Gloss level is adjustable too. A full-gloss clear topcoat bounces light around a space and makes it feel larger and brighter. A satin or matte finish hides minor imperfections in the slab and gives a more understated result. Most installers offer both.

How long does a concrete floor coating last, and what maintenance does it need?

A well-installed epoxy or polyaspartic floor coating, on properly prepared concrete, will realistically last 10 to 20 years in a residential garage with normal use. The coating does not require waxing, polishing or any specialist chemicals. A mop with warm water and a neutral pH cleaner is genuinely all the regular maintenance needed.

The things that shorten coating life are using harsh solvents directly on the surface, dragging heavy sharp-edged objects across it without protection, and allowing hot tyre pickup in very hot weather. Hot tyre pickup is what it sounds like: a car tyre that has been driven hard sits on the coating while still very warm, softens it slightly, and pulls a patch of the coating away when the car moves. A good quality polyaspartic topcoat is far more resistant to this than a straight epoxy, which is one reason experienced installers almost always recommend a topcoat as part of the system.

Is a concrete floor coating a DIY job or should you use a professional?

Hardware stores sell epoxy kits, and some of them produce a passable result on a small, clean, lightly trafficked slab. But the gap between a kit and a professional system is significant. Professional installers use commercial-grade two-part products with higher solids content, which means a thicker, harder finished film. They have diamond grinders that reach the correct surface profile in one pass. They know how to manage pot life, temperature and humidity on the day.

The most common outcome of a DIY epoxy attempt is peeling within 12 to 18 months. The coating lifts not because the product failed but because the surface was not prepared to the depth the product needed. Fixing a failed DIY coat means grinding the whole thing back anyway, so the saving disappears fast.

If the slab has cracks, previous coatings, oil staining or moisture issues, a professional assessment before any product goes down is worth every cent. Those variables change which system is appropriate, what primers to use and whether the slab needs remediation first.

Get a professional concrete floor coating quote from Metal and Flake

Metallic Epoxy Flooring: Finishes, Process and Costs in Melbourne

Metallic Epoxy Flooring: Finishes, Process and Costs in Melbourne

Metallic epoxy flooring is a decorative resin coating that blends metallic pigments into an epoxy base to produce flowing, three-dimensional effects that look different from every angle. It suits garages, showrooms, retail spaces and living areas. In Melbourne, installed costs typically range from around $80 to $150 per square metre depending on floor condition, size and the finish chosen.

What finishes are available with metallic epoxy flooring?

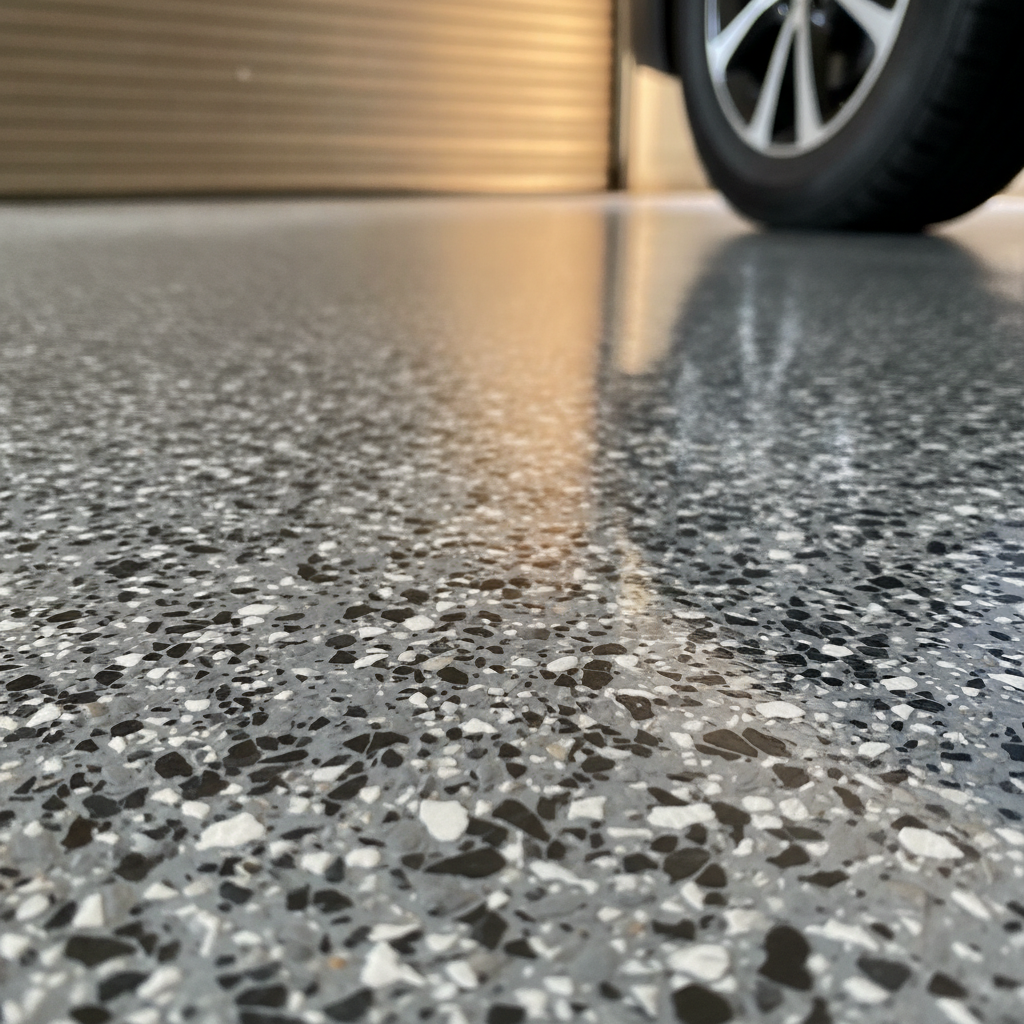
Metallic epoxy flooring comes in several distinct looks, all produced by manipulating the pigment while the resin is still wet. The most common are a pearl or oyster swirl, a deep lava or marbled vein effect, and a smoky, cloud-like wash. Colour options range from single-tone silvers and golds through to layered combinations of bronze, copper, charcoal and blue-grey.

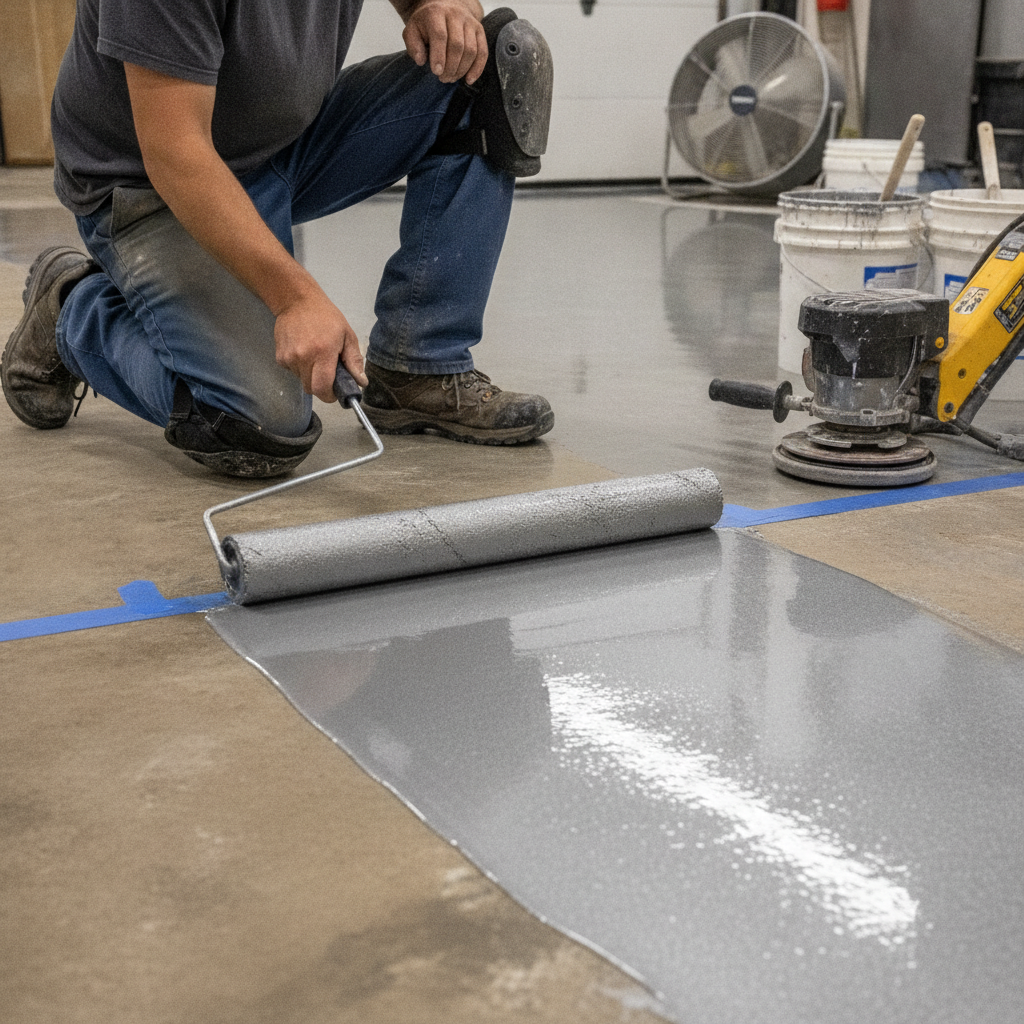
The finish is shaped by how the installer works the surface. A foam roller laid in long, overlapping passes creates soft, wave-like movement. A heat gun or torch pulled across the wet coat causes the pigment to migrate and produce sharper, more dramatic veining. Some installers add a second contrasting colour mid-pour to build depth. The topcoat, usually a clear polyurethane or polyaspartic sealer, locks everything in and determines the final sheen level, from satin through to a high-gloss mirror finish.

Because every pour responds slightly differently to temperature, humidity and technique, no two metallic epoxy floors are exactly the same. That is genuinely one of the main reasons people choose the product. You end up with something that is one of a kind on your property.

What does the metallic epoxy flooring installation process involve?

The installation process for metallic epoxy flooring has four main stages: surface preparation, primer, the metallic base coat, and a clear topcoat. Each stage needs to cure before the next goes down. From start to walk-on ready, most residential jobs take two to three days. Larger commercial floors can run to four or five days.

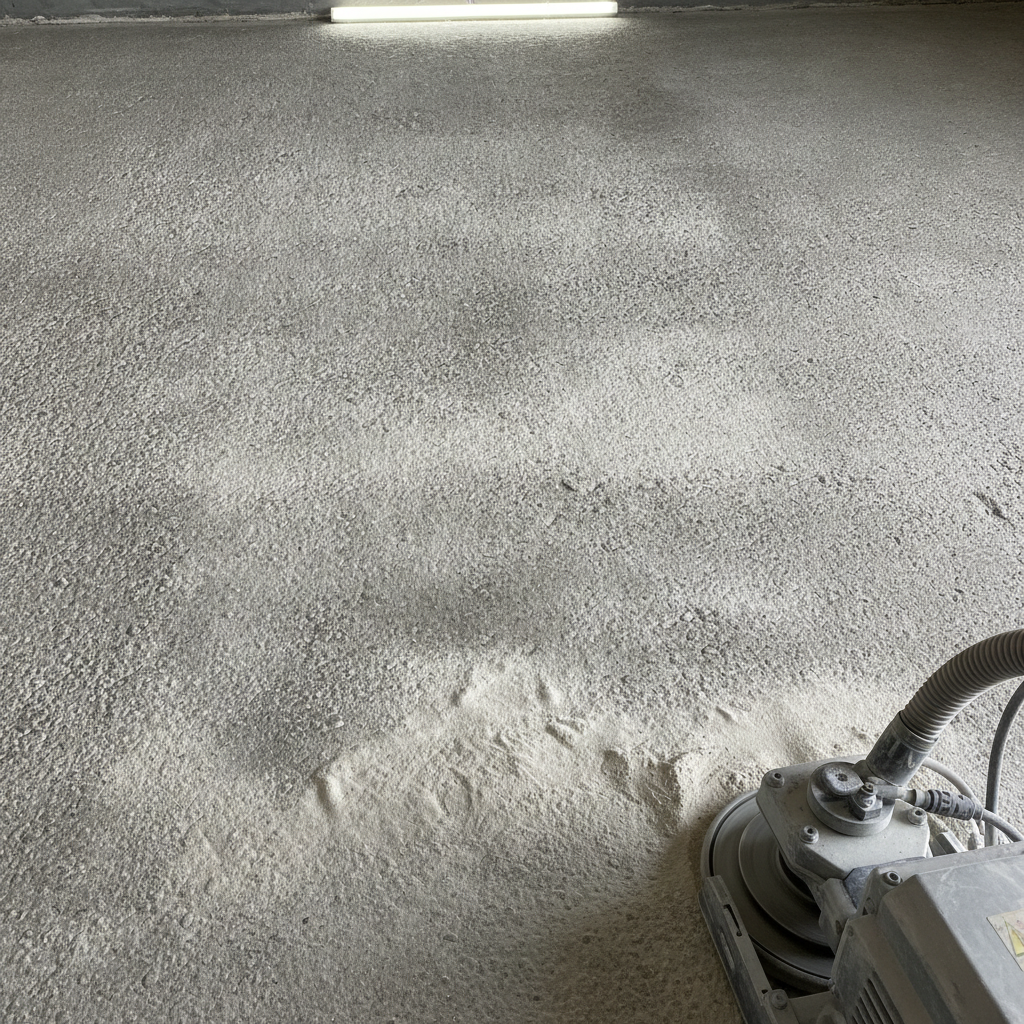
Surface preparation is the most critical part of the whole job, and it is where shortcuts cause the most grief later. Concrete needs to be mechanically ground or diamond-ground to open the surface profile so the epoxy can bond properly. Any cracks, spalling or low spots are filled and levelled before the primer goes on. If the slab has moisture issues, a moisture-tolerant primer is used as a barrier coat. Skipping or rushing this stage is the number one reason epoxy floors peel, bubble or delaminate within a year or two of installation.

Once the primer has cured, the metallic epoxy base coat is mixed and poured. The installer works quickly because the pot life of most two-part epoxy systems is only 20 to 40 minutes at typical Melbourne temperatures. The pigment is manipulated into the desired pattern before the product gels. A second colour can be introduced at this point. After curing overnight, the surface is lightly abraded and the clear topcoat is applied in one or two coats depending on the specification. Polyaspartic topcoats cure faster than standard polyurethane and allow a quicker return to traffic, which matters on commercial sites.

How much does metallic epoxy flooring cost in Melbourne?

Metallic epoxy flooring in Melbourne generally costs between $80 and $150 per square metre fully installed, though complex jobs with significant concrete repair or very large areas can sit outside that range. The biggest cost variable is the condition of the existing slab. A new slab in good order costs far less to prepare than an old warehouse floor full of cracks, oil contamination and previous coatings that need stripping.

A standard double garage of around 36 square metres would typically come in somewhere between $2,900 and $5,400 all up, depending on finish complexity and prep requirements. A 100-square-metre showroom or retail space, where a more dramatic multi-colour effect is common, might sit between $9,000 and $14,000 once preparation, materials and labour are factored in.

A few things push costs up. Moving from a single-colour pearl finish to a layered, multi-tone lava effect takes considerably more material and time. Requesting a matte or satin topcoat rather than high-gloss uses the same materials but some finishes require additional coats. Deep concrete repairs, moisture mitigation primers and tight access areas all add to the ticket. A genuine way to keep costs reasonable is to get the slab assessed early so there are no surprises mid-job.

How long does metallic epoxy flooring last and how do you maintain it?

A properly installed metallic epoxy floor will last 10 to 20 years in a residential setting with basic care. In commercial or light industrial settings with higher traffic, a topcoat refresh every five to seven years can extend the floor’s life considerably. The main enemies are prolonged standing water, heavy point loads from steel feet and harsh chemical spills left sitting.

Day-to-day maintenance is straightforward. Sweep or dust-mop regularly to remove grit, which is the most common cause of surface scratching. Wet mop with a neutral pH cleaner and warm water. Avoid bleach, ammonia-based products and anything highly acidic, as these can dull the sealer over time. Felt pads under furniture legs prevent scuffing. In a garage, wiping up oil or fuel spills promptly keeps the topcoat looking sharp.

One practical tip: if the floor sees regular vehicle traffic, opt for a polyaspartic topcoat rather than a standard polyurethane. Polyaspartic systems are notably more resistant to tyre marks and hot tyre pick-up, which is the phenomenon where a hot tyre bonds briefly to a softened coating and pulls it away when the car moves. It is a common complaint on cheaper garage floor coatings and not something you want to deal with after spending good money on a premium metallic finish.

Is metallic epoxy flooring right for your space?

Metallic epoxy flooring suits spaces where appearance matters and the floor needs to be tough at the same time. It works particularly well in garage conversions, home theatres, open-plan living areas, retail boutiques, car showrooms and hospitality fit-outs. It is a harder ask in areas with very high moisture transmission through the slab, such as some basement slabs sitting directly on uncompacted fill, where moisture management needs to be sorted out first.

It is also worth thinking about slip resistance. A high-gloss metallic finish is beautiful but can be slippery when wet. Specifying a fine-broadcast anti-slip additive in the topcoat is a practical solution for kitchens, bathrooms or any area likely to see water. This does not noticeably change the look but changes the feel underfoot significantly.

The other consideration is heat. In Melbourne’s summers, a dark metallic floor in a garage or alfresco area exposed to direct sun will get warm underfoot. Lighter colour choices, or positioning the finish so direct sun is limited, addresses this. A good installer will walk through these questions with you before the job starts, because the best result comes from matching the product to the actual conditions on site.

Request a metallic epoxy flooring installation quote from Metal and Flake.

Epoxy Flake Floors: What They Are and Why Homeowners Love Them

Epoxy Flake Floors: What They Are and Why Homeowners Love Them

Epoxy flake floors are a multi-layer flooring system where decorative vinyl or acrylic flakes are broadcast into a wet epoxy base coat, then sealed under a clear topcoat. The result is a surface that is tough, slip-resistant, easy to clean and good-looking. They suit garages, laundries, workshops and living areas, and they last well over a decade with minimal upkeep.

What exactly goes into an epoxy flake floor system?

An epoxy flake floor is made up of three core layers: a prepared concrete substrate, a pigmented epoxy base coat, and a hard-wearing polyurethane or epoxy clear topcoat. The decorative vinyl or acrylic flakes are scattered into the wet base coat before it cures, creating a speckled finish that hides minor surface imperfections and adds texture underfoot.

The base coat is the workhorse. It bonds chemically to the concrete, which is why proper surface preparation matters so much. Professionals grind or shot-blast the slab to open up the pores so the epoxy can grip. Skip that step and no amount of expensive coating will stop the floor from peeling down the track.

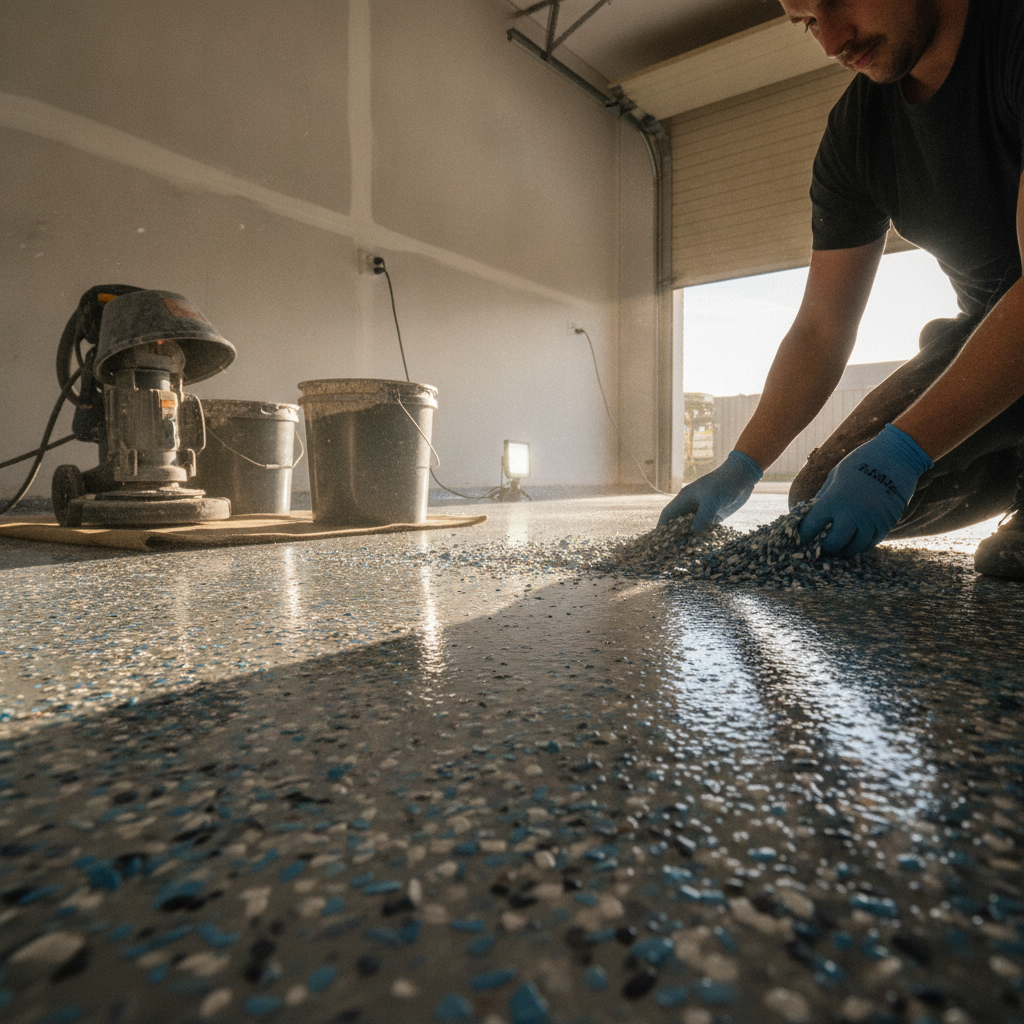
The flakes themselves come in dozens of colour blends. Common combinations run from neutral grey and beige mixes through to bold charcoal-and-white or earthy sandstone tones. The size of the flake also varies. A fine sprinkle gives a refined, almost terrazzo-like look. A full-broadcast coverage, where flakes are thrown until they overlap completely, creates a chunkier texture that hides dirt really well and adds meaningful slip resistance.

On top of the flakes goes the clear topcoat. Polyurethane topcoats are popular in Melbourne because they resist the UV that comes through garage doors and skylights, so the colour stays true rather than yellowing over time.

Why do epoxy flake floors perform so well in garages and high-traffic areas?

Epoxy flake floors perform well in garages and high-traffic areas because the cured system reaches a compressive strength that far exceeds standard concrete, the textured flake surface adds grip underfoot, and the sealed topcoat resists oil, chemicals, water and abrasion. That combination makes them one of the most practical choices for working floors in Australian homes.

Take a typical double garage. Bare concrete absorbs oil drips, tyre marks and garden chemical spills. Once stained, concrete is nearly impossible to restore without grinding. An epoxy flake floor changes that equation completely. Spills sit on the surface and wipe up with a damp cloth. Tyre rubber does not bond to the cured topcoat the way it does to raw concrete, so the black skid marks that plague bare slabs are not a problem.

The slip resistance is worth calling out separately. The texture created by the broadcast flakes gives the floor meaningful grip, even when wet. That matters in Melbourne homes where a garage doubles as a workshop, a laundry or a mudroom entrance, and wet boots are a daily reality through winter.

Durability figures in, too. A properly installed epoxy flake system on a well-prepared slab can hold up for 15 to 20 years in a residential garage before it needs any serious attention. Compare that to a painted concrete floor, which typically starts flaking and peeling within two to three years, and the value equation becomes clear.

Are epoxy flake floors only for garages, or can they work inside the home?

Epoxy flake floors work well beyond the garage. They are a practical and attractive choice for laundries, workshops, pool surrounds, patios and even interior living spaces. The key consideration indoors is choosing a low-VOC formulation during installation and ensuring good ventilation, because the curing process does produce fumes that need to clear before the space is occupied.

In Melbourne, more homeowners are bringing epoxy flake systems into laundries and mudrooms. These rooms take a beating: wet shoes, pet paws, washing machine overflow and cleaning chemicals are all part of daily life. Tiles crack and grout discolours. Vinyl lifts at the seams. An epoxy flake floor is seamless, so there are no joints for water to sneak under, and it handles the moisture without complaint.

Some homeowners go further and use flake floors in rumpus rooms, home gyms and studio spaces. The aesthetic has broadened well beyond the traditional grey garage look. With the range of flake blends now available, a well-chosen colour scheme can look genuinely sharp in a living environment rather than industrial.

One honest caveat: epoxy floors are hard underfoot. In a living room where you are walking barefoot for long stretches, that hardness is noticeable. In a gym, laundry or garage, it is a non-issue. Matching the product to the actual use of the space is the sensible approach.

How does the installation process for epoxy flake floors actually work?

Installing epoxy flake floors involves grinding or shot-blasting the concrete to create a mechanical profile, repairing any cracks or surface defects, applying the pigmented epoxy base coat, broadcasting the flakes while the coat is wet, removing excess flakes once cured, and finishing with one or two clear topcoat layers. The whole process typically takes two to three days including cure time.

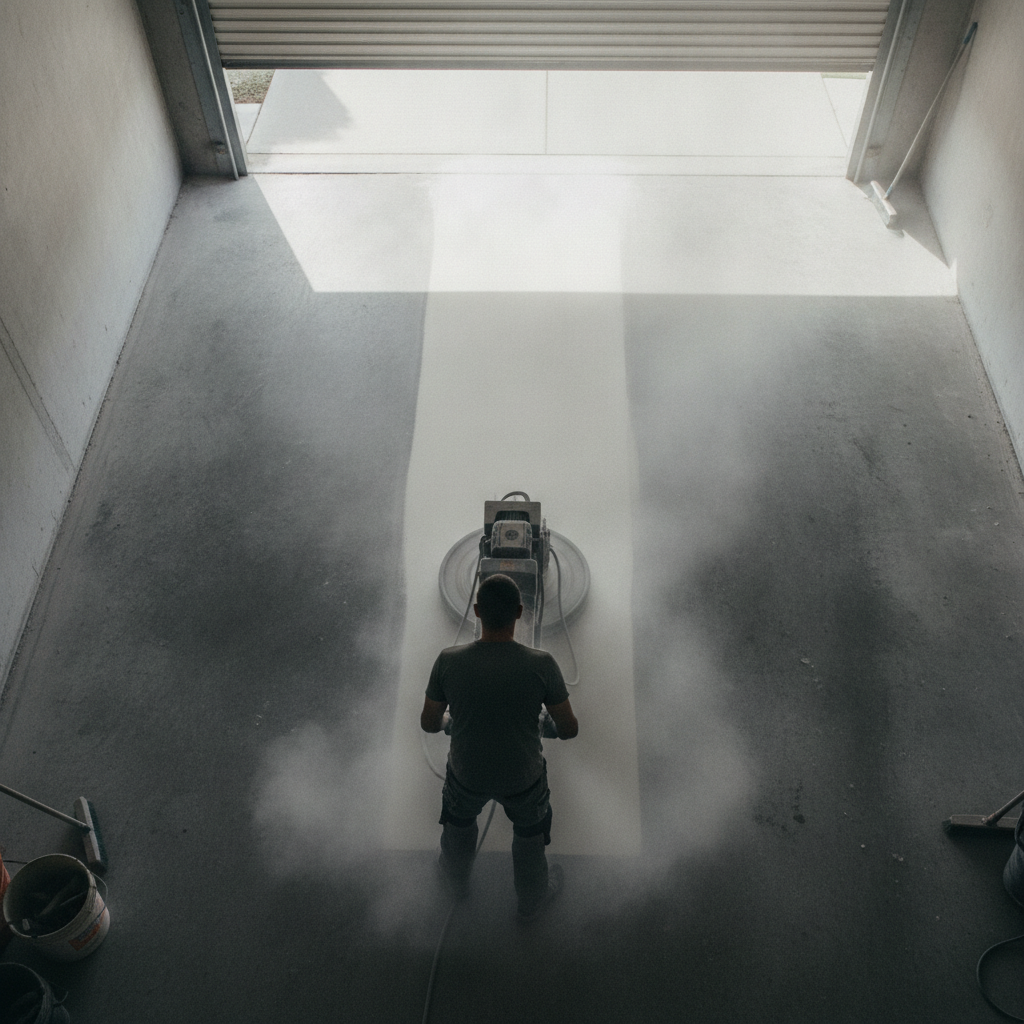
Day one is almost always preparation. The grinder or shot-blaster passes over the entire slab, raising a fine dust and creating a rough profile that the epoxy can bond to. Any cracks get filled and levelled. This is the part that separates a floor that lasts from one that fails early. It is not glamorous work, but it is the most important step in the whole job.

Day two is the application. The base coat goes down and the flakes go in immediately after, while the epoxy is still tacky. Installers work in sections to keep up with the open time of the product. Once the base coat cures overnight, the excess flakes are scraped back and the surface is lightly sanded to knock down any sharp edges.

Day three is the topcoat. One or two coats of clear polyurethane or epoxy sealer lock everything in. Then the floor needs to cure before foot traffic, typically 24 hours, and before vehicle traffic, usually 48 to 72 hours depending on temperature and humidity. Melbourne’s cooler winters can extend cure times slightly, so planning around the season is worth doing.

What should homeowners look for when choosing an epoxy flake floor installer?

When choosing an epoxy flake floor installer, homeowners should look for evidence of proper concrete preparation equipment, product knowledge about the specific coatings being used, a portfolio of completed residential work and clear communication about cure times and aftercare. A cheap quote that skips surface prep will cost more to fix than a quality job done right the first time.

Ask directly: do they grind or shot-blast the concrete before coating? If the answer is no, or is vague, that is a signal to keep looking. Proper mechanical preparation is non-negotiable for a system that bonds correctly and lasts.

Ask about the specific products they use. A quality installer can name the brand and grade of their base coat and topcoat and explain why they chose it. They should also be honest about what the floor will and will not handle, and give you real guidance on maintenance: how to clean it, what products to avoid and when to expect it might need a refresh coat down the line.

Finally, look at their previous work. Photos of finished floors across different homes, different colour blends and different spaces give you a realistic picture of what to expect. Word-of-mouth referrals from people in your suburb carry real weight too.

Get a free quote on epoxy flake flooring installation from Metal and Flake.

Epoxy Floor Installation Cost in Melbourne: 2026 Pricing Guide

Epoxy Floor Installation Cost in Melbourne: 2026 Pricing Guide

Epoxy floor installation cost in Melbourne typically ranges from $30 to $120 per square metre, depending on the system, the condition of the slab, and the size of the job. A basic single-colour garage coat sits at the lower end, while metallic or flake systems with a full prep, prime and topcoat land toward the top. Most residential jobs come in somewhere between $50 and $80 per square metre installed.

What does epoxy floor installation cost per square metre in Melbourne?

For a professionally installed epoxy floor in Melbourne, expect to pay roughly $30 to $50 per m² for a basic broadcast flake system on a sound slab, $55 to $80 per m² for a mid-tier metallic or full-flake system with diamond-grinding prep, and $90 to $120-plus per m² for a high-build decorative system requiring crack repairs, multiple coats and a premium polyaspartic topcoat. These figures reflect 2026 Melbourne labour and materials rates and assume a job of at least 40 square metres. Smaller areas often carry a minimum call-out fee that can push the effective per-metre rate higher on tight footprints like a single-car garage alcove.

What factors push your epoxy floor cost up or down?

The single biggest driver of epoxy floor installation cost is slab preparation. A fresh, flat, uncontaminated slab that only needs a light diamond grind will cost far less to prep than one that has years of oil saturation, a failing old coating, or significant cracking. Beyond the slab, these are the main levers:

  • System type. A single-colour solid coat uses less material and fewer coats than a full metallic pour or a full-broadcast vinyl flake system. More coats means more labour time and more product cost.
  • Floor size. Larger areas spread fixed costs like grinding, priming and mobilisation across more square metres, so the per-m² rate drops on bigger jobs. A 200 m² commercial warehouse will almost always be cheaper per metre than a 25 m² single-car garage.
  • Moisture in the slab. Concrete that is holding moisture above 75 per cent relative humidity (as tested with an in-situ probe) needs a moisture-tolerant primer or a vapour barrier coat before the decorative layers go down. That adds both time and materials cost.
  • Crack and joint repairs. Structural cracks need to be ground out and filled with a flexible polyurea filler before coating. Each crack adds to the prep bill, and a floor with a lot of them can add $5 to $15 per m² to the overall price depending on severity.
  • Finish and topcoat selection. A standard epoxy topcoat is durable enough for most residential garages, but high-traffic areas benefit from a polyaspartic or polyurethane topcoat. Those coatings cost more per litre and apply differently, which adds to the labour side too.
  • Access and working conditions. Tight access, odd-shaped floors, floor drains, columns and machinery that needs moving all add time. Time is money on any trade job.

How much does a garage epoxy floor cost in Melbourne?

A standard double-car garage in Melbourne (around 35 to 40 m²) with a vinyl flake system, diamond grind preparation, a moisture-tolerant primer, one broadcast coat and a clear polyaspartic topcoat typically costs between $2,000 and $3,200 fully installed. That works out at roughly $55 to $80 per m². A single-car garage at around 18 to 22 m² will often attract a minimum job fee from most installers, so you might pay $1,400 to $1,900 even though the floor area is smaller. The exact number depends on the slab condition found on the day. If the concreter left a smooth trowel finish, it needs more aggressive grinding to open the surface profile, which adds time.

Colour and flake choices matter more than most people expect. Standard flake blends are stocked in bulk and cost less than custom colour mixes. Metallic epoxy systems, which use pigment suspensions to create swirling, three-dimensional effects, require more product, more labour and a lot more skill to apply consistently. On a 40 m² garage, a metallic system typically adds $800 to $1,500 to the job cost compared with a standard flake.

What does a commercial epoxy floor installation cost?

Commercial epoxy floor installation cost varies widely because the environments are so different. A light-duty retail or showroom floor at 150 m² might cost $6,500 to $9,000 installed, while a food-grade kitchen or food processing facility of the same size could cost $15,000 or more once you factor in coved skirting, anti-slip aggregate, multiple system coats and the curing time required between each one. Warehouses and workshops often sit in between, at $35 to $60 per m², because the system specification is simpler even if the area is large.

One thing worth understanding on commercial jobs is that downtime costs money. A coating system that can be walked on in 12 to 18 hours versus one that needs 24 to 72 hours before heavy forklift traffic is placed on it has a real value to the business. Fast-cure polyaspartic systems cost more per litre, but many commercial clients find the reduced downtime worth every cent.

How do you get an accurate epoxy floor installation cost estimate?

The only reliable way to get a number you can actually budget to is to have an installer inspect the slab in person. Photos help, but they cannot reveal moisture readings, surface contamination, existing coating adhesion failures or the concrete hardness that determines how long grinding will take. Any quote given over the phone without a site visit is a ballpark at best and a source of nasty surprises at worst.

When comparing quotes, check that each one includes the same scope: surface preparation method (grind specification), number of coats, product brands, topcoat type, and what happens if moisture or structural issues are found on the day. A quote that omits prep or uses a thin single-coat system is not a bargain; it is a floor that will peel inside two years. Australian standards for concrete surface preparation (AS 1884 covers floor coatings for light traffic) give you a baseline reference point when asking installers what profile they are grinding to.

It also pays to ask about the installer’s warranty. A quality residential epoxy floor should carry at least a two to three year workmanship warranty, and some systems come with manufacturer product warranties of five years or longer when applied by a certified applicator.

Is epoxy flooring worth the cost compared to other options?

Compared to alternatives like polished concrete (which typically costs $80 to $150 per m² in Melbourne), tiles ($60 to $100 per m² installed), or vinyl plank ($40 to $70 per m² for commercial-grade product), a quality epoxy system is genuinely competitive on price. The advantage epoxy has over tiles is the seamless finish with no grout lines to trap oil, dirt or bacteria. The advantage over polished concrete is the ability to achieve a hard-wearing decorative finish on a slab that is not in good enough condition to polish attractively.

For garages, workshops and warehouses, the return on investment is straightforward. A well-installed epoxy floor resists oil, chemical spills, tyre marks and abrasion. It reflects light, making the space noticeably brighter, and it cleans up with a mop in minutes. That durability means you are not repainting a painted floor every two or three years, which adds real-world value to the upfront cost.

Ready to find out exactly what your job will cost? Request an epoxy floor installation cost estimate from Metal and Flake.

Epoxy Kits for Garage Floors: DIY vs Professional Results Compared

Epoxy Kits for Garage Floors: DIY vs Professional Results Compared

Epoxy kits for garage floors are water-based or solvent-based two-part coatings sold at hardware stores, designed for homeowners to apply themselves. They cost between $150 and $500 for a single-car garage, but professional epoxy systems use higher-solids resins, proper concrete grinding and multiple coats that produce a finish lasting two to three times longer than most DIY results.

What do epoxy kits for garage floors actually include?

Most off-the-shelf epoxy kits for garage floors contain a two-part water-based epoxy resin, a bag of colour flakes, an acid-etch solution and a roller. The solids content in these kits typically sits between 30 and 50 percent, which means a significant portion of the coating evaporates as it cures. What’s left behind is a relatively thin film, often around 100 to 150 microns dry film thickness. That’s the main reason many homeowners notice peeling or bubbling within two to three years, particularly in Melbourne garages where summer heat causes concrete to expand and contract.

The kits themselves aren’t bad products. They’re designed for convenience and a moderate budget. But it’s worth understanding exactly what you’re buying before you commit a weekend and a few hundred dollars to the job.

How hard is garage floor preparation for a DIY epoxy kit?

Concrete preparation is the single biggest factor separating a lasting epoxy floor from one that fails early. Professional installers use diamond-grinding equipment to open the concrete surface and create a mechanical profile, the tiny peaks and valleys the epoxy bonds into. Most DIY kits recommend acid etching instead, which is better than nothing but nowhere near as effective on dense or power-trowelled slabs, which is exactly what most Melbourne suburban garages have.

If the concrete isn’t opened up properly, the epoxy sits on top like paint rather than bonding into the slab. Moisture trapped beneath the surface then pushes it off. A few specific things to watch for before you start any DIY kit application:

  • Moisture vapour emission from the slab. Concrete slabs can emit moisture from below, particularly in older homes without a proper vapour barrier. You can test this by taping a piece of plastic sheeting flat against the floor for 24 hours. If condensation forms underneath, a standard kit is likely to fail.
  • Previous sealers or coatings. If the garage floor has been painted or sealed before, acid etching won’t cut through. The new epoxy won’t stick.
  • Oil contamination. A single oil drip from a car that sat there for years can create a weak spot that de-bonds an entire section of coating.

Professional crews carry moisture meters, angle grinders with diamond cup wheels and commercial degreasers. That preparation kit alone represents several thousand dollars of equipment that most homeowners don’t have sitting in the shed.

How do DIY and professional epoxy finishes compare on durability?

A quality professional epoxy system, applied over properly ground concrete, typically uses a high-build basecoat with 80 to 100 percent solids content, broadcast decorative flake and a polyurethane or polyaspartic topcoat. The total build can reach 500 to 800 microns. Compare that to the 100 to 150 microns from a hardware store kit and you’re looking at a finish that’s four to five times thicker and significantly more resistant to hot tyre pick-up, chemical spills and abrasion.

Hot tyre pick-up is one of the most common complaints about DIY epoxy kits in Australia. When you park a car after a highway drive, the heat in the tyres can literally pull the coating off the floor in sheets. Higher-solids professional systems cure to a much harder matrix that resists this. Many professional installers also add a polyaspartic topcoat, which has a higher heat deflection temperature than standard epoxy.

That said, a well-applied DIY kit on a properly prepared slab can last five or more years with light vehicle use. The issue is that the prep and application steps that make this possible are the same steps most first-timers either skip or underestimate.

What does each option actually cost for a typical garage?

For a standard single-car garage of around 20 to 25 square metres, the numbers usually look something like this:

  • DIY kit: $150 to $500 for materials, plus roughly 6 to 10 hours of your own time across a weekend. Add the cost of hiring an angle grinder and diamond cup wheel if you want proper prep, around $80 to $120 per day from a hire place.
  • Professional installation: Typically $1,500 to $3,500 for a single-car garage, depending on the system, the number of coats and the condition of the concrete. Double garages run from around $2,500 upward.

The gap looks large on paper. But factor in the real risk of a kit failing within two years, the cost of stripping it back and starting again, and the lost weekend, and the value calculation gets a lot closer. A professional floor done right the first time can realistically last 10 to 15 years with basic maintenance.

When does a DIY epoxy kit actually make sense?

There are situations where a DIY kit is a sensible choice. If you’re renting and want to tidy up a rough slab for a modest investment, a kit does the job. If you’re coating a workshop or storage area that sees foot traffic only and no vehicle parking, the lower build thickness is perfectly adequate. If you have prior experience with concrete prep and understand what you’re signing up for, results can be genuinely impressive.

The honest truth is that the people who get the best DIY results are the ones who spend more time on preparation than on the application itself. They grind rather than etch, they patch cracks properly with epoxy filler, they let the concrete dry for at least 48 hours after any moisture work, and they apply two thin coats rather than one thick one. That discipline makes a real difference.

Where a kit consistently underdelivers is in high-use residential garages with vehicles parked daily, in homes with concrete slabs that have moisture issues, and in commercial or light industrial settings where the floor takes real punishment. In those situations, the money saved on a kit is usually spent twice over when it starts to peel.

What should you ask before choosing between a kit and a professional?

Before you commit either way, run through a few honest questions. How old is the slab, and do you know if there’s a vapour barrier underneath? Is the concrete power-trowelled or broom-finished? Have you had any previous coating on the floor? How often do you park vehicles in the space, and do those vehicles sit there hot after highway driving? Are you planning to sell the property in the next few years, where a professional-grade finish adds genuine kerb appeal?

The answers will tell you a lot. A broom-finished slab in a rarely used garage is a reasonable candidate for a kit. A polished, dense slab in a daily-use double garage is not.

Getting a professional quote costs nothing and gives you a concrete comparison point. You’ll know exactly what a professional system would look like, what prep work is involved and what the warranty covers. That makes the DIY versus pro decision a lot easier to make with confidence rather than guesswork.

Compare DIY kits to professional installation , get a quote from Metal and Flake

Coating a Concrete Floor: Which Product Is Right for Your Garage?

Coating a Concrete Floor: Which Product Is Right for Your Garage?

Coating a concrete floor in your garage comes down to three main options: penetrating sealers, polyurethane topcoats, and epoxy systems. Epoxy is the most durable and popular choice for residential and light-commercial garages because it bonds chemically to the slab, resists oil and tyre marks, and can handle the heat and load of everyday vehicles. The right pick depends on your budget, how you use the space, and how well the slab is prepared beforehand.

What are the main types of concrete floor coatings for a garage?

There are three broad categories worth knowing. Penetrating sealers soak into the surface and protect from moisture but leave no visible film, so they do nothing for aesthetics. Polyurethane topcoats add a clear, hard-wearing layer over bare or previously coated slabs. Epoxy coatings are two-part systems (resin plus hardener) that cure into a rigid, chemical-resistant film that outperforms the other two on almost every practical measure for a busy garage floor.

Each category has a different job. Penetrating sealers are best for outdoor slabs or areas where you simply want to slow moisture ingress. They are cheap to apply but wear off within a few years and give you no colour or gloss. Polyurethane is often used as a topcoat over epoxy to add UV resistance and a final sheen, but on its own it lacks the build and adhesion strength of a proper epoxy base. Epoxy systems are the go-to for garages because they create a seamless, easy-to-clean surface that stands up to hot tyre pickup, petrol spills, jack stands, and the general punishment a working garage gets.

Beyond the base chemistry, you also have choices around finish. A solid-colour epoxy gives a clean, professional look. Adding decorative flake (also called vinyl flake or chip) creates texture that hides minor imperfections and adds grip underfoot, which is exactly why it is so popular in Australian residential garages. Metallic pigment systems are another step up, giving a marble-like swirl effect that works well in showrooms, man caves, and premium home garages.

Why does surface preparation matter so much when coating a concrete floor?

Surface preparation is the single biggest factor in whether a coating concrete floor job lasts five years or fails in five months. Epoxy will not bond to a dusty, contaminated, or smooth-as-glass slab. The concrete must be mechanically abraded, usually by diamond grinding or shot blasting, to open up the surface profile so the epoxy can grip at a microscopic level. Any oil, moisture, or laitance left on the slab will cause the coating to peel or bubble.

This is where a lot of DIY jobs go wrong. Acid etching with a diluted hydrochloric solution is sometimes suggested for home use, and it does remove some surface contamination, but it does not create a consistent surface profile the way mechanical grinding does. For a garage floor that will see regular vehicle traffic, grinding is the professional standard. It removes old paint, levels minor high spots, and opens up capillary pores in the concrete so the primer coat soaks in properly.

After grinding, any cracks, spalls, or low spots get filled with a polyurea or epoxy filler before the coating goes down. Skip this step and you will see those defects telegraph straight through the finished coat. Moisture testing also matters here. Concrete that is releasing moisture above about 75 percent relative humidity (measured with an in-slab probe over 72 hours) can cause osmotic blistering under an epoxy film. A professional applicator will test for this before mixing a single pot of product.

How does epoxy coating compare to polyurethane for a garage floor?

Epoxy is the better base coat for a garage floor because it is thicker, harder, and chemically bonds to concrete. Polyurethane is more flexible and UV-stable, so it is often applied as a clear topcoat over epoxy to protect the colour and add a final layer of abrasion resistance. Used alone on bare concrete, polyurethane adhesion is less reliable and the film build is thinner, which means it will show wear faster under vehicle traffic.

In practical terms, a properly installed epoxy system in a Melbourne garage typically consists of a penetrating epoxy primer, one or two build coats of pigmented epoxy (sometimes with decorative flake broadcast into the wet coat), and a clear polyurethane or polyaspartic topcoat. The total dry film thickness of a quality system sits around 1.5 to 3 millimetres. That stack of layers is why professional epoxy floors look and feel so different from a rattle-can sealer you roll on over a weekend.

Polyaspartic coatings deserve a mention here because they have become popular in recent years. They are a type of polyurea that cures very quickly (sometimes within an hour), which lets installers complete a floor in a single day rather than two or three. The trade-off is a much tighter application window and higher material costs. For most residential garages, a standard epoxy system is still the most cost-effective path to a durable, great-looking result.

What should you look for in a concrete floor coating installer in Melbourne?

Any installer worth hiring will talk about surface preparation before they talk about colour or finish. If someone quotes you a job without mentioning grinding, moisture testing, or primer adhesion, that is a red flag. Concrete slabs across Melbourne vary a lot. Older slabs in bayside suburbs often carry decades of oil contamination; newer slabs in growth corridors can have curing compounds on the surface that prevent adhesion if not removed first. A good installer will inspect the slab, not just measure the area.

Ask what products they are using and whether they are working with commercial-grade two-part systems or consumer single-pack products. The difference in solids content is significant. A professional two-part epoxy might contain 80 to 100 percent solids, meaning almost all of what you apply stays on the floor as a solid film. Single-pack consumer products can be as low as 40 percent solids, so a lot of what you apply simply evaporates, leaving a much thinner, weaker film.

Warranty matters too. A professional system installed over properly prepared concrete should carry at least a two-year workmanship warranty. If an installer cannot stand behind their work for that long, the preparation process is probably being cut short somewhere.

The finish you choose, whether solid colour, decorative flake, or a metallic swirl, has no bearing on durability if the groundwork is not done right. Get the prep right, use the correct product for your slab type and usage, and a coated garage floor will look sharp and perform reliably for a decade or more.

Book concrete floor sealing and preparation with Metal and Flake

Commercial Floor Coating in Sunbury: Epoxy Options for Local Businesses

Commercial Floor Coating in Sunbury: Epoxy Options for Local Businesses

Commercial floor coating in Sunbury means applying a protective resin system, most commonly epoxy, to a concrete floor inside a business premises. The right coating hardens the surface, resists chemical spills and heavy foot or vehicle traffic, and gives the space a clean, professional look that lasts well over a decade with basic maintenance.

Why do Sunbury businesses need a dedicated commercial floor coating?

Commercial floor coating in Sunbury protects concrete from the daily punishment that warehouses, workshops, retail spaces and food businesses dish out. Bare concrete dusts, stains and cracks under load. A properly applied epoxy or polyurethane coating seals those pores, stops contaminants soaking in and makes the floor far easier to clean, which matters for both safety compliance and presentation.

Sunbury has grown quickly over the past decade. Light industrial estates along Quarry Road, trade businesses near the Calder Freeway corridor and the steady stream of new retail and hospitality fit-outs in the town centre all share one problem: standard concrete floors were never built to handle the volume and variety of use that a busy commercial operation throws at them.

A raw slab absorbs oil, harbours bacteria and turns into a slipping hazard the moment it gets wet. Once you coat it correctly, you have a surface that can take forklift tyres, food-grade hose-downs and heavy foot traffic in a single room. That versatility is why epoxy floor coatings have become the go-to solution for Melbourne’s north-western growth corridor, Sunbury included.

What epoxy floor coating options work best for commercial spaces?

The best epoxy options for commercial spaces depend on what the business actually does. Solid-colour epoxy suits workshops and warehouses needing pure durability. Metallic or decorative flake systems suit retail, hospitality and showroom floors where appearance counts. Polyurethane topcoats add UV stability and scratch resistance on top of an epoxy base. Each system can be tailored in thickness, texture and slip rating to match the specific site.

Here is a straightforward breakdown of the most common systems used on commercial floors:

  • Solid epoxy (two-part system). Typically applied at 2 to 3 mm thickness, this is the workhorse for warehouses, automotive workshops and food manufacturing facilities. It bonds chemically to the slab, bridges minor cracks and provides a surface rated to withstand continuous forklift traffic.
  • Epoxy flake or broadcast system. Vinyl flakes are broadcast onto a wet epoxy base, sealed with a clear polyurethane or polyaspartic topcoat. The texture hides minor imperfections, adds grip underfoot and gives showrooms and retail spaces a premium finish without looking industrial.
  • Metallic epoxy. Pigment powders are mixed into a clear epoxy base and manipulated to create flowing, three-dimensional patterns. Popular in hospitality venues, gyms and high-end retail. The finish is genuinely striking and no two floors look the same.
  • Polyurethane and polyaspartic topcoats. These are rarely used alone on commercial floors. Instead, they cap an epoxy base to add UV resistance (epoxy alone yellows under sunlight), chemical resistance and a faster return-to-service time. Polyaspartic in particular can cure fast enough to reopen a floor within a day.

For most light-industrial or trade businesses in Sunbury, a solid epoxy base with a polyurethane or polyaspartic topcoat hits the sweet spot between cost, durability and turnaround time. Retail and hospitality operators tend to push toward flake or metallic systems where the look of the floor becomes part of the brand.

How does the commercial floor coating process actually work?

The commercial floor coating process starts with surface preparation, which takes up more time than the coating itself. The concrete is ground or shot-blasted to open the pores and remove any existing sealers, paint or contamination. After prep, the epoxy primer goes down, followed by the body coat, any decorative broadcast, and finally a clear protective topcoat. Most commercial jobs are complete and walkable within two to three days.

Surface preparation is the step that separates a coating that lasts from one that peels within a year. Professionals use diamond-grinding equipment or shot-blasting machines to achieve a concrete surface profile (CSP) of around 3, which is the texture recommended by the SSPC (Society for Protective Coatings) for most heavy-duty epoxy systems. Without that profile, the coating simply cannot grip the slab properly no matter how good the product is.

Once the slab is prepped, any cracks or expansion joints are filled and repaired before anything goes down. Then the epoxy primer seals the surface and gives the body coat something solid to bond to. On a broadcast flake system, the vinyl chips are tossed across the wet epoxy until the surface is fully covered, excess is swept back, and the whole thing is locked in with one or two clear topcoats.

Temperature and humidity matter throughout. Most epoxy systems require an ambient temperature above 10 degrees Celsius and relative humidity below 85 percent to cure correctly. Winter jobs in Sunbury can be tight on those conditions, so timing and site setup are part of the planning process.

How long does a commercial epoxy floor coating last?

A professionally installed commercial epoxy floor coating typically lasts between 10 and 20 years in a business environment, depending on traffic intensity and how well it is maintained. Lighter-traffic retail or office floors sit at the upper end of that range. High-traffic workshops or warehouses with heavy machinery may need a maintenance topcoat applied at the 8 to 10 year mark to restore the surface without stripping back to the concrete.

The maintenance required is genuinely low. Sweep regularly to keep abrasive grit off the surface (that is the main thing that dulls a coating over time), mop with a pH-neutral cleaner, and avoid dragging sharp steel edges across the floor. Those three habits make a serious difference to how long the coating holds its gloss and its protection.

It is worth noting that not all epoxy products are equal. Industrial-grade, two-part epoxy systems bought through a commercial coating professional are a completely different product from the single-component “epoxy paint” sold at hardware stores. The latter is easy to apply yourself but typically fails within two to three years under any real commercial load. The performance gap is substantial enough that it changes the economics of the whole project.

What should a Sunbury business consider before getting a floor coating quote?

Before getting a floor coating quote, Sunbury businesses should document the floor area in square metres, identify any existing coatings or contamination on the slab, note the business’s operating hours to plan around downtime, and think about what the floor actually needs to resist, whether that is vehicle traffic, chemical spills, food and moisture or just heavy foot traffic. That information lets a contractor quote accurately from the start.

A few practical points worth sorting out before anyone shows up on site:

  • Moisture in the slab. If the building is older or was built without a proper moisture barrier, the slab may push moisture vapour upward. Epoxy coatings are not breathable and moisture vapour pressure can cause blistering and delamination. A good contractor will test for this before quoting, usually with a calcium chloride test or a relative humidity probe.
  • Downtime tolerance. Most coating systems need at least 24 hours of no foot traffic after the final coat and 72 hours before heavy vehicle traffic. If the business cannot close for two days, a polyaspartic system with its faster cure time might be a better fit.
  • Slip resistance rating. Workplaces in Victoria are governed by the Occupational Health and Safety Act, which requires employers to provide a safe working environment. For wet areas, a Pendulum Test Value (PTV) of 36 or above is typically needed. This can be built into the coating system through the choice of topcoat or by adding an anti-slip aggregate during application.

Getting two or three quotes from local contractors who actually come out and look at the slab will always produce better results than going on price alone from a phone call. The condition of the concrete, the level of prep required and the specific system recommended should all be reflected in the quote.

Sunbury businesses looking for a reliable, experienced team that services the north-western Melbourne corridor are in good hands with Metal and Flake. The team handles commercial and industrial floors across the region, using quality two-part epoxy systems and proper surface preparation every time.

Book a commercial floor coating service in Sunbury with Metal and Flake.

7 Garage Floor Ideas That Add Value to Your Melbourne Home

7 Garage Floor Ideas That Add Value to Your Melbourne Home

The right garage floor ideas can lift your home’s value, make your space cleaner and safer, and turn a grim slab into something you’re actually proud of. For Melbourne homeowners, the best options balance durability against our variable climate, cost of installation, and the look you want to live with for the next decade or more.

Why does your garage floor matter for home value?

A finished garage floor signals to buyers that the whole property has been properly looked after. Real estate agents consistently report that a clean, coated garage adds perceived value well beyond the cost of the floor itself, because it removes a visible maintenance concern from the buyer’s checklist and makes the space feel usable rather than purely functional.

Melbourne’s property market is competitive, and buyers are increasingly treating the garage as an extension of the home rather than just a place to park. A bare concrete slab that’s stained, pitted and dusty is one of the first things a buyer notices on inspection day. A smooth, sealed surface reads as a well-maintained home.

Beyond resale, a finished floor is simply more liveable. Concrete dust stays out of the house. Spills wipe up instead of soaking in. And in Melbourne’s unpredictable weather, a sealed slab is far less prone to moisture damage and surface deterioration over time.

What garage floor ideas work best for durability in Melbourne?

Epoxy floor coatings are the standout choice for durability in Melbourne garages. A properly applied two-part epoxy bonds directly to the concrete slab and creates a surface that resists hot tyre marks, chemical spills, oil, and heavy foot traffic. Quality epoxy systems applied at the correct thickness can last 10 to 20 years in a residential garage with basic cleaning maintenance.

Melbourne’s climate throws a few extra challenges at garage floors. Humidity, temperature swings from summer highs to winter lows, and the odd flooding risk in low-lying suburbs all mean the floor coating needs to be flexible enough not to crack and sealed well enough to resist moisture migration from below the slab. That’s exactly why a full epoxy system (primer, base coat, broadcast flake or metallic mid-coat, and a polyurethane or polyaspartic topcoat) outperforms cheaper single-coat paint products by a wide margin.

Here’s a quick rundown of the seven ideas, from most to least popular among Melbourne homeowners right now:

  1. Epoxy with broadcast flake: The most popular choice. Coloured vinyl flakes are broadcast into the wet epoxy and then sealed under a clear topcoat. The result hides dirt, provides grip, and looks sharp. The flake pattern also disguises any minor surface imperfections in the slab.
  2. Metallic epoxy: A pigmented mid-coat that creates a swirling, three-dimensional look. Often used in showrooms and high-end residential garages where appearance is the priority. Unique to each pour, so no two floors look exactly alike.
  3. Solid-colour epoxy: A clean, single-colour finish. Cheaper and faster to install than flake or metallic systems. Works well if you want a minimalist aesthetic or plan to add floor markings for workshop zones.
  4. Polyaspartic coating: A fast-curing alternative to epoxy. Can be installed in a single day and walked on within hours. Slightly more UV stable than standard epoxy, which matters if your garage door faces north and gets direct afternoon sun.
  5. Concrete grinding and sealing: No colour added, just a grind to open the surface pores and a clear penetrating sealer. Lowest cost, good for those who want natural concrete aesthetics with better stain resistance.
  6. Interlocking floor tiles: Raised PVC or polypropylene tiles that snap together over the existing slab. No prep required beyond sweeping. Easy to remove and replace individual tiles if one section gets damaged. Popular for workshop setups where you might want drainage channels.
  7. Rubber mat or coin-top roll: The budget option. Rubber rolls or mats are laid directly on the slab. They offer cushioning underfoot and protect the concrete, but they can trap moisture underneath if the slab isn’t sealed first.

How much do garage floor ideas like epoxy coating cost in Melbourne?

For a standard single-car garage in Melbourne (roughly 18 to 20 square metres), a professional epoxy flake system typically costs between $1,500 and $2,500 installed, depending on slab condition, the number of coats, and the topcoat product used. A double garage runs $2,500 to $4,500 for a quality system. These figures are based on typical residential jobs in metropolitan Melbourne and will vary with access, slab prep required, and finish chosen.

The biggest variable in any quote is concrete preparation. If your slab has cracks, spalling, oil contamination or a previous paint coating that needs to be removed, expect additional time and cost for grinding and patching before the epoxy goes down. Skipping proper prep is the single most common reason DIY epoxy jobs peel and fail within two years.

Interlocking tiles sit at the lower end of the cost spectrum: around $20 to $40 per square metre for mid-grade products, so a single-car garage can be done for $400 to $800 in materials. The trade-off is that tiles don’t add the same perceived value as a seamless coated floor, and they can lift or shift under heavy vehicle tyres over time.

Which garage floor ideas are best for a DIY approach?

Interlocking PVC tiles are genuinely DIY-friendly: no mixing, no grinding, no drying times. Rubber rolls are similar. If you want the look of epoxy without hiring a professional, water-based single-component epoxy paints are available at hardware stores, but be realistic about their lifespan. Without diamond grinding to open the concrete surface first, adhesion is poor, and most DIY epoxy paint jobs start peeling within 12 to 18 months under vehicle traffic.

A two-part professional epoxy system is technically possible as a DIY project, but the mixing ratios are critical, working times are short, and the diamond grinder hire and disposal of waste materials add complexity quickly. Most Melbourne homeowners who price it properly find the gap between DIY and professional installation is smaller than they expected, especially when factoring in their own time and the cost of a failed job that needs to be stripped and redone.

What finish colour and style suits a Melbourne garage?

Neutral tones, grey blends and charcoal flake combinations are consistently the most popular choices for Melbourne garages. They hide tyre marks, oil drips and dust between cleans, and they complement the dark and grey-toned architectural finishes common in Melbourne new builds and renovations. Light grey and salt-and-pepper flake blends are particularly popular in bayside and inner-eastern suburbs.

Metallic epoxy in copper, pewter or ocean tones suits garages that double as home gyms or workshop showrooms. If you’re going for resale value specifically, keep it neutral. A very bold or unusual colour can read as a personalisation that buyers discount rather than appreciate.

Consider the direction your garage faces. A north or west-facing garage that gets a lot of direct sun benefits from a UV-stable polyaspartic topcoat rather than standard epoxy, which can amber slightly over years of UV exposure.

How do you maintain a coated garage floor long-term?

A sealed epoxy or polyaspartic floor is genuinely low maintenance. A weekly sweep and a monthly mop with a mild detergent is all most residential garages need. Avoid harsh acids or citrus-based cleaners, which can dull the topcoat over time. If you’re parking a vehicle that drips oil, wipe it up promptly rather than letting it sit, even though a quality topcoat will resist it for a while.

A polyurethane or polyaspartic topcoat will eventually show wear in high-traffic zones, typically after eight to twelve years in a residential setting. At that point, a light scuff and recoat of the topcoat only (without redoing the base system) is usually all that’s needed to bring the floor back to new condition. This is significantly cheaper than a full reinstall.

Get a garage floor coating quote from Metal and Flake