Polyaspartic Garage Floor Coating: Is It Better Than Epoxy?

Polyaspartic Garage Floor Coating: Is It Better Than Epoxy?

A polyaspartic garage floor coating cures faster than epoxy, resists UV yellowing, and handles Australia’s temperature swings without going brittle. Epoxy costs less upfront and delivers a thick, hard-wearing base coat. For most garages, the best result combines both: epoxy as the foundation, polyaspartic as the tough topcoat that ties it all together.

What exactly is a polyaspartic garage floor coating?

Polyaspartic is a type of polyurea coating. It uses an aliphatic chemistry that makes it flexible, UV-stable and extremely fast-curing. A single coat can go from wet to foot-traffic-ready in as little as one to two hours, compared to the 24-plus hours a standard water-based epoxy needs before you can walk on it. That speed is the headline feature, but it comes with other genuine advantages that are worth understanding before you commit.

The coating bonds to prepared concrete through a chemical reaction that creates a dense, slightly flexible film. That flexibility matters in a Melbourne garage where concrete can expand and contract with the seasons. A rigid coating that can’t move with the slab can crack or peel at the edges over time.

Polyaspartic was originally developed for industrial applications like bridge coatings and mining equipment. It filtered down to residential garage floors over the last decade or so, and it’s now a common topcoat choice for professional installers who want durability without long cure times holding up a job.

How does polyaspartic compare to epoxy on durability and cure time?

Polyaspartic outperforms standard epoxy on cure speed and UV resistance; epoxy generally wins on raw thickness and upfront cost. Polyaspartic is typically applied at 2 to 4 mils dry film thickness per coat, curing fully in two to four hours. Solvent-based epoxy builds thicker at 6 to 10 mils but needs a full 24 hours between coats and up to 72 hours before driving on it.

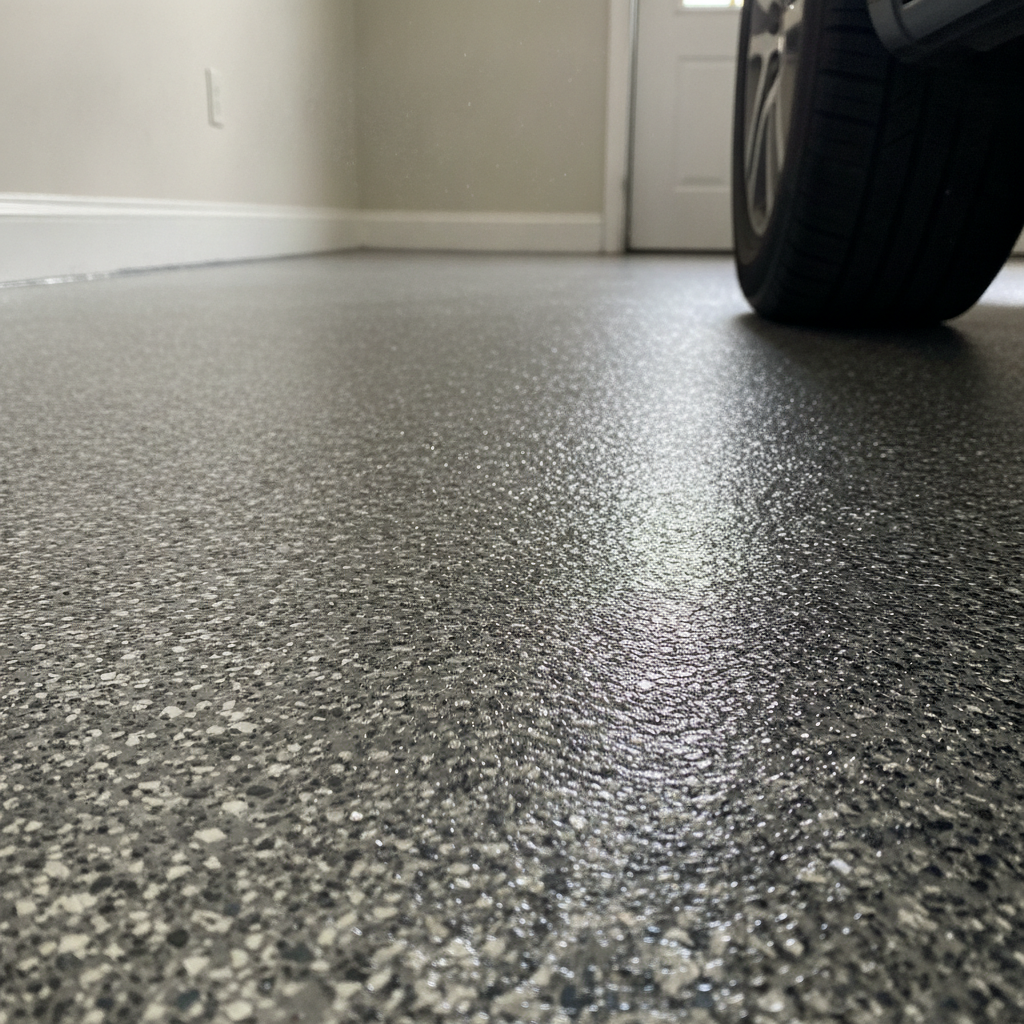
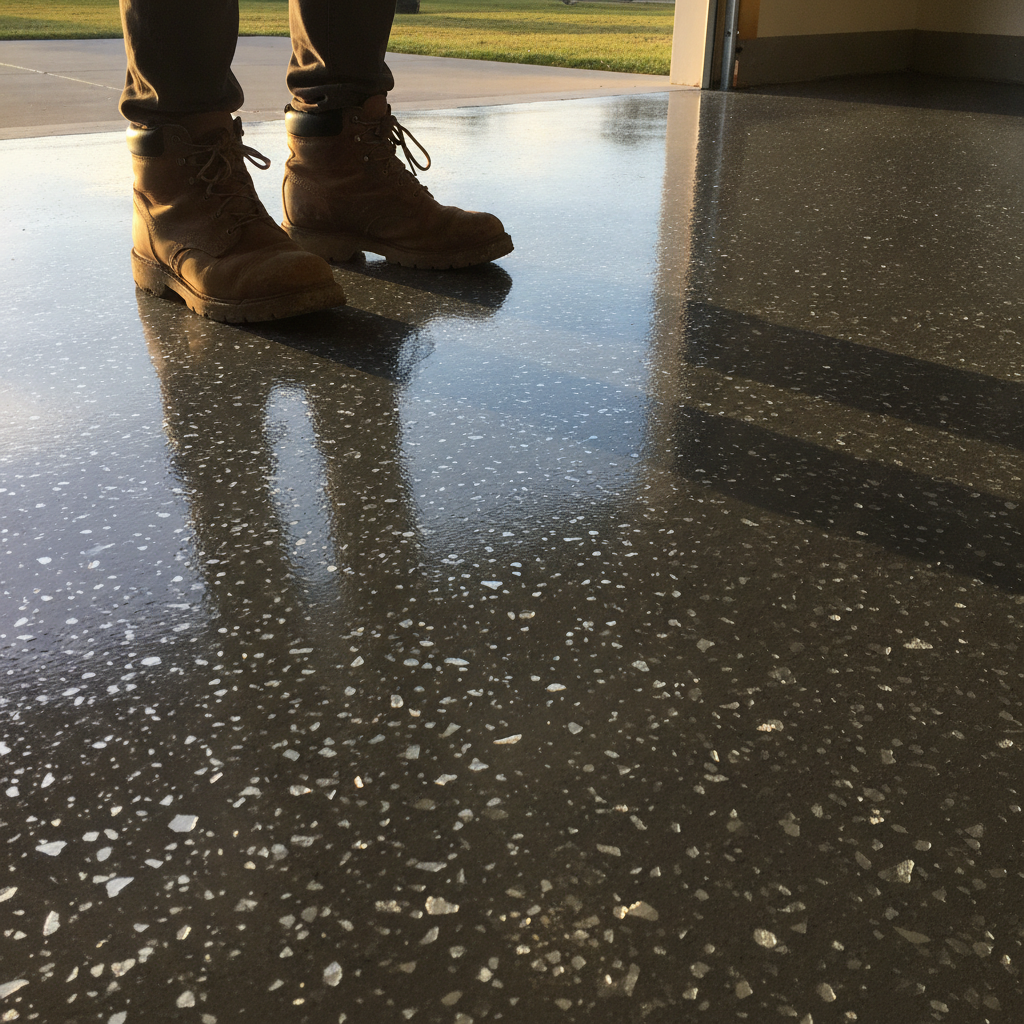
Here’s where it gets practical. Epoxy is a workhorse base coat. It fills minor surface imperfections, builds a solid foundation, and holds the decorative flakes or metallic pigments that give your floor its look. Polyaspartic, applied over the top, seals everything in and adds the UV-stable, scratch-resistant surface that people actually see and scuff every day.

The two materials genuinely complement each other. Running epoxy alone as your final surface means risking yellowing in a garage that gets direct sunlight through the door. A clear epoxy topcoat will go amber within a year or two in those conditions. Polyaspartic won’t. That’s not a small thing when you’ve spent money on a decorative flake floor and don’t want it looking tired by the second summer.

On hardness, a fully cured solvent-based epoxy sits around 80 to 85 Shore D. A quality polyaspartic sits in the same range, so there’s no meaningful gap in scratch or impact resistance. What changes is how quickly you get there. A polyaspartic-only system can have a car parked on it the same day. An epoxy-only system needs the weekend.

What are the real drawbacks of polyaspartic garage floor coatings?

Polyaspartic’s fast cure time, which is its biggest advantage, is also its trickiest limitation. Because it sets so quickly, application has to be fast, consistent and deliberate. An inexperienced applicator can end up with lap marks, fish eyes or uneven sheen if they lose pace on a large floor. This is why most professional installers with proper training treat polyaspartic as a topcoat material rather than a DIY product.

Cost is the other honest drawback. Polyaspartic raw materials cost more than standard epoxy, so a polyaspartic-only system carries a higher price tag. A hybrid system using epoxy as the base and polyaspartic as the topcoat is often the better value proposition because you get the build and affordability of epoxy with the UV and wear performance of polyaspartic on the surface that matters.

Temperature sensitivity during application is also worth flagging for Melbourne conditions. Polyaspartic cures faster in heat, which can be a problem on a 38-degree day in Dandenong if you’re working on a large floor. On cold winter mornings, it behaves more predictably and gives you a bit more working time. A professional applicator plans their schedule and product ratios around the ambient temperature on the day.

Is a polyaspartic garage floor coating worth it for a residential garage in Melbourne?

Yes, for most Melbourne homeowners who want a long-lasting, good-looking garage floor, a system that includes a polyaspartic topcoat is worth the investment. It handles UV from the afternoon sun, resists hot tyre pickup, cleans up easily and keeps its colour and gloss for years longer than an epoxy-only surface would in the same conditions.

Hot tyre pickup is a specific issue worth naming. When you park a hot car on an uncured or low-quality floor coating, the rubber can bond to the surface and pull it up when the car moves. A properly cured polyaspartic topcoat has the thermal resistance to handle this where a budget epoxy often won’t.

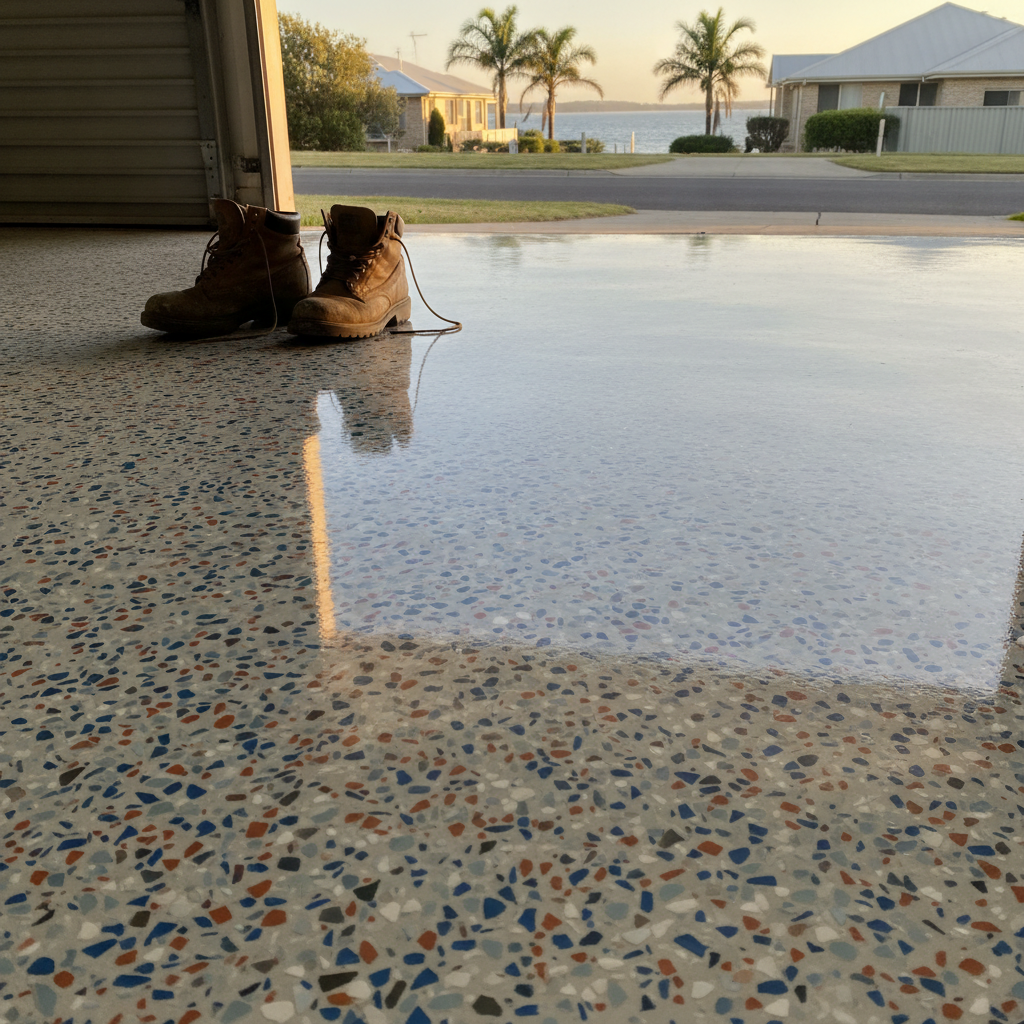
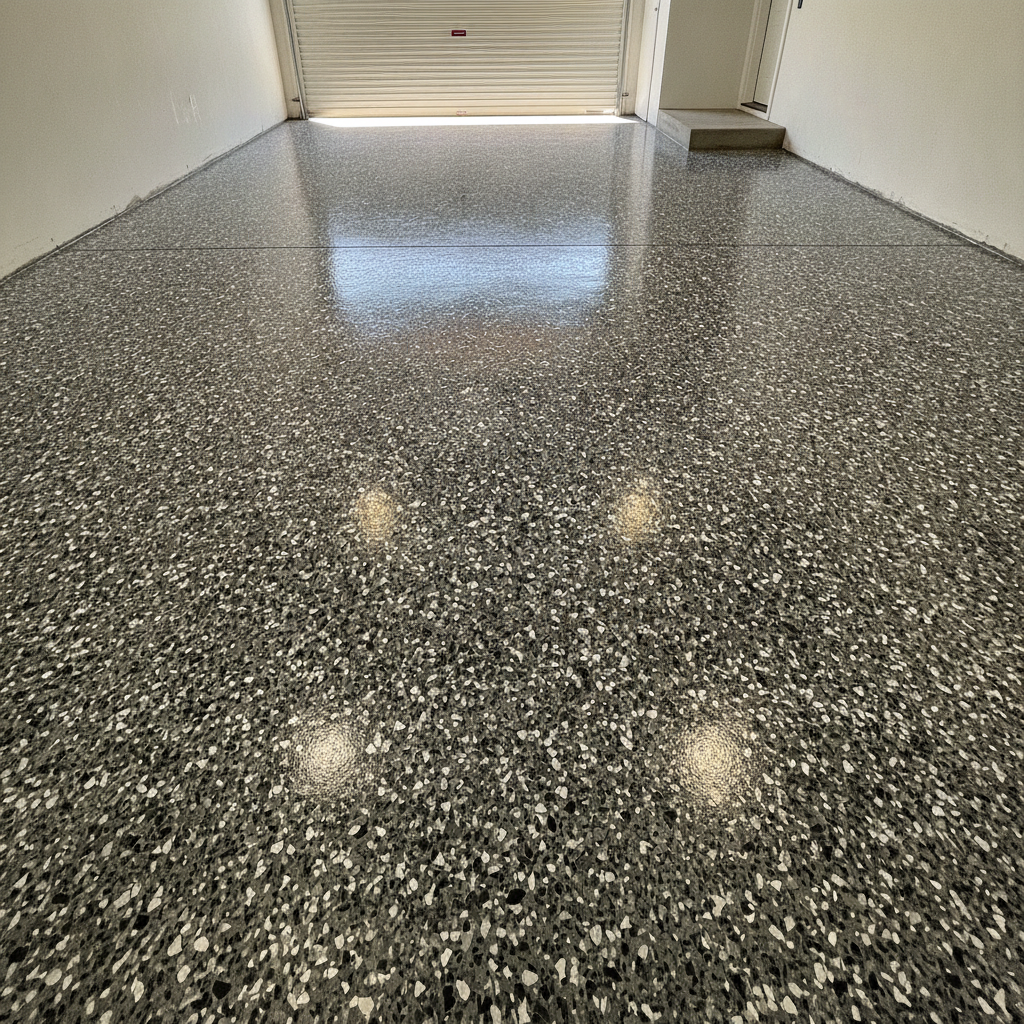
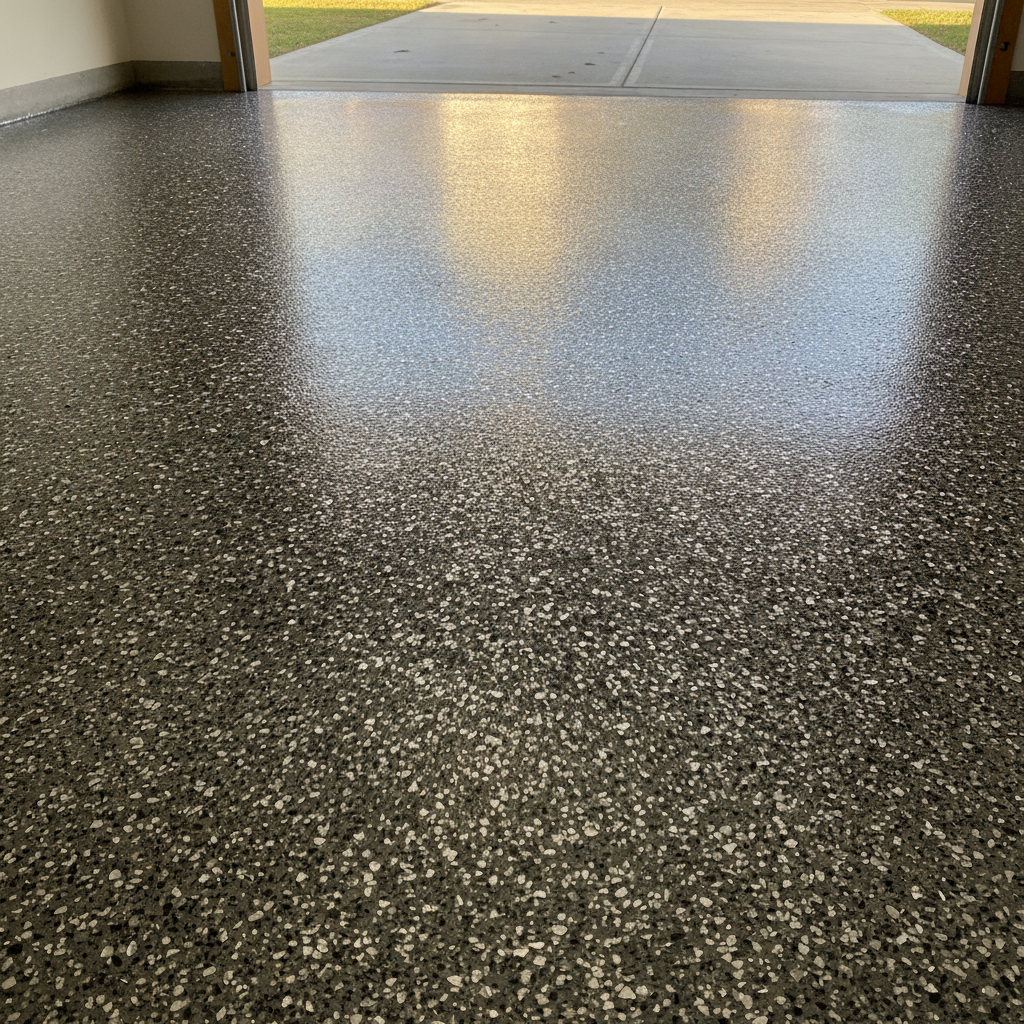
For a standard double garage of around 36 to 40 square metres, a professionally installed epoxy base with broadcast decorative flake and a clear polyaspartic topcoat gives you a floor that genuinely looks sharp and holds up to daily use. The colour flakes sit under the polyaspartic seal, protected from scuffing and staining, and the surface wipes clean with a mop. That’s a practical, sensible outcome for a working garage.

The question of whether polyaspartic alone beats epoxy alone misses the point a bit. The best garage floor systems use each product for what it does well. Epoxy builds, bonds and holds decoration. Polyaspartic protects and finishes. Together, they produce results that neither can match on its own.

Ask Metal and Flake about polyaspartic and epoxy garage floor options.
Metallic Epoxy Garage Floors: What Melbourne Homeowners Should Know

Garage Floor Metallic Epoxy: What Melbourne Homeowners Should Know

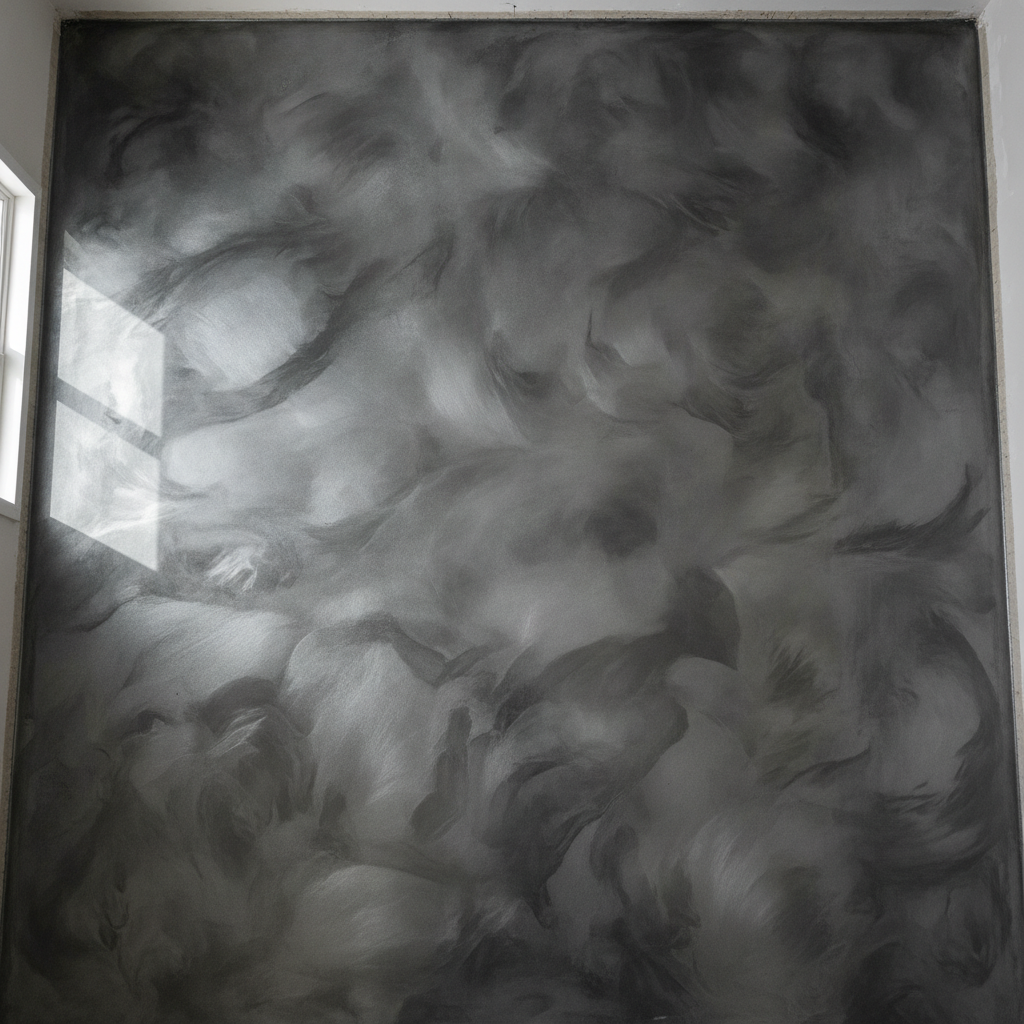
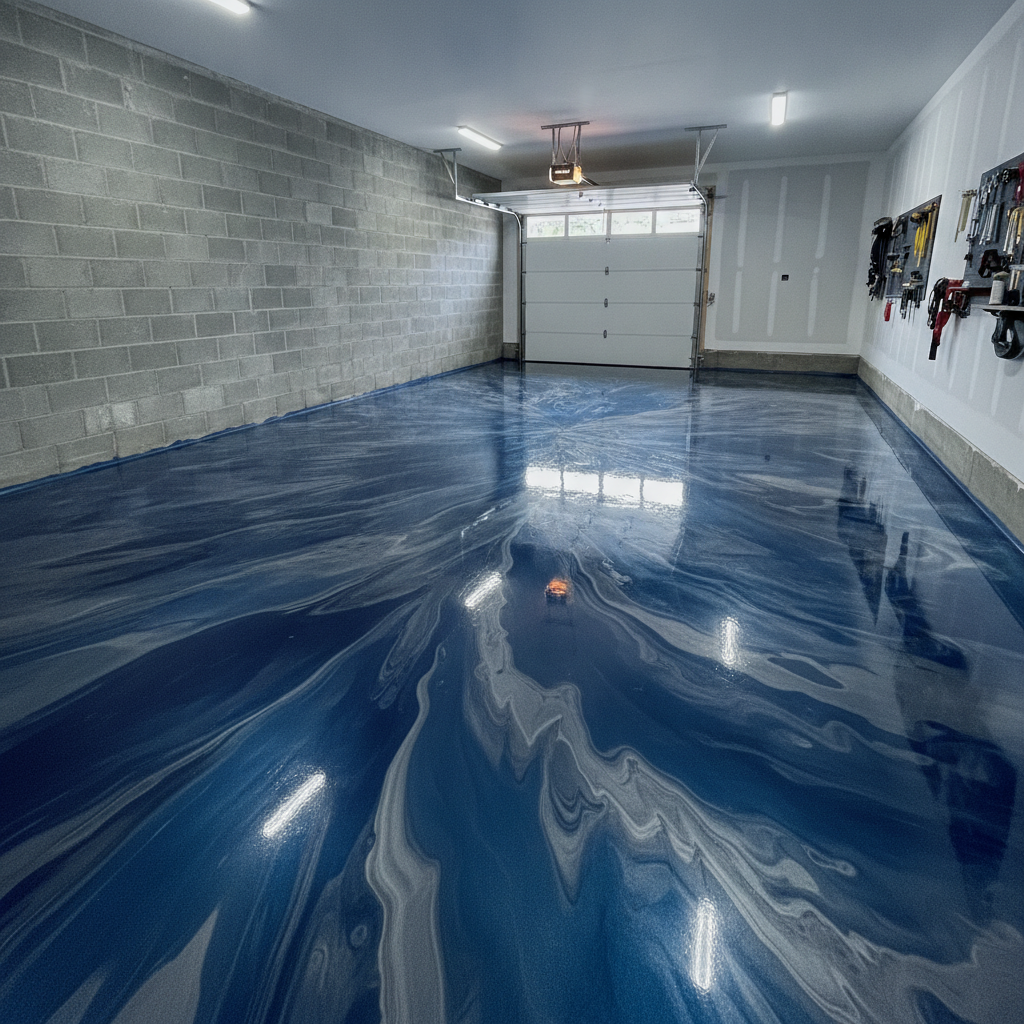
Garage floor metallic epoxy is a two-part resin coating mixed with fine metallic pigments that flow and swirl as the product levels out, creating a three-dimensional, marble-like finish. It is harder than standard paint, resistant to oil and tyre marks, and lasts well over a decade with basic care. For Melbourne homeowners, it turns a plain concrete slab into a feature that genuinely adds kerb appeal and resale value.

What exactly makes metallic epoxy different from regular garage paint?

Regular garage floor paint is a thin, single-component coating that sits on the surface and wears through within a couple of years under tyre traffic. Garage floor metallic epoxy is a thick, two-part system combining a resin with a hardener, then loaded with aluminium or mica-based pigment. The combined film builds to around two to three millimetres, bonds chemically into the concrete, and reaches a hardness that standard paint simply cannot match.

The metallic pigments are the visual difference. As the mixed product spreads across the slab, the particles drift and settle in unpredictable patterns. No two floors look identical. You can push the pigments with a leaf blower or a roller to create swirls, cells or wave effects before the coat cures. The result looks closer to polished stone than anything you would associate with a garage floor.

From a practical standpoint, the cured surface is also non-porous. Oil drips, brake fluid and dirty water sit on top rather than soaking in, so cleanup is a hose and a mop rather than a scrubbing session.

How should concrete be prepared before a garage floor metallic epoxy coating?

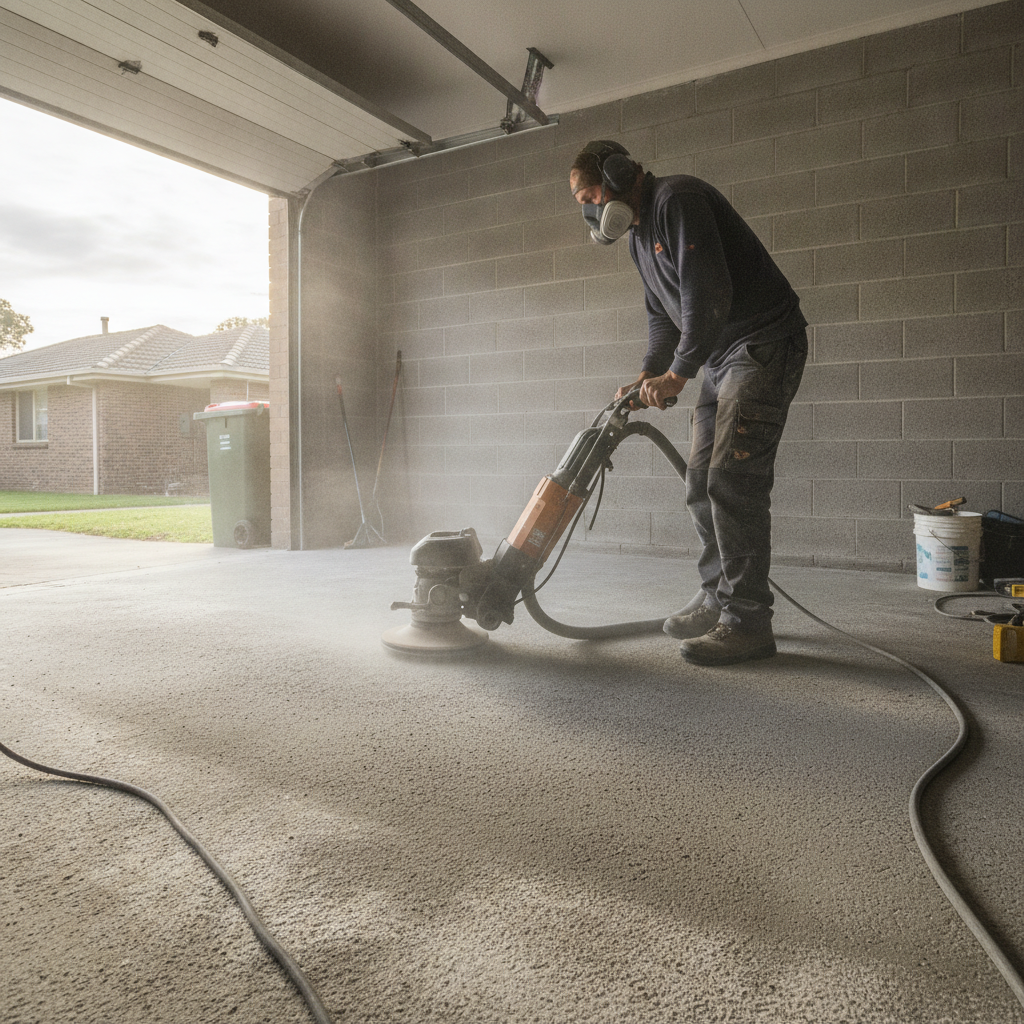
Concrete preparation is the single most important step in any epoxy floor project. For a metallic epoxy garage floor, the slab must be mechanically ground or diamond-ground to open the surface profile, remove any existing sealers and expose clean aggregate. Skipping this step is the main reason DIY epoxy jobs peel within months.

A professional installer will also test for moisture. Melbourne’s clay-heavy soils can push moisture vapour up through a slab, especially in older homes built before vapour barriers were standard practice. If moisture is present above about 4 kg per square metre per 24 hours (measured by the Calcium Chloride test method), a moisture-tolerant primer is applied first. Without it, moisture will eventually lift the coating from underneath no matter how well everything else was done.

Cracks and spalling are filled and allowed to cure before any product goes down. Low spots are built up with a repair mortar. The goal is a flat, clean, open surface that gives the epoxy somewhere to grip. Rushing this stage to save a day will cost you the whole job inside a couple of years.

How long does a garage floor metallic epoxy system take to install and cure?

A typical single-car to double-car garage takes two to three days on site, spread across multiple sessions. Day one covers grinding, crack repair and priming. Day two applies the metallic epoxy base coat and allows the installer to work the pigment effects. Day three adds the clear polyurethane or polyaspartic topcoat that protects the metallic layer and provides the final sheen level, from satin through to a high-gloss mirror finish.

Light foot traffic is usually safe after 24 hours. Parking a car back in takes longer. Most installers recommend waiting a full seven days before driving on the surface, because that is roughly when the coating reaches its full cure hardness. Rushing the car back in on day two is another common way homeowners end up with tyre marks permanently bonded into their shiny new floor.

Temperature matters here too. Melbourne summers can push shed and garage temperatures well above 30 degrees, which shortens working time considerably. Cooler autumn and spring days tend to give installers the best conditions for working the metallic pigments into the detailed patterns clients are after.

How much does garage floor metallic epoxy cost in Melbourne?

Pricing depends on floor size, condition and the complexity of the finish you choose. As a rough guide, a full metallic epoxy system including preparation, a pigmented base, metallic effects layer and clear topcoat typically ranges from around $80 to $140 per square metre for residential garages in Melbourne. A standard double garage of around 36 square metres would therefore sit somewhere between $2,900 and $5,000 fully installed.

That range shifts upward if significant crack repair or moisture remediation is needed, or if you want a more elaborate multi-colour metallic effect that requires extra product and technique time. It shifts downward slightly for larger floor areas where the per-square-metre rate improves.

Quotes that come in noticeably below that range are often leaving something out. The most common shortcuts are skipping proper diamond grinding in favour of acid etching (which gives nowhere near the same adhesion on a dense Melbourne slab), using a thinner or lower-solids product, or applying only one protective topcoat instead of two. It is worth asking specifically what preparation method is included before accepting any price.

How durable is metallic epoxy on a garage floor under everyday use?

A properly installed metallic epoxy garage floor holds up well to daily use for ten to fifteen years before it needs attention, and in some cases longer. The clear polyurethane or polyaspartic topcoat takes the direct abuse from tyres, boots and dropped tools, protecting the decorative metallic layer beneath it.

Polyaspartic topcoats are harder and more UV-stable than standard polyurethane, which matters for garages with skylights or open roller doors that let in direct sunlight. Standard epoxy yellows under UV exposure over time. A polyaspartic layer on top prevents that from happening to the clear coat, keeping the metallic colours looking clean for longer.

For maintenance, a dust mop or soft broom weekly and a neutral pH cleaner for spills is all the floor needs. Avoid dragging sharp metal edges across it and skip the steam mop, which can soften the surface over time with repeated use. Treated properly, the floor should still look sharp years down the track with no recoating needed.

Is garage floor metallic epoxy a good investment for Melbourne homes?

For most Melbourne homeowners, the answer is yes. The finished floor does real work: it resists staining, cleans up fast and makes the space genuinely more usable. Beyond function, a well-executed metallic floor photographs well, which matters if the home goes to market. Real estate agents often call out premium garage fitouts because buyers increasingly treat the garage as an extension of the living space rather than somewhere to hide boxes.

The investment also compares well against alternatives. Polished concrete is beautiful but requires an already-sound slab and typically costs more. Standard grey epoxy is cheaper but offers nothing visually. Paving or tiles are an option but carry grout lines that collect oil and dirt. Metallic epoxy sits in a practical middle ground: premium look, solid durability, and a price that works for a standard suburban garage.

Get a metallic epoxy garage floor quote from Metal and Flake

Finding Epoxy Floor Installers Near You in Melbourne’s North and West

Finding Epoxy Floor Installers Near You in Melbourne’s North and West

When you search for epoxy floors near me in Melbourne’s north and west, you want someone who knows the local conditions, can visit the site quickly and will give you a straight quote. A good local installer cuts travel time, understands the region’s concrete slabs and gets the job done without the runaround you might get from a CBD-based company.

What should you look for in an epoxy floor installer near you?

A trustworthy local epoxy floor installer should offer a site visit before quoting, be upfront about the prep work required and carry proper public liability insurance. Check that they have a portfolio of real local jobs, not just stock photos, and that they can clearly explain how many coats they apply and what topcoat they use to protect the finish long term.

There is a lot riding on preparation. Concrete grinding is the single most important step in any epoxy floor installation. Without it, even the most expensive coating will peel within months. A quality installer uses a diamond-cup grinder or shot blaster to open up the concrete surface so the epoxy can bond at a mechanical level. If a tradie turns up with just a bucket of product and a roller, walk away.

Ask about moisture testing too. Melbourne’s north and west sits on a mix of older clay-heavy soils and post-war concrete slabs that can trap ground moisture. Moisture rising through a slab will push an epoxy coating off from underneath. A reputable installer will test moisture vapour emission before they start, not after a failure occurs.

Why does location matter when choosing epoxy floors near me?

Choosing an installer local to Melbourne’s north and west matters because they can respond faster, price more accurately and bring their equipment without charging you a call-out fee that makes the quote look cheap then blows out the invoice. A local crew also knows which suburbs are on heavy clay, which estates have relatively new slabs and which older warehouses carry legacy contamination that needs extra prep.

Suburbs like Craigieburn, Sunbury, Werribee, Hoppers Crossing, Keilor and Broadmeadows all have residential garages, home workshops, commercial units and industrial sheds that suit epoxy flooring. Knowing the area means an installer can factor in access (tight driveways, roller-door clearances, uneven aprons) without being surprised on the day.

Local knowledge also applies to weather. Epoxy products have temperature and humidity windows. Application in full Melbourne summer sun on a north-facing garage slab can cause the product to flash off too fast, trapping bubbles. An experienced local crew knows how to time a pour, use fans or choose a product with a longer working time for warmer conditions.

What types of epoxy floor systems are available for homes and businesses?

Epoxy floor systems range from single-coat garage paints through to multi-layer broadcast systems with metallic pigments or vinyl flake, and high-build industrial coatings. The right system depends on traffic, the purpose of the space and the look you are after. For residential garages, a flake broadcast system is one of the most popular choices because it hides tyre marks and minor surface imperfections while still looking sharp.

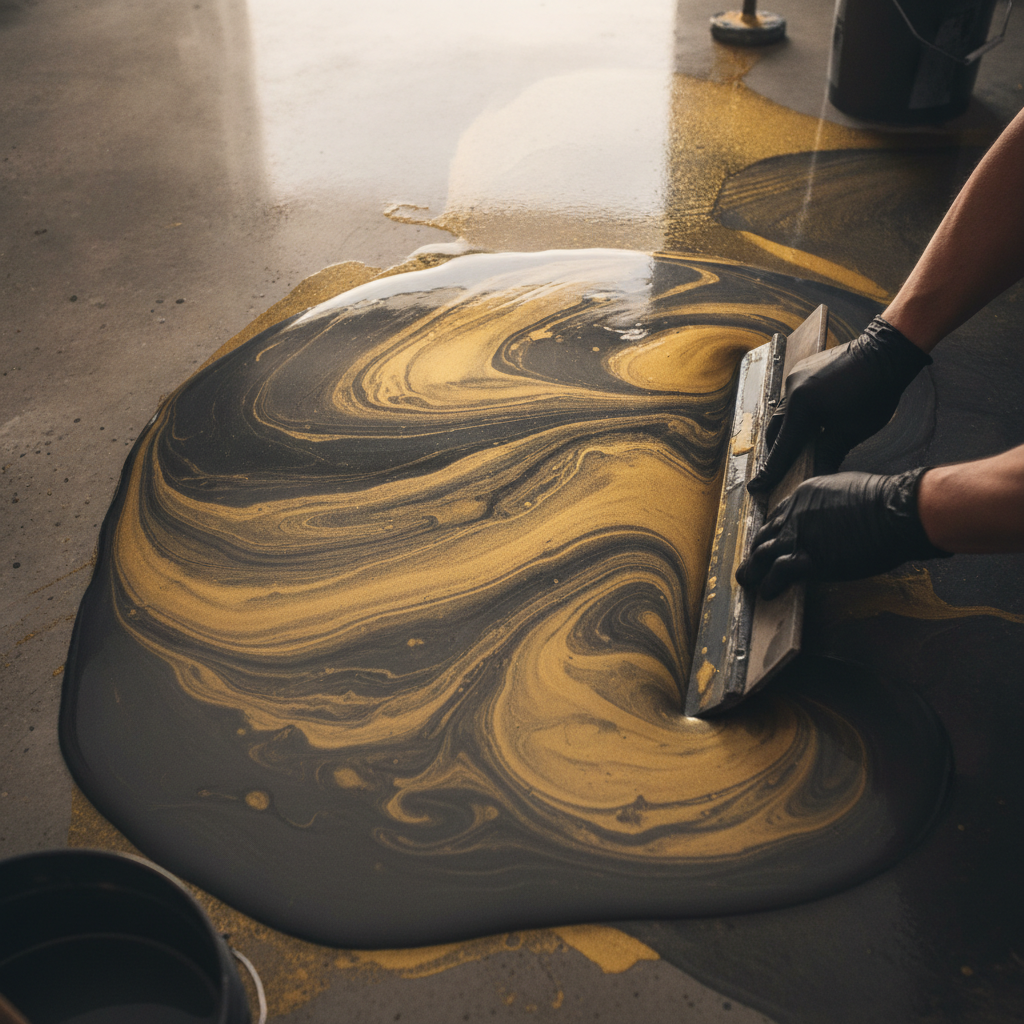
Metallic epoxy floors use pearlescent pigments suspended in a clear epoxy base. The installer manipulates the wet product with a squeegee and forced air to create flowing, marble-like patterns. No two metallic floors look identical. They suit showrooms, high-end home gyms and open-plan living areas connected to a polished-concrete aesthetic.

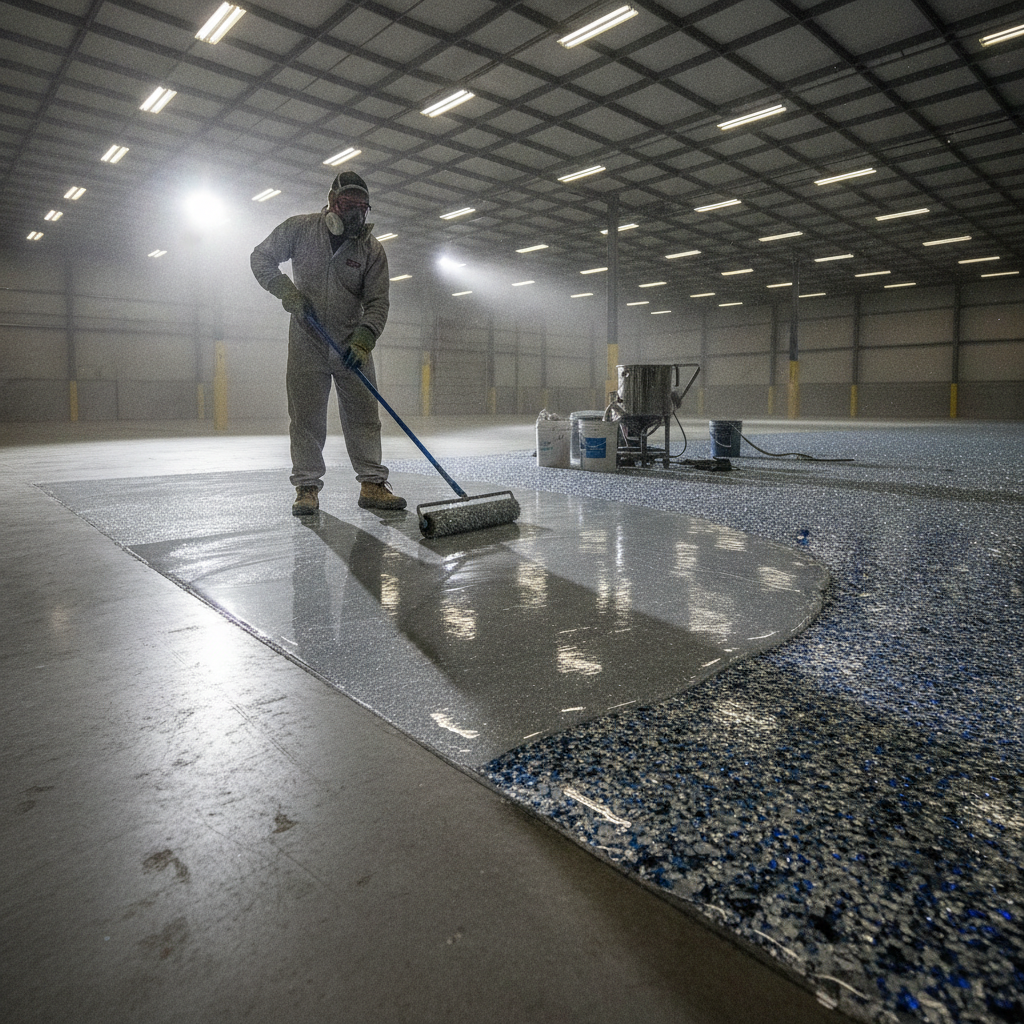
For commercial and light industrial spaces, a thicker self-levelling epoxy or a polyurethane topcoat system offers better resistance to forklift traffic, chemicals and heavy impact. These systems are typically applied at 2 to 3 mm thickness across the full floor, then sealed with a UV-stable polyurethane to prevent yellowing under fluorescent or natural light.

How do you get an accurate quote for epoxy floors near me?

Getting an accurate epoxy floor quote requires the installer to physically see the slab, not just take your word for the square metres. When you contact a local company, have these details ready: the floor area in square metres, the current condition of the concrete (cracks, oil stains, previous coatings), the intended use of the space and your preferred finish. That gives the installer enough to do a meaningful first assessment before they arrive.

A few things affect the final price more than most people expect. Oil contamination in a garage slab, for instance, requires a degreasing treatment and sometimes additional grinding passes. Cracks need to be chased out and filled with a semi-flexible filler before coating, otherwise they will telegraph straight through the finished surface. Previous paint or sealer has to be fully removed or the new epoxy will bond to that old coating rather than to the concrete itself.

Square-metre rates for a quality residential epoxy floor in Melbourne typically sit somewhere between $50 and $120 per square metre depending on system type, number of coats and the prep required. Metallic and multi-layer systems sit at the higher end. Simple single-colour two-coat systems for a clean slab sit at the lower end. Be cautious of quotes that come in well below that range as they usually mean shortcuts on prep or thin coating thickness.

How long does an epoxy floor installation take and when can you use the space?

Most residential epoxy floor jobs in Melbourne take one to two days to apply, depending on system complexity and floor size. The grinding and prep work usually takes up the first half of the job. After the final coat is applied, foot traffic is generally possible after 24 hours and vehicle traffic after 72 hours, though full chemical cure takes around seven days. Your installer should give you these timeframes in writing so there are no surprises about when you can park your car back in the garage.

During that curing window, keep the space dry and avoid dragging anything across the surface. In Melbourne’s cooler months, curing may take slightly longer, especially if the garage is unheated. A good installer will factor ambient temperature into their scheduling and let you know if a follow-up visit is needed to check the surface before handover.

Planning around the cure time is straightforward once you know it. Most homeowners drop off their cars at a neighbour’s place for three days. For commercial spaces, the installer may work in sections so part of the floor remains operational throughout the project.

When you are ready to stop searching and start getting a real answer on cost and timeline, Contact Metal and Flake for epoxy floor installation near you.

Metallic Epoxy for Floors: Design Options and Installation Tips

Metallic Epoxy for Floors: Design Options and Installation Tips

Metallic epoxy for floors is a two-part epoxy coating mixed with fine metallic pigment that produces a flowing, three-dimensional finish with depth and movement. It suits garages, living areas, commercial spaces and showrooms. Colours range from champagne and charcoal to ocean blue and copper. A professional installation typically takes two to three days including cure time.

What design options are available with metallic epoxy for floors?

Metallic epoxy floors come in a wide range of colours and movement patterns. The metallic pigment shifts and swirls as it is worked, so no two floors look identical. Common looks include single-colour with soft wave effects, two-tone blends that mimic marble or lava, and full-coverage pearlescent finishes with high gloss or satin topcoats.

Here is a closer look at the main design directions homeowners and business owners tend to choose.

Single-colour wave. One metallic pigment is mixed into the base coat and then manipulated with a squeegee, roller or blower to create organic ripple patterns. Champagne, bronze and silver are the most popular picks for garage floors and home theatres because they read as neutral but still have visual interest.

Two-tone marble blend. Two contrasting pigments, say charcoal and gold or white and blue, are poured together and then worked before they set. The result looks like polished stone at a fraction of the cost. This option suits open-plan living areas and retail spaces where the floor needs to carry the room visually.

Ocean or geode effect. Deep blues, teals and greens layered over a white or pearl base create a look that resembles agate or deep water. Designers and homeowners use it in bathrooms, feature corridors and bar areas. The layering technique requires a skilled applicator to time the pour correctly before the product begins to set.

Topcoat finish. Regardless of colour, the topcoat choice changes the final character of the floor significantly. A high-gloss polyurethane topcoat amplifies the metallic depth and makes the space feel larger. A satin topcoat softens the shine and reduces glare, which suits workshop and garage environments where overhead lighting can bounce off a mirror-like surface.

How do you prepare a concrete slab for metallic epoxy?

Proper surface preparation is the single most critical step when installing metallic epoxy for floors. The concrete must be clean, dry and mechanically profiled so the epoxy can bond at a chemical level. Skipping or rushing prep is the number-one reason epoxy coatings fail, typically within the first twelve months.

These are the preparation steps a professional installer works through before any product touches the floor.

Moisture testing. Concrete slabs hold residual moisture, especially in Melbourne’s cooler months. A calcium chloride or relative-humidity probe test tells you whether the slab is dry enough. Most epoxy systems require the moisture vapour emission rate to sit below a specified threshold, often around 3 pounds per 1,000 square feet per 24 hours on older imperial specs, or the equivalent in metric readings. Applying epoxy over a damp slab causes adhesion failure and blistering.

Mechanical grinding. Diamond-cup grinders or shot-blasters open up the surface pores of the concrete and remove any existing sealers, paint or laitance (the weak top layer that forms as concrete cures). This creates a surface profile that epoxy can grip. Hand grinding around edges and in corners is fiddly work but it matters just as much as the main field.

Crack and joint repair. Hairline cracks are filled with a flexible polyurea or epoxy filler before the base coat goes down. Movement joints need to be addressed separately because they are designed to flex, and a rigid coating bridging a live joint will crack again.

Dust removal. All grinding debris must be vacuumed thoroughly. Any dust left on the surface sits between the slab and the coating and weakens the bond.

What happens on installation day for a metallic epoxy floor?

On installation day for a metallic epoxy floor, the installer applies a primer or base coat first, then mixes and pours the metallic layer, manipulates the pigment to achieve the chosen pattern and allows each coat to reach the right cure stage before the next one goes down. The full process across a typical residential garage or room runs over two to three days.

Here is how the sequence plays out in practice.

Day one: primer coat. A penetrating epoxy primer seals the slab and locks out any remaining minor moisture. Some systems use a 100-percent-solids epoxy base coat in this step. It is rolled on and left to cure to a tacky-but-firm state, usually four to eight hours depending on ambient temperature.

Day two: metallic broadcast. The metallic epoxy is mixed to manufacturer ratios, poured onto the primed slab in ribbons and then spread with a squeegee. The installer uses a spiked roller to remove air bubbles and a leaf blower or alcohol spray to push the pigment into waves and swirls. This is where the artistic skill sits. The product has a working time of roughly 20 to 30 minutes per batch, so the applicator needs to move at a steady pace without stopping to second-guess decisions.

Day two or three: topcoat. Once the metallic layer has hardened, typically overnight, a clear polyurethane or polyaspartic topcoat is applied in one or two coats. Polyaspartic topcoats cure faster (some are walk-ready in four to six hours) and offer excellent UV stability, which matters in spaces with direct sunlight. Polyurethane topcoats are more economical and still deliver a tough, abrasion-resistant surface.

Cure and handover. Light foot traffic is usually safe after 24 hours. Vehicle traffic on a garage floor should wait 72 hours minimum. Full chemical cure takes around seven days, so it pays to avoid dragging heavy furniture or parking cars with a tight turning radius during that window.

What maintenance does a metallic epoxy floor actually need?

Metallic epoxy floors are low-maintenance compared to polished concrete or natural stone. Regular sweeping and a damp mop with a pH-neutral cleaner is all most floors need week to week. Avoid harsh solvents and abrasive scrubbing pads, which can scratch or dull the topcoat over time.

In high-traffic commercial environments, a maintenance coat of topcoat every few years extends the life of the floor and refreshes the gloss without requiring a full reinstall. Residential floors installed in a well-prepared garage or living area can hold their look for a decade or more with basic care.

One practical tip: put felt pads under furniture legs and use a rubber-backed mat near entry doors. Grit carried in on shoes is the most common cause of surface micro-scratches on any coated floor.

If you are thinking about the look and longevity of your next floor project, the design and installation details covered here give you a solid foundation for conversations with any installer. When you are ready to move from planning to laying, Book a metallic epoxy floor installation with Metal and Flake.

Residential Epoxy Floors: Best Systems for Melbourne Homes

Residential Epoxy Floors: Best Systems for Melbourne Homes

Epoxy floors for residential use offer a hard-wearing, low-maintenance surface that suits garages, living areas and laundries alike. The best system for a Melbourne home depends on the substrate condition, the room’s traffic load and the finish you want. Most homeowners choose between a metallic, flake or solid-colour build, each offering a different look at a similar durability level.

What makes epoxy floors a good choice for residential spaces?

Epoxy floors work well in homes because the cured coating bonds directly to concrete, creating a surface that resists staining, moisture and abrasion far better than bare slab or painted concrete. A properly installed system can handle daily foot traffic, dropped tools and the occasional wet mop for well over a decade without peeling or cracking.

Melbourne homes sit on some of the most reactive clay soils in the country, which means slabs move. Floors in older inner-suburban properties, particularly those built before the 1980s, often show hairline cracking or surface dusting. A quality epoxy system fills minor surface porosity and, when applied over a mechanically prepared substrate, flexes enough with minor slab movement to stay intact.

Beyond durability, the practical appeal is simple. Concrete left unsealed collects dust, traps oil and is nearly impossible to keep clean. Epoxy floors seal that surface shut. A quick mop and the job is done, no scrubbing, no sealer reapplication every season.

Which residential epoxy floor systems are most popular in Melbourne?

The three systems that appear most often in Melbourne homes are full-flake broadcast, metallic epoxy and solid-colour two-part epoxy. Full-flake broadcast involves scattering coloured vinyl flakes into a wet epoxy base coat until full coverage is achieved, then locking it all in with a clear polyaspartic or polyurethane topcoat. Metallic systems use pigmented mica powders swirled into the epoxy to create flowing, three-dimensional patterns. Solid colour is exactly what it sounds like: a uniform tinted coating that suits a more minimal interior look.

Full-flake is the most forgiving system for residential garages. The texture hides minor surface imperfections, the chips add a non-slip quality underfoot and the flake pattern disguises light scratches over time. It is also the most cost-effective of the three for larger floor areas.

Metallic epoxy has become the go-to for homeowners who want a showroom-style result in an indoor entertaining area, home gym or open-plan living space. The swirl patterns are unique to each pour, so no two floors look the same. Pigment combinations like gunmetal and white, copper and charcoal or ocean blue and silver all translate well against the polished concrete aesthetic that is popular across Melbourne’s inner north and bayside suburbs.

Solid colour suits utility spaces: laundries, workshops and storage rooms where the point is function over flair. A good two-part solid-colour epoxy is still significantly more durable than a single-part hardware store paint, which tends to peel within a year or two of normal use.

How do you prepare a residential slab for epoxy floors?

Surface preparation is the step that determines whether a residential epoxy floor lasts ten years or ten months. The concrete needs to be mechanically opened so the epoxy can penetrate and bond rather than sitting on top of a smooth, sealed surface. The two standard methods are diamond grinding and shot blasting.

Diamond grinding uses industrial grinders fitted with diamond-segment tooling to abrade the surface to a profile similar in feel to 80-grit sandpaper. This is the go-to method for most residential installs because grinders are manoeuvrable enough to get into corners and around obstacles. Shot blasting, which propels steel shot at the surface at high velocity, is faster over large open areas like big warehouse-style garages but requires more clearance to operate effectively.

Once the surface is profiled, any cracks, spalls or expansion joints need attention. Cracks wider than about two millimetres should be chased out and filled with an epoxy crack filler or polyurea joint compound before the base coat goes down. Skipping this step means those cracks telegraph through the finished coating, which looks poor and can let moisture migrate underneath.

Moisture is the other critical check. Concrete that reads above 75 percent relative humidity on a Tramex or similar moisture meter needs a moisture-tolerant primer coat, otherwise the epoxy can blister or delaminate within months. This is more common than people expect in Melbourne, particularly in homes with older suspended slabs or slabs poured directly on ground without a proper membrane.

How long does a residential epoxy floor take to install and cure?

A standard residential garage or laundry floor typically takes one to two days on-site across two separate visits: one for preparation and primer, one for the broadcast or metallic coat and topcoat. The floor needs to be kept clear of foot traffic for around 24 hours after the final coat and clear of vehicle traffic for at least 72 hours, sometimes longer depending on the topcoat product and ambient temperature.

Melbourne’s temperature swings matter here. Epoxy cures through a chemical reaction that slows significantly in cold conditions. Installing in winter, particularly in an unheated garage that drops below 10 degrees Celsius overnight, can extend cure times and affect the quality of the film if it is not managed properly. An experienced installer will account for this by adjusting product selection and timing accordingly.

Polyaspartic topcoats cure faster than standard polyurethane and handle lower temperatures better, which is one reason they have largely replaced older topcoat products for residential work in Victoria. A polyaspartic-finished floor can often take foot traffic the same day the topcoat is applied, which is a real advantage in a family home where you cannot keep the garage sealed off for days on end.

What should homeowners look out for when choosing a residential epoxy floor installer?

The single biggest red flag is a quote that skips surface preparation costs. Grinding and shot blasting equipment, disposal of grinding slurry and the time involved in proper prep represent a real portion of the job cost. A quote that looks unusually cheap almost always means the prep is being cut short, which directly shortens the life of the floor.

Ask to see examples of finished residential work, not just commercial or industrial jobs. The tolerances are different. Homeowners look at their floors up close every day, so swirl consistency in a metallic pour or flake coverage density in a broadcast system matters more in a home than in a warehouse.

Check that the installer uses a two-part epoxy system with a dedicated primer coat, a body coat and a UV-stable topcoat. Single-coat systems applied by rollers with no primer stage are common in the DIY space and regularly fail within a year. A properly layered system builds to around two to three millimetres of total thickness, which is what delivers the durability residential floors need.

Book a residential epoxy floor installation with Metal and Flake

Commercial Floor Coating in Melbourne: What Every Business Needs to Know

Commercial Floor Coating in Melbourne: What Every Business Needs to Know

Commercial floor coating in Melbourne is the process of applying a protective epoxy or polyurethane system over a concrete slab to produce a surface that handles heavy traffic, chemical spills, forklift loads and daily cleaning without cracking or peeling. Done properly, a quality coating lasts 10 to 20 years and costs far less than replacing a concrete floor.

Why do Melbourne businesses choose commercial floor coating over other options?

Commercial floor coating outlasts paint, vinyl and bare concrete in high-traffic environments because it bonds directly into the concrete rather than sitting on top of it. A well-applied two-coat epoxy system creates a surface that resists abrasion, most industrial chemicals and heavy point loads, which makes it practical for warehouses, workshops, retail spaces and food-production facilities alike.

Plain concrete is porous. Every time a forklift drops oil, a staff member spills a cleaning chemical or rainwater tracks in on boots, that moisture and contamination soaks straight into unprotected concrete. Over a couple of years the surface becomes stained, dusty and increasingly difficult to clean. A sealed epoxy coating closes that porosity completely, so spills sit on top and wipe up in seconds.

From a compliance angle, a smooth, sealed floor also helps businesses meet Workplace Health and Safety obligations around slip resistance and hygiene, particularly in food handling and manufacturing environments. Anti-slip additives can be broadcast into the topcoat during installation to hit the specific slip-resistance rating your site requires.

What types of commercial floor coating are used in Melbourne?

The most common commercial floor coatings are solvent-borne epoxy, water-borne epoxy, 100% solids epoxy and polyurethane topcoats. Each suits different environments. Solvent-borne systems offer strong penetration on older slabs; 100% solids epoxy builds maximum film thickness in one coat; polyurethane is preferred as a topcoat where UV exposure or chemical resistance is the priority.

For most Melbourne commercial and industrial jobs, a multi-coat epoxy system is the standard approach. It typically involves a primer or penetrating seal, a basecoat, optional decorative elements like metallic flake or colour chips, and a clear polyurethane topcoat. That topcoat is what provides UV stability and scratch resistance at the wear surface.

Metallic flake systems, sometimes called flake or chip floors, are popular in showrooms, gyms and retail environments because they hide minor surface imperfections and add texture without looking industrial. The coloured vinyl flakes are broadcast into a wet basecoat and then locked under a clear topcoat, giving a finish that is both decorative and genuinely durable.

For heavy industrial environments, like food processing or chemical storage areas, a thicker 100% solids system with an anti-static or coved skirting detail is often the better call. The coating is applied at 2 to 3 mm thickness rather than the 300 to 600 micron range used for lighter commercial work.

How does surface preparation affect a commercial floor coating in Melbourne?

Surface preparation is the single most important step in any commercial floor coating job. Poor prep is the reason coatings fail, peel or bubble within months. The concrete must be mechanically abraded (usually by diamond grinding or shot blasting) to open the surface profile, remove laitance and give the primer something to grip onto. No amount of premium product fixes a poorly prepared slab.

Moisture is the other big issue. Melbourne’s variable climate means concrete slabs, especially older ones poured without a proper vapour barrier, can carry moisture vapour that rises up through the slab. If an epoxy coating is applied over a slab with a moisture vapour emission rate above the product’s tolerance, the coating will blister and delaminate. A reputable contractor will test moisture levels before committing to a system and will specify a moisture-tolerant primer if readings are elevated.

Cracks, control joints and spalled areas all need attention before coating. Hairline cracks can be filled with a rigid epoxy grout; wider moving cracks get a flexible polyurethane sealant that can flex with the joint rather than transmit stress into the rigid coating above.

How long does a commercial floor coating take, and what downtime should a business expect?

Most commercial floor coating jobs in Melbourne take two to three days from surface preparation through to final cure, though actual foot-traffic clearance is typically 24 hours after the final coat. Full chemical and mechanical cure, where the floor reaches its rated hardness, takes around seven days. Planning the job over a weekend or a planned shutdown avoids operational disruption for most businesses.

The prep day is usually the noisiest and most disruptive. Diamond grinders and shot blasters generate dust, vibration and noise, so scheduling that phase when neighbouring businesses or your own staff are not on site is worth planning for. Most contractors can stage the work in sections so that parts of a large floor remain in use while others cure.

Temperature and humidity matter too. Epoxy products have working temperature windows, typically between 10°C and 30°C, and relative humidity limits. Melbourne summer days can push ambient temperatures high enough to shorten pot life significantly, so experienced applicators start early in the morning during warmer months.

What should you look for when choosing a commercial floor coating contractor in Melbourne?

Look for a contractor who conducts a proper site assessment rather than quoting from a photo or a rough square-metre figure over the phone. A good applicator will check the slab age, finish, moisture content and any previous coatings before recommending a system. They should be able to tell you which product brand and system they are using, not just offer a generic “epoxy floor.”

Ask for a written scope that covers surface preparation method, primer type, number of coats, film thickness per coat, topcoat product and expected cure schedule. That document protects you if disputes arise and tells you immediately whether the contractor actually understands the work involved.

References from similar commercial or industrial jobs nearby are worth requesting. A contractor who has coated similar floors in Melbourne’s industrial suburbs, whether that’s Braeside, Dandenong, Campbellfield or Sunshine, will be familiar with the types of slabs, the climate conditions and the logistical constraints common to those sites.

Warranty terms are another telling detail. A reputable contractor will offer a workmanship warranty on adhesion and delamination. Be cautious of operators who offer no warranty or who make it conditional on conditions so narrow they are effectively unenforceable.

How much does commercial floor coating cost in Melbourne?

Commercial floor coating in Melbourne generally ranges from around $25 to $70 per square metre depending on system type, slab condition and floor area. A basic single-colour epoxy system on a well-prepared slab sits toward the lower end; a decorative metallic flake system with a polyurethane topcoat on a slab needing significant remediation will sit toward the higher end. Large floor areas attract lower per-square-metre rates due to the efficiency of working in open space.

The cheapest quote is rarely the best outcome on a commercial floor. If a contractor is significantly lower than others, the saving is almost always coming from thinner coats, skipped primer, minimal surface prep or lower-grade product. Any of those shortcuts shortens the coating’s life and increases the cost of premature failure. A floor that needs recoating after three years instead of lasting fifteen has cost you far more than the difference in the original quote.

Get at least two or three detailed quotes and compare what each scope actually includes before making a decision. The investment in a quality commercial floor coating pays off every year through easier cleaning, fewer slip incidents and a floor that simply keeps looking the part.

Get a commercial epoxy floor coating quote from Metal and Flake.

Epoxy Garage Floor Coating Cost: 2026 Pricing Guide for Melbourne

Epoxy Garage Floor Coating Cost: 2026 Pricing Guide for Melbourne

Epoxy garage floor coating in Melbourne typically costs between $30 and $80 per square metre, depending on the system used, the condition of the slab, and the finish you choose. A standard single-car garage of around 20 sqm will usually land between $600 and $1,600 fully installed. Flake and metallic systems sit toward the higher end of that range.

What does epoxy garage floor coating cost per square metre in Melbourne?

For most Melbourne garages, expect to pay $30 to $50 per sqm for a basic solid-colour epoxy, $45 to $65 per sqm for a flake (chip) broadcast system, and $60 to $80 per sqm for a full metallic or decorative finish. These figures cover materials, surface preparation and installation by a professional applicator. DIY kits from hardware stores run $10 to $20 per sqm but rarely include proper primer or a UV-stable topcoat, so they tend to peel within a couple of years.

To put that in plain dollar terms for common garage sizes:

  • Single garage (18 to 22 sqm): $540 to $1,760
  • Double garage (35 to 42 sqm): $1,050 to $3,360
  • Triple or oversized garage (55 to 70 sqm): $1,650 to $5,600

These are realistic ballparks. Your actual quote can move quite a bit based on the factors covered below.

What factors push epoxy garage floor coating cost up or down?

The four biggest cost drivers are the condition of the concrete, the system chosen, the number of coats and the size of the job. A slab with heavy oil staining, cracks or a previous coating that needs grinding back will cost more to prep. Preparation alone, done properly with a diamond grinder or shot blaster, can represent 30 to 40 percent of the total job cost, but skipping it is the main reason budget coatings fail early.

Here is a breakdown of what moves the needle:

  • Concrete condition. Fresh, clean concrete is the cheapest starting point. Old oil-stained or previously sealed slabs need more prep time and sometimes chemical treatment before any coating can bond.
  • Crack and spall repair. Minor cracks are usually filled as part of the job. Significant structural cracking or surface spalling adds to the quote and is worth addressing properly rather than coating over.
  • Coating system. A two-coat solid epoxy is cheaper than a three-coat flake system, which is cheaper again than a multi-layer metallic pour with a polyaspartic topcoat. Each step up adds durability and visual impact.
  • Topcoat type. Polyaspartic and polyurethane topcoats cost more than a standard epoxy clear, but they resist UV yellowing and abrasion far better. For a Melbourne garage that gets afternoon sun, this matters.
  • Access and logistics. Tight driveways, steps up to the garage or the need to work around stored items all add labour time.

Is a flake or metallic finish worth the extra cost?

For most homeowners, yes. Flake broadcast systems hide tyre marks, light scratches and dust far better than a solid colour, and they add texture that reduces slip risk on a wet floor. Metallic epoxy systems deliver a genuinely striking finish that can look like polished concrete or a liquid pour, and they are unique because no two floors come out identical. The extra $15 to $25 per sqm over a basic coat pays for years of easier cleaning and a floor that still looks sharp after a decade of daily use.

The cost difference between a flake system and a solid epoxy on a standard double garage is typically $500 to $1,000. When you spread that over a floor that should last 10 to 15 years with proper maintenance, it works out to less than $100 a year. Put it next to the cost of resurfacing concrete or replacing damaged flooring, and the premium finish is genuinely good value.

Why does surface preparation affect the epoxy garage floor coating cost so much?

Surface preparation is the single biggest variable in any coating quote, and it is the part most DIYers underestimate. Epoxy bonds chemically to concrete, but only if the surface is open, clean and profiled correctly. Professional applicators use diamond grinding equipment or, on larger jobs, shot blasters to achieve a surface profile similar to 60 to 80 grit sandpaper. That mechanical key is what allows the coating to grip and stay gripped under the stress of hot tyres, foot traffic and chemical exposure.

When a contractor quotes cheap and fast, it is almost always the prep that gets cut short. The coating might look fine on day one, but delamination (bubbling or peeling) shows up within 12 to 18 months, particularly in areas where cars park and heat builds up. Redoing a failed floor costs more than doing it right the first time, because you have to strip the failed coating before you can start again.

Expect a reputable applicator to spend a meaningful portion of the job day just on prep. If someone quotes you and never mentions grinding or shot blasting, ask the question directly.

How do you get an accurate quote for your garage floor?

Getting an accurate quote comes down to a few practical steps. First, measure your garage floor properly, including any alcoves or workshop bays, because that is what you are paying to coat. Second, be upfront about the current state of the slab. Oil stains, previous paint or sealers, cracks and moisture issues all need to be declared so the contractor can price them in rather than discover them on the day and adjust costs.

Ask each applicator to specify:

  • What preparation method they will use (grinding, shot blasting, acid etching)
  • How many coats are included and what products are being used
  • Whether the topcoat is standard epoxy clear, polyaspartic or polyurethane
  • What the warranty covers and for how long

Comparing quotes that specify all of this is far more useful than comparing bottom-line numbers alone. A quote that is $400 cheaper but uses two coats instead of three on a contaminated slab is not the same job.

One more thing worth knowing: Melbourne’s climate does affect application timing. Epoxy should not be applied in temperatures below 10 degrees Celsius or above 30 degrees, and high humidity can interfere with curing. Winter months may limit scheduling options, and a good applicator will factor that into planning rather than push ahead in borderline conditions and risk a compromised finish.

If you are weighing up whether to coat just the main parking bay or the full floor including a workshop bench area, coating the whole space in one hit is almost always more cost-effective than doing it in stages. You save on setup, prep and mobilisation costs, and you get a consistent finish throughout.

Get an accurate garage floor coating quote from Metal and Flake.

Concrete Floor Coating in Williamstown: Protecting Your Slab Near the Bay

Concrete Floor Coating in Williamstown: Protecting Your Slab Near the Bay

Concrete floor coating in Williamstown is one of the smartest things you can do for a garage, workshop or residential slab in this suburb. The combination of salt-laden bay air, seasonal humidity and a strong coastal UV load accelerates slab deterioration faster than most people expect. A quality coating seals the surface, blocks moisture ingress and gives your floor a finish that holds up for years.

Why does coastal living make concrete floor coating in Williamstown so critical?

Concrete floor coating in Williamstown matters more than in inland suburbs because salt air attacks unprotected concrete at a chemical level. Airborne chlorides work into the surface pores, encourage the steel reinforcement to rust and cause spalling from the inside out. A sealed, coated slab blocks that cycle before it starts, saving you from costly remediation work down the track.

Williamstown sits right on Hobsons Bay, which means the western wind picks up salt spray off the water and deposits it on every exposed surface, including your garage or workshop floor. Left bare, a concrete slab in this environment will start showing surface dusting, pitting and staining within a few seasons. Moisture also wicks up from the ground through the slab, especially in older homes on the foreshore streets where drainage has changed over decades of development.

A properly applied floor coating cuts off both attack routes. It seals the top surface against salt, oil and chemical spills while also slowing moisture vapour transmission. That dual protection is why tradies and homeowners in bayside suburbs treat floor coatings as maintenance, not a luxury.

What types of floor coating work best for a bayside environment?

Epoxy-based floor coatings perform exceptionally well in coastal environments because they form a hard, chemically resistant film that bonds tightly to prepared concrete. Two-part epoxy systems are particularly suited to Williamstown conditions: they resist salt, petroleum products and the constant humidity that comes with living near the bay, and when finished with a UV-stable polyurethane topcoat they won’t yellow or chalk from sun exposure.

Polyurethane topcoats are the finishing layer most professionals recommend over a base epoxy in coastal areas. Epoxy alone can chalk and yellow under UV radiation, which in Williamstown means a west-facing garage floor can start looking tired within a couple of years if it hasn’t got that UV-stable top layer. Polyurethane holds colour and gloss far better outdoors or in bright, sun-hit spaces.

Decorative flake systems, where coloured vinyl flakes are broadcast into the wet base coat and then sealed under a clear topcoat, are a popular choice locally. The flakes add texture that helps with slip resistance (useful in a workshop where wet shoes are common), and they hide the minor surface marks that accumulate in a working garage. The finish looks polished without being impractical.

Metallic epoxy coatings are another option worth knowing about. Metallic pigments are blended through the epoxy to create a marbled, flowing effect that can look striking in a showroom, studio or high-end garage. These systems require skilled application to get the flow pattern consistent, so the quality of the installer matters as much as the product.

How should you prepare a Williamstown slab before coating?

Proper preparation is what separates a coating that lasts a decade from one that starts peeling within a year. For concrete floor coating in Williamstown, the prep process typically involves mechanical diamond grinding to open up the surface pores, removal of any existing sealers or contamination, repair of cracks and spalls with appropriate fillers, and a final check on moisture vapour emission rates before any product goes down.

Moisture is the biggest variable on older Williamstown slabs. Many homes in the suburb date from the early to mid twentieth century, and their slabs were poured before modern moisture barriers were standard. A simple plastic sheet test left on the slab overnight can indicate whether you have a moisture problem, but a professional will use a calibrated moisture meter to get a reading you can actually act on. If vapour emission is too high, a moisture-tolerant primer or a specific moisture barrier coat goes down before the main system.

Grinding rather than acid etching is the current industry standard for a good reason. Grinding removes the top layer mechanically, creating a consistent profile across the whole floor. Acid etching can work on clean slabs but is unreliable on contaminated concrete, and it leaves behind residual salts if not rinsed thoroughly, which is counterproductive when you’re already dealing with a salt-rich coastal environment.

Crack repairs should be done with a semi-flexible filler on slabs that see temperature movement. Williamstown’s coastal location means slabs can cycle through a reasonable temperature range between summer and winter, and a rigid filler will crack again. A polyurea or semi-flexible epoxy filler moves with the slab and keeps the repair sealed.

How long does a concrete floor coating last near the bay?

A professionally installed concrete floor coating in a coastal area like Williamstown will typically last between eight and fifteen years with basic maintenance, depending on traffic, UV exposure and the quality of the original preparation and products. A garage floor that sees daily car traffic and occasional chemical spills sits at the lower end of that range; a workshop with moderate foot traffic and no vehicle use sits toward the higher end.

Maintenance is straightforward. A neutral-pH cleaner and a mop is all it takes for routine cleaning. Avoid harsh solvents and high-pressure steam cleaning directly on the surface, as either can soften or blister a coating over time. If the topcoat starts to look dull after several years, a re-coat of just the top layer can restore the finish without stripping the whole system back to bare concrete.

Colour and finish choice also affects longevity in a practical sense. Darker solid colours show dust and footprints more readily, while flake systems and lighter tones are more forgiving in a busy space. That’s not a coating durability issue as such, but it affects how happy you’ll be with the floor day to day, which is worth thinking about before you commit to a colour.

What should you look for when choosing a floor coating contractor in Williamstown?

The most important things to look for are evidence of proper surface preparation, the use of commercial-grade two-part products (not single-component hardware store coatings), and a contractor who asks about your slab’s history before quoting. A good operator will want to know whether the floor has been sealed before, what it’s used for and whether you’ve had any moisture or cracking issues. That information shapes the system they specify.

Ask to see examples of completed work, particularly in bayside or coastal suburbs where the environment is comparable to Williamstown. A contractor who has done work in Altona, Newport or Seaholme will already understand the moisture and salt challenges specific to this stretch of the bay.

Also clarify what’s included in the quote. Surface preparation, crack repairs, primer coats, the number of base coats, the topcoat and cleanup should all be spelled out. A low quote that doesn’t include proper grinding and a moisture primer is likely to cost more in the long run when the coating fails early.

Metal and Flake specialises in epoxy floor coatings and decorative systems across Melbourne’s bayside and western suburbs, including Williamstown. The team understands the specific demands of coastal slabs and uses commercial-grade products suited to the local environment.

Book concrete floor sealing and coating in Williamstown with Metal and Flake

Epoxy Flake Flooring in Coburg: Colours and Costs for Local Garages

Epoxy Flake Flooring in Coburg: Colours and Costs for Local Garages

Epoxy flake flooring in Coburg is one of the most popular garage upgrades for inner-north Melbourne homeowners. A full flake system typically costs between $40 and $70 per square metre, covers bare or aged concrete in one visit, and delivers a hard-wearing, slip-resistant surface that handles oil, moisture and heavy traffic for well over a decade with basic maintenance.

What exactly is epoxy flake flooring and why do Coburg garages suit it so well?

Epoxy flake flooring is a multi-layer coating system where decorative vinyl flakes are broadcast into a wet epoxy base coat, then locked in under a clear polyurethane or epoxy topcoat. The flakes add texture, hide minor surface imperfections, and create a finish that is far more grip-friendly than plain polished concrete. Coburg garages suit it perfectly because many homes in the suburb feature original concrete slabs that are porous, stained or uneven, and a flake system bridges those issues without the cost of a full slab replacement.

The inner-north Melbourne climate also plays a role. Garages here cop morning moisture, seasonal temperature swings between cold winters and hot summers, and plenty of tracked-in grit from local streets. A quality flake system is flexible enough to handle that thermal movement without cracking, and the textured surface gives tyres and boots proper grip even when the floor is damp.

What colour options are available for epoxy flake flooring in Coburg?

Colour choice for epoxy flake flooring comes down to two things: the base coat colour and the flake blend. Base coats typically run from standard greys and whites through to charcoals, tans and custom colours. Flake blends are sold in small (1 mm), medium (3 mm) and large (6 mm) sizes, and in blended colour packs that mix two to six colours in a single broadcast. A Coburg homeowner can choose a neutral grey base with a salt-and-pepper flake for a classic workshop look, or go bolder with a charcoal base and a multi-tone copper or blue flake for a showroom finish.

Some of the most requested combinations for garages in the area include:

  • Dove grey base, white and grey flake blend. Clean, bright, suits compact single-car garages well.
  • Charcoal base, black and silver flake. Hides tyre marks and gives a sleek industrial look popular with double-garage renovations.
  • Beige base, earth-tone multi-flake. Warmer underfoot and works well in garages that double as workshops or home gyms.

Full broadcast coverage (where flakes cover 100 percent of the base) is the standard for garages because it completely masks the underlying concrete colour and gives the most consistent finish. Partial broadcasts are used more often in commercial settings where a more decorative, terrazzo-style pattern is wanted.

How much does epoxy flake flooring cost in Coburg?

For a standard Coburg residential garage, expect the installed cost of a full epoxy flake system to sit between $40 and $70 per square metre, depending on the number of coats, the condition of the existing concrete, and the flake density chosen. A single-car garage of around 18 square metres will therefore come in somewhere between roughly $720 and $1,260 all up. A double garage at 36 square metres lands in the $1,440 to $2,520 range.

Those numbers assume the slab is in reasonable condition. If the concrete needs significant crack repairs, diamond grinding to remove old paint or sealers, or moisture mitigation treatment, those steps add cost but are not optional. Skipping proper surface prep is the single most common reason epoxy floors fail early, peeling up within a year or two instead of lasting the ten-plus years the system is rated for.

It is also worth knowing that the topcoat choice affects price. A standard clear epoxy topcoat is the budget option. A polyurethane or polyaspartic topcoat costs a little more but offers better UV stability (important if the garage door is open for long periods) and a faster cure time that means you can park back on it within 24 hours rather than the standard 48 to 72 hours for a basic epoxy finish.

What does the installation process look like from start to finish?

The installation process for epoxy flake flooring follows a consistent set of steps regardless of garage size. Understanding them helps you plan the job and know what to expect on the day.

Surface preparation. The slab is diamond ground or shot blasted to open the pores of the concrete and create mechanical adhesion. Any cracks are filled with a flexible filler or rigid epoxy repair mortar depending on their width and cause. Oil contamination is treated with a degreaser before grinding. This stage typically takes two to four hours for a standard double garage.

Primer coat. A penetrating epoxy primer is rolled on to seal the slab and prevent off-gassing, which is the main cause of bubbles in a finished floor. The primer usually needs one to two hours of cure time.

Base coat and flake broadcast. The coloured epoxy base coat is applied, then flakes are broadcast by hand across the wet surface. For a full broadcast, the installer keeps throwing flakes until they reject, meaning the surface is saturated. Excess flakes are swept up and reused. This is the most labour-intensive part of the job.

Grout coat (optional). On a full broadcast, a clear grout coat is sometimes applied over the flakes to lock them down before topcoating, giving a smoother finished surface.

Topcoat. One or two coats of clear polyurethane or polyaspartic sealer are applied to protect the flakes and provide the final sheen level, from matte through to high gloss. Total cure time before foot traffic is typically 12 to 24 hours, and full vehicle traffic is usually safe at the 48 to 72 hour mark.

How do you keep an epoxy flake floor looking good long term?

Maintaining an epoxy flake floor is straightforward. Regular sweeping or a leaf blower to remove grit stops fine particles from acting as sandpaper underfoot, which is the main cause of surface dulling over time. A mop with warm water and a pH-neutral cleaner every few weeks keeps the topcoat bright. Avoid bleach and citrus-based cleaners because they degrade the sealer over time.

For Coburg garages that see daily car use, placing a drip mat under the vehicle during Melbourne’s rainy months reduces standing moisture on the floor and extends the life of the topcoat. The flake texture means water does not pool the way it does on smooth coatings, but reducing prolonged exposure is still good practice.

Most properly installed epoxy flake systems will go eight to fifteen years before the topcoat needs a refresh. When that time comes, the process is simply a light sand and a new topcoat rather than a full re-coat of the whole system, which keeps the maintenance cost low.

Ready to upgrade your garage slab? Book an epoxy flake floor installation in Coburg with Metal and Flake.

Epoxy Floors in Hoppers Crossing: Garage Coating Guide for Locals

Epoxy Floors in Hoppers Crossing: Garage Coating Guide for Locals

Epoxy floors in Hoppers Crossing are a popular upgrade for homeowners who want a garage that’s easy to clean, hard-wearing and genuinely good-looking. A quality epoxy coating bonds directly to concrete, resists oil and tyre marks, and can last well over a decade with basic care. This guide walks you through everything you need to know before you book a job.

Why are epoxy floors such a practical choice for Hoppers Crossing garages?

Epoxy floors suit Hoppers Crossing garages because the coating handles Melbourne’s temperature swings, everyday vehicle traffic and the kind of workshop use most homeowners throw at it. The sealed surface stops oil and chemicals soaking into bare concrete, so clean-up is a wipe rather than a scrub. It also reflects light well, which makes a single-car garage feel noticeably brighter.

Hoppers Crossing sits in Melbourne’s western growth corridor, where a lot of homes were built in the 1990s and 2000s. That era of concrete slab is usually sound but porous, which means bare floors absorb every spill and grind grit into boot soles. Epoxy changes that completely. Once the coating cures, you’ve got a surface that sheds water, resists petrol drips and wipes down in minutes.

There’s also a real aesthetic payoff. Metallic and flake finishes in particular turn a plain grey slab into something that looks more like a showroom floor than a storage room. For a lot of homeowners out this way, that’s the moment the garage stops being a dumping ground and starts being a usable space.

What does the preparation process actually involve for a garage floor coating?

Preparation for a garage floor epoxy coating means mechanically grinding or shot-blasting the concrete surface so the epoxy bonds properly. The concrete must be clean, dry and free of laitance (the weak top layer that forms during pouring). Any cracks or holes are filled before the primer goes down. Skipping or rushing this step is the single biggest reason epoxy floors fail early.

A professional installer will typically spend a good portion of the job day just on prep. For a standard double garage, that can mean an hour or more of diamond grinding. The goal is an open, slightly rough surface profile, sometimes described as the texture of 80-grit sandpaper, so the epoxy has something to grip.

A few things worth checking before a quote visit:

  • Moisture. Concrete slabs in Melbourne’s west can hold ground moisture. A simple plastic sheet taped down overnight will tell you if condensation is an issue. High moisture can cause epoxy to delaminate.
  • Existing coatings. If someone has painted the floor previously, that old paint usually needs to come off entirely before epoxy goes down.
  • Cracks. Hairline cracks are normal and can be filled. Wide or moving cracks are a structural conversation for a builder first.

What types of epoxy garage floor coatings are available?

The main epoxy garage floor coating types are solid colour epoxy, flake (chip) systems and metallic epoxy. Solid colour is the most straightforward. Flake systems broadcast vinyl chips over a base coat for texture and slip resistance, which is a popular choice in working garages. Metallic epoxy uses pigment and a clear topcoat to create a swirling, three-dimensional finish that’s more decorative.

Each system has a place depending on how you use the space:

  • Flake (chip) systems are the workhorse option. The texture hides minor dirt between cleans and adds grip underfoot, which matters if the garage doubles as a workshop or if kids ride bikes through it. They’re also very forgiving to maintain.
  • Metallic epoxy is the showpiece finish. It photographs beautifully and works well in showroom-style garages or man caves where appearance is the priority. It takes a little more care to keep looking sharp.
  • Solid colour epoxy is clean and classic. It’s often used where a business logo colour or a specific aesthetic is the brief.

A good installer will walk you through colour samples in person, because colours look quite different under warehouse lighting versus natural light in your actual garage.

How long does an epoxy floor job take in Hoppers Crossing, and when can you drive on it?

A standard garage epoxy floor job in Hoppers Crossing typically takes one day for installation, then requires around 24 hours before foot traffic and up to 72 hours before you drive a vehicle on it. Full chemical cure, where the floor reaches its maximum hardness, generally takes about seven days. Temperature affects cure time: cooler days slow things down slightly.

Most homeowners plan the job for a Thursday or Friday. That way the floor is curing over the weekend, and by Monday morning the car’s back inside. It’s worth clearing everything out of the garage the night before so the installer can start on bare concrete first thing.

Weather matters too. Epoxy shouldn’t be applied when ambient temperature drops below around 10 degrees Celsius, so Melbourne’s cooler months can limit scheduling windows. A reputable installer will check conditions before committing to a date.

What should Hoppers Crossing homeowners look for in an epoxy floor quote?

When reviewing an epoxy floor quote in Hoppers Crossing, look for clear line items covering surface preparation, the number of coats, the product system being used (brand and type), and the topcoat warranty. A quote that lists only a single price with no breakdown is a sign to ask more questions. Concrete grinding should be explicitly included, not assumed.

A few practical points to raise with any installer:

  • Ask what diamond grit profile they grind to. Serious installers know this number.
  • Ask about the topcoat. A UV-stable polyurethane or polyaspartic topcoat protects the colour from fading, which matters for garages with natural light.
  • Ask how they handle moisture. If they skip this question, consider it a yellow flag.

Pricing for epoxy garage floors across Melbourne’s western suburbs generally sits in the range of $50 to $100 per square metre for a quality flake or metallic system, depending on the size of the job, the prep required and the finish chosen. Smaller garages cost more per square metre because set-up time is relatively fixed. A single-car garage and a double are both worth quoting, since the per-metre rate usually drops as the floor area grows.

How do you keep an epoxy garage floor looking good year after year?

Keeping an epoxy garage floor in good shape long-term means sweeping or blowing out grit regularly, mopping with a pH-neutral cleaner when needed, and wiping up any chemical spills quickly rather than leaving them to sit. Avoid dragging metal objects across the surface. The coating itself is tough, but sharp edges under concentrated load can scratch the topcoat over time.

A common maintenance mistake is using harsh degreasers or bleach-based products. These can dull the topcoat finish over time. Warm water with a splash of mild detergent is all most epoxy floors need for routine cleaning.

If the floor takes a knock, say a dropped tool chips a small section, spot repairs are possible. It’s worth keeping a small quantity of the original topcoat product if your installer can supply it. That said, a properly installed system with a quality topcoat is genuinely hard to damage under normal residential use.

Metal and Flake works across Melbourne’s western suburbs, including Hoppers Crossing, and brings the kind of local knowledge that makes a difference: understanding the soil and slab conditions common to the area, knowing how the weather affects cure windows and showing up with the right gear to do the prep properly from the start.

Get an epoxy garage floor quote in Hoppers Crossing from Metal and Flake.