Garage Floor Coatings: Which Option Suits Your Home?

Garage Floor Coatings: Which Option Suits Your Home?

A garage floor coating is a protective layer applied directly to bare concrete to resist oil stains, tyre marks, moisture and daily wear. The main options available to Melbourne homeowners are epoxy, polyurea, polyaspartic and decorative flake systems. Each has different strength, cure time and appearance characteristics, and the right choice depends on how you use your garage and what finish you want.

What is a garage floor coating and why does bare concrete fall short?

A garage floor coating is any resin-based product that bonds to concrete and forms a hard, sealed surface. Bare concrete is porous, so oil, brake fluid and water soak straight in and cause staining, spalling and long-term structural damage. A proper coating seals those pores and gives you a surface you can actually clean with a mop rather than a wire brush.

Unsealed concrete also dusts. That grey powder you see on tools, tyres and shoes is concrete particulate breaking away from the surface. Even a single coat of a quality floor coating stops that immediately. For anyone who uses their garage as a workshop, a gym or extra living space, that alone is worth the investment.

It is also worth knowing that not every paint or sealer sold at a hardware store qualifies as a true floor coating. Single-part acrylic garage paints are thin, they peel under hot tyres, and they rarely last more than a season or two in a busy Australian garage. A proper two-part system, whether epoxy or polyurea, chemically crosslinks as it cures, creating a surface that is fundamentally harder and more resistant to chemical attack.

What are the main types of garage floor coating available?

The four coating types most commonly used in residential garages are solvent-based epoxy, water-based epoxy, polyurea or polyaspartic, and decorative broadcast systems that combine a base coat with coloured vinyl flakes. Each suits a different set of priorities around budget, cure time, finish and durability.

Solvent-based epoxy is the workhorse of the industry. It penetrates concrete deeply, bonds aggressively and builds to a thick film in fewer coats. The trade-off is fumes during application and a longer cure window, typically 24 to 72 hours before light foot traffic and up to seven days before you drive on it.

Water-based epoxy has a much lower odour, making it easier to apply in enclosed spaces. It is a popular choice for attached garages where fumes can travel into the house. Film build is slightly thinner than solvent-based products, so a water-based system often benefits from an additional topcoat for maximum durability.

Polyurea and polyaspartic coatings cure fast, sometimes within hours, and have excellent UV stability. Standard epoxy will amber over time when exposed to sunlight, which matters for garages with windows or roller doors that let in afternoon light. A polyaspartic topcoat keeps the colour true for years longer. These products also handle temperature extremes better, which is relevant in Melbourne where a concrete slab can swing from cold winter mornings to very hot summer afternoons.

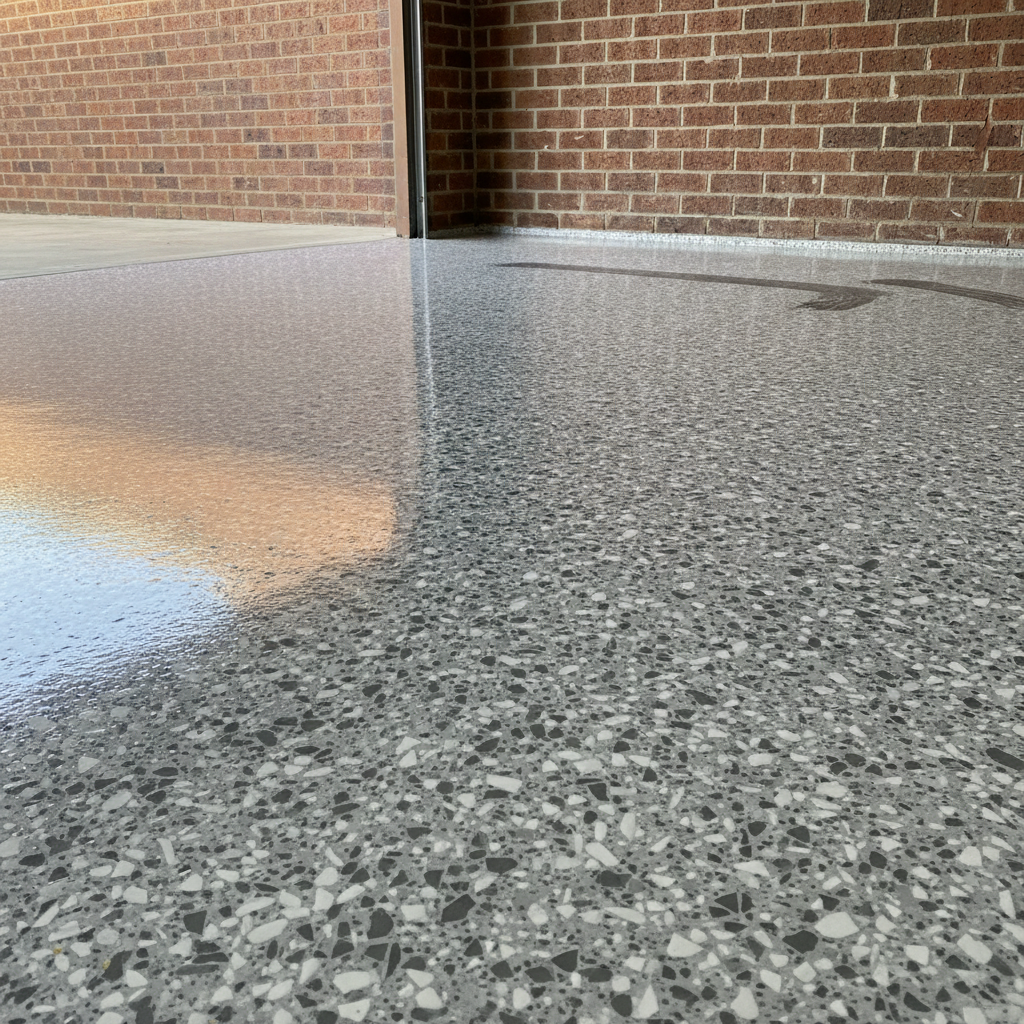
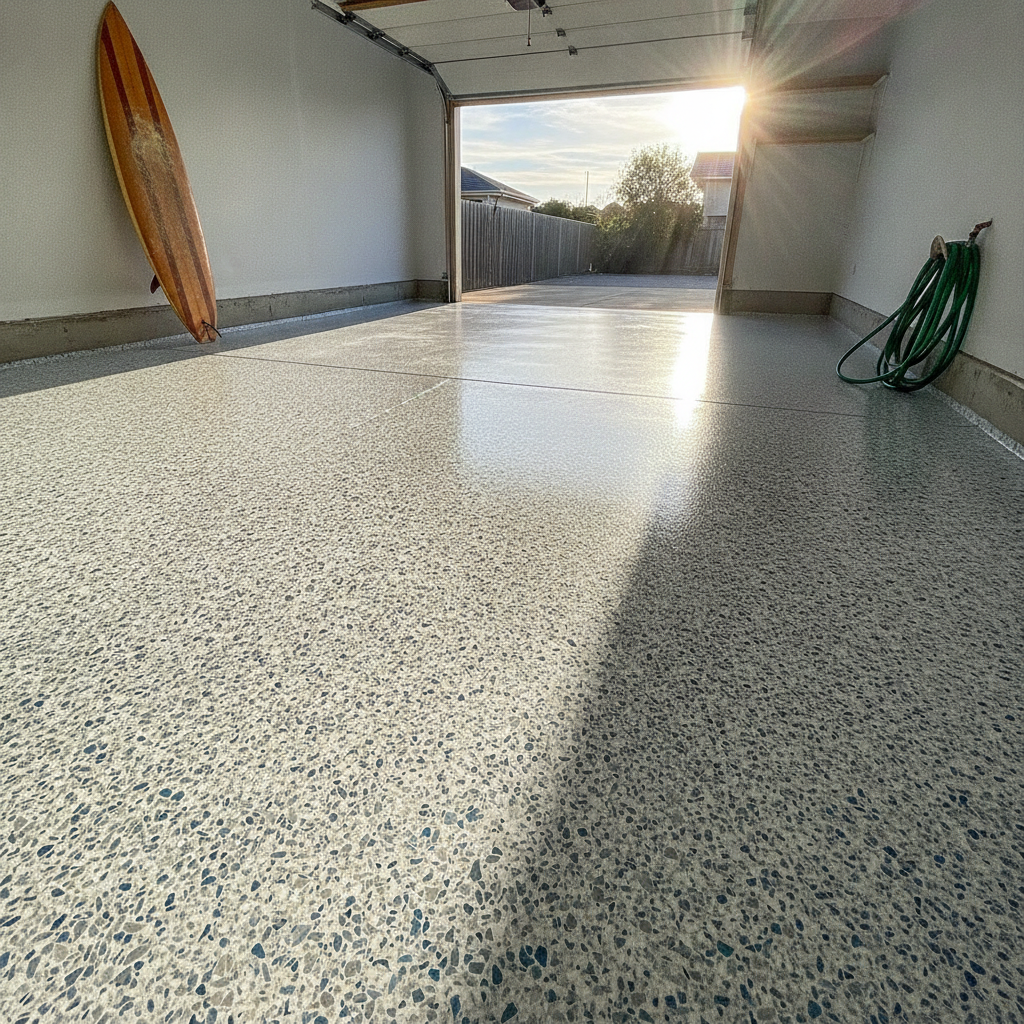
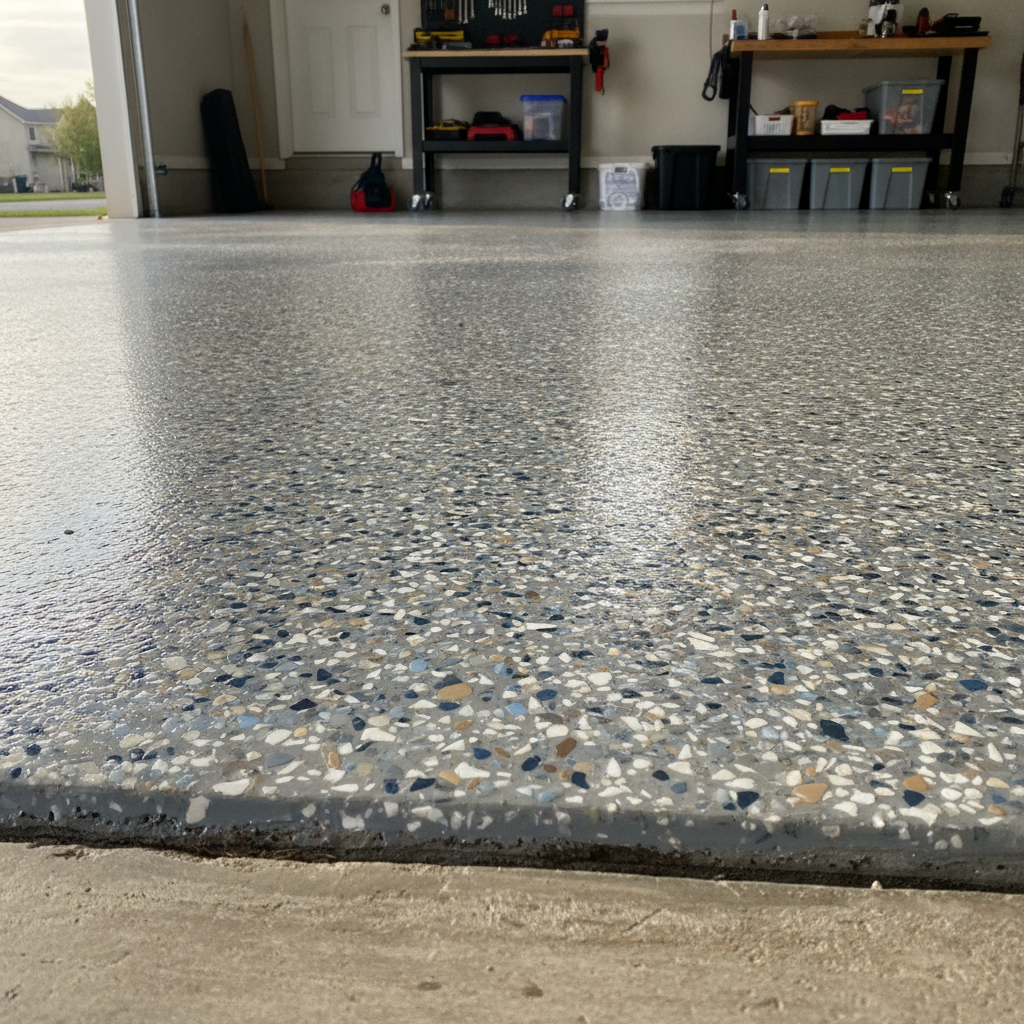
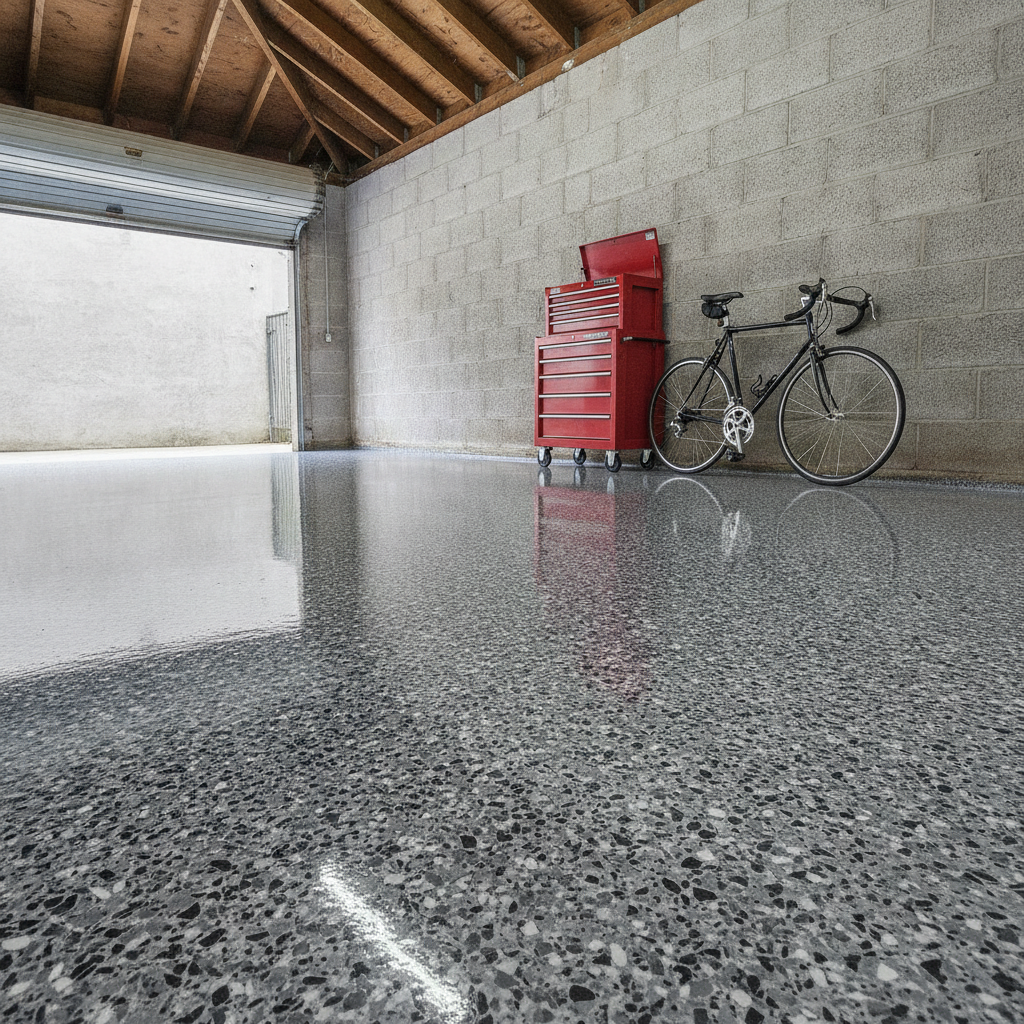
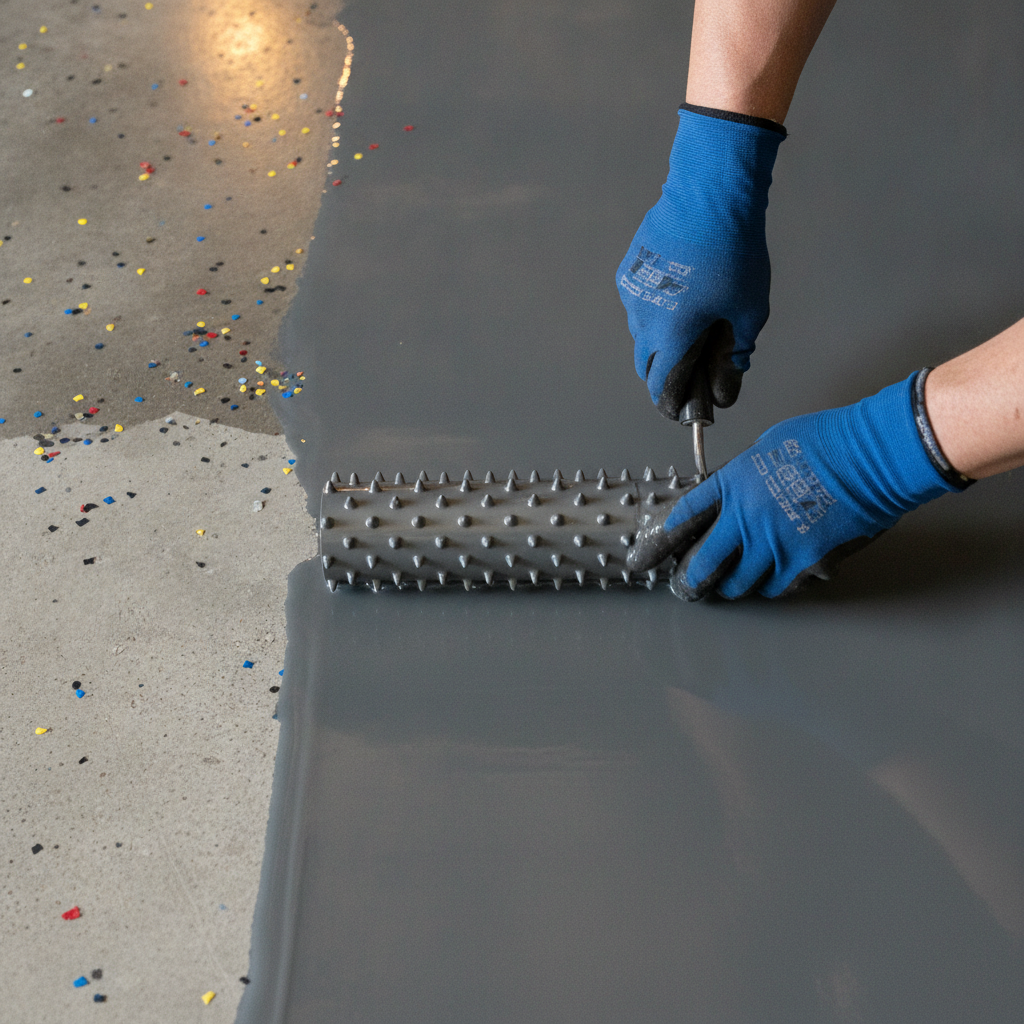
Decorative flake systems broadcast vinyl colour flakes into a wet base coat, then seal them under a clear topcoat. The result hides imperfections in the slab, adds texture for slip resistance and gives a finish that looks sharp enough for a showroom. This is arguably the most popular residential option right now because it delivers both performance and aesthetics in one system.

How do you choose the right garage floor coating for your situation?

Choosing the right garage floor coating comes down to three questions: how much traffic and chemical exposure will the floor see, how much downtime can you tolerate while the coating cures, and what finish do you want to look at every day. Answer those honestly and the field narrows quickly.

For a single-car garage used mainly for storage and occasional DIY work, a water-based epoxy with a clear polyaspartic topcoat is a solid, cost-effective combination. For a working workshop where petrol, oil and solvents are a daily reality, a thicker solvent-based epoxy base coat is worth the extra ventilation effort. For a double garage that doubles as a gym or entertaining area, a full flake broadcast system with a satin or gloss polyaspartic finish will hold up to foot traffic, look great and be easy to keep clean.

Cure time matters more than most people expect. If you need your car back in the garage on day two, a fast-cure polyaspartic system is the practical answer. If the garage is already empty and you can give the floor a full week, a conventional epoxy system is perfectly fine and generally more affordable.

Slab condition is also a factor. If your concrete has existing cracks, pitting or moisture coming up from below, those need to be addressed before any coating goes down. A coating applied over a damp or contaminated slab will delaminate, usually starting at the edges, and no amount of re-coating will fix it until the underlying problem is sorted.

What surface preparation is needed before applying a garage floor coating?

Surface preparation is the single most important factor in how long any garage floor coating lasts. The concrete needs to be clean, dry, structurally sound and mechanically profiled so the resin has a texture to grip. Skipping or rushing this step is the number one reason coatings fail prematurely.

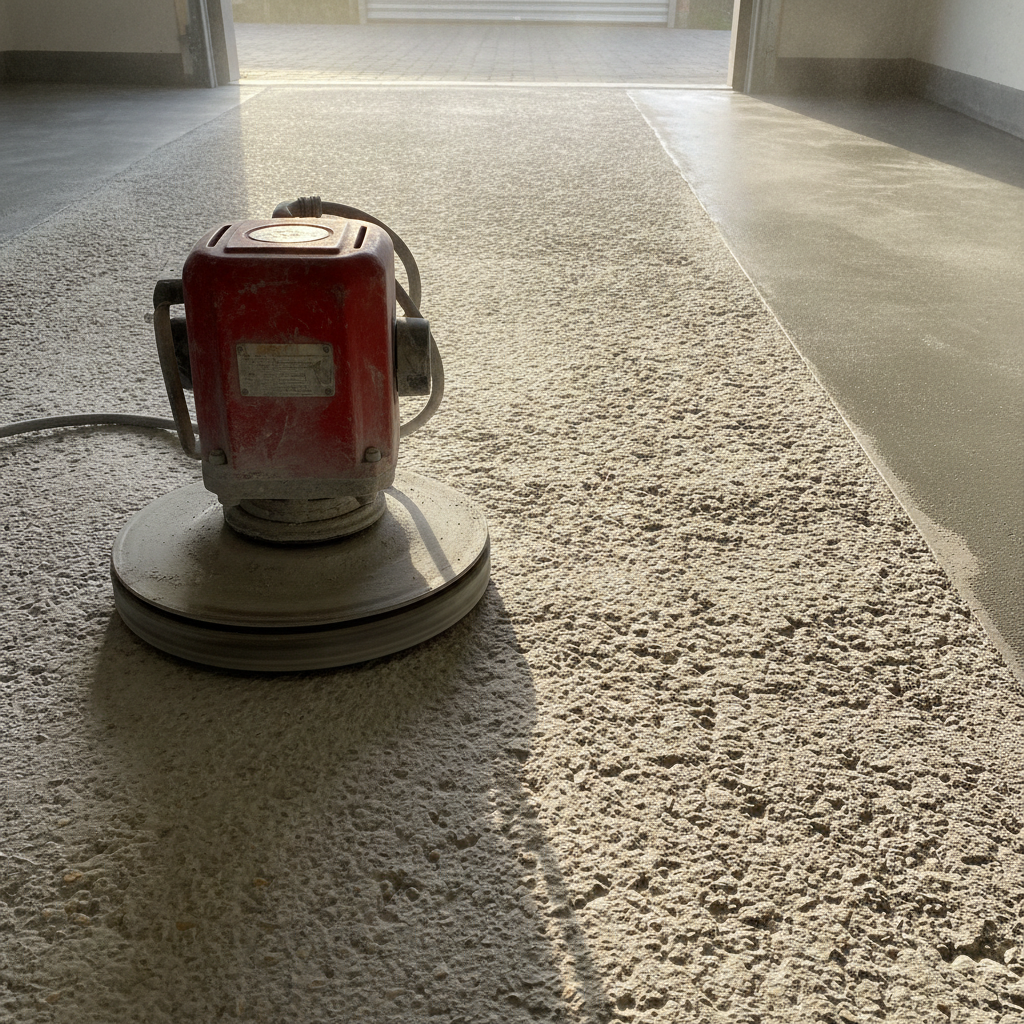
The industry standard for profiling residential concrete is diamond grinding. A walk-behind grinder fitted with diamond segment tooling removes laitance (the weak surface layer), opens the pores of the concrete and leaves a consistent profile. Shot blasting is used on larger commercial slabs but is less common in a standard double garage. Acid etching is sometimes offered as a cheaper alternative, but it is inconsistent on older or contaminated slabs and is generally considered second-best to mechanical grinding.

After grinding, the floor should be vacuumed thoroughly and allowed to dry completely. A moisture test, either a plastic sheet taped down overnight or a calcium chloride test, is worth doing if there is any history of water under the slab. In Melbourne suburbs built on reactive clay, slab moisture can be seasonal, so timing the job to a dry stretch is sensible.

Any cracks wider than a hairline should be filled with a semi-rigid epoxy filler before the base coat goes down. Rigid fillers crack again as the slab moves; semi-rigid products flex with the concrete and hold the repair over the long term.

How long does a garage floor coating last in Melbourne conditions?

A professionally applied, two-coat epoxy or polyaspartic system on a properly prepared slab should last somewhere between ten and twenty years in a typical residential garage. Real-world longevity depends on the quality of the products used, the thickness of the system, how much UV exposure the floor gets and how well the surface is maintained.

Melbourne’s climate is worth factoring in specifically. The city sits in a temperate zone but has a well-documented tendency toward rapid temperature swings, including the famous four-seasons-in-a-day pattern. Coatings that lack flexibility can micro-crack under repeated thermal cycling. That is one reason polyaspartic topcoats have become popular here: they remain slightly more flexible than standard epoxy clear coats at full cure, which helps them handle those temperature changes without crazing.

Maintenance is straightforward. A weekly sweep and a monthly mop with a pH-neutral cleaner is generally all that is needed. Avoid bleach-based cleaners on epoxy surfaces as they can dull the gloss over time. If the topcoat does eventually wear in high-traffic areas, a maintenance coat can often be applied without stripping the whole system back, which extends the life of the investment significantly.

Get a quote for garage floor coating in Melbourne
Garage Floor Ideas for Hoppers Crossing Homes: Which Coating Suits You?

Garage Floor Ideas for Hoppers Crossing Homes: Which Coating Suits You?

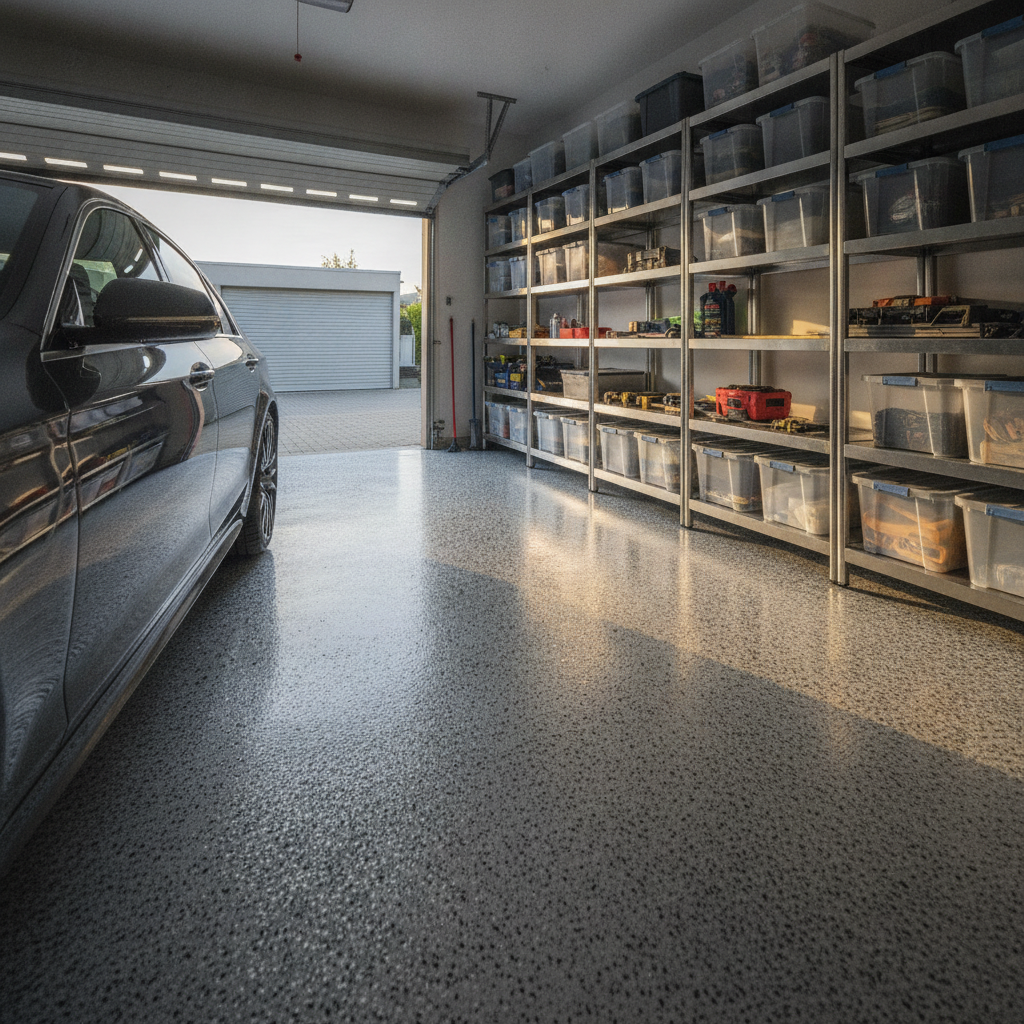
The best garage floor ideas for Hoppers Crossing homes come down to three practical options: solid epoxy colour, decorative flake (chip) systems and metallic epoxy finishes. Each suits a different budget, look and use case. Solid colour epoxy is the most affordable, flake adds slip resistance and texture, and metallic delivers a showroom-quality finish with depth and shimmer.

Why does your garage floor in Hoppers Crossing need coating at all?

An uncoated concrete garage floor in Hoppers Crossing will absorb oil, stain from tyre rubber and eventually begin to dust and pit. Melbourne’s western suburbs see genuine temperature swings across the seasons, and bare concrete expands and contracts with that heat, letting moisture push up from below. A quality coating seals the slab, stops dusting, resists chemical spills and makes the whole space easier to sweep clean. You also get a floor that actually looks like part of the house rather than an afterthought.

Most homeowners in the area are using their garages for more than just parking. Workshop benches, gym gear, bike storage, even a second living area. A coated floor makes all of that more comfortable and presentable, and it protects the concrete underneath so you are not looking at a resurfacing job in ten years.

What are the main garage floor coating options worth considering?

The three coatings that come up most often for residential garages are solid epoxy colour coats, vinyl flake (chip) broadcast systems and metallic epoxy. Each has a distinct look and a different set of practical strengths. Solid colour epoxy is a single-tone, high-gloss finish that is clean and modern. Flake systems broadcast coloured vinyl chips into a wet base coat then seal them under a clear topcoat, giving you texture, slip resistance and a speckled terrazzo-style look. Metallic epoxy uses pigment blends that swirl and shift with the light, creating a marbled or liquid-metal appearance.

Here is a quick way to think about each one:

  • Solid colour epoxy: Clean, modern, easy to maintain. Works well in workshops where you want to see dropped screws or spills clearly against a plain background. Usually the most cost-effective starting point.
  • Vinyl flake (chip) system: The most popular choice for family garages. The texture from the chips gives grip underfoot when the floor gets wet, and the multi-tone pattern hides the odd scuff or small stain between cleans. Systems like these are routinely specified to meet Australian Standards for slip resistance in wet conditions.
  • Metallic epoxy: The premium option. Pigment powders mix into the epoxy resin and are worked with a squeegee and blower to create unique swirling patterns. No two floors look identical. Popular in Hoppers Crossing homes where the garage doubles as a showroom for a project car or a tidy home gym.

Which garage floor idea suits the way you actually use your garage?

Match the coating to your real-world use rather than just the look. If your garage is mainly a parking and storage space that sees a fair bit of foot traffic and the occasional oil drip, a full flake broadcast system is your most practical pick. The textured surface grips wet boots and the pattern makes maintenance low-stress. If you run a home workshop and need bright, reflective light bouncing off the floor, a solid light-grey or off-white epoxy coat amplifies your workshop lighting noticeably. If the garage is a showcase space or a converted living area, metallic epoxy delivers a result that genuinely impresses.

Consider what sits on the floor too. Heavyweight car hoists, scissor lifts or racking systems need the concrete prepped and the coating applied at the right film thickness so the anchor points hold properly. A good applicator will discuss this before they start, not after.

How does concrete preparation affect the final result?

Concrete prep is where most cheap DIY kits fall apart, and it is the single biggest factor in how long your coating lasts. The slab surface needs to be mechanically abraded, usually by diamond grinding or shot blasting, to open up the pores and give the epoxy somewhere to grip. Acid etching alone (the approach sold in big-box hardware kits) rarely achieves adequate surface profile on a dense, trowelled garage slab.

Any cracks, spalling or low spots should be filled and levelled before coating goes down. Moisture coming up through the slab is the other common issue in Melbourne’s western suburbs, where older homes sometimes have slabs laid without an adequate vapour barrier underneath. A professional applicator will test moisture levels before they start. If moisture is above acceptable limits and coatings go down anyway, you end up with bubbling and delamination within months. Getting this step right is what separates a coating that lasts a decade from one that peels by the following winter.

What should you look for when getting quotes for garage floor coatings in Hoppers Crossing?

A few things separate a solid quote from a vague one. First, ask what surface preparation method is included. Diamond grinding is the industry standard for garage floors and should be listed explicitly, not just implied. Second, ask how many coats are going down and what the total dry film thickness will be. A proper residential floor system typically involves a primer or base coat, a broadcast layer (for flake systems) and at least one clear topcoat. Skimping on film thickness is the most common way to cut corners on price.

Third, ask about the topcoat. A polyaspartic or polyurethane topcoat is far more UV stable than a standard epoxy clear, which matters for garage doors that face north or west and let in direct afternoon sun. A coating that yellows within a year is nobody’s idea of a good investment. Finally, check that the person quoting is actually going to be on the tools. Subcontracting without telling the homeowner is more common than people realise in the floor coating trade.

How long does a professionally coated garage floor last in Hoppers Crossing?

A professionally installed epoxy floor coating in a residential garage, maintained reasonably well, should last ten to fifteen years before it needs attention beyond a light maintenance coat. The flake chip systems tend to be particularly durable because the clear topcoat takes the daily wear and the decorative layer underneath is protected. Metallic floors with a quality polyaspartic topcoat hold their gloss and colour well even in high-UV situations.

Day-to-day care is simple: a soft broom or dust mop for regular cleaning, a mild ph-neutral cleaner for spills, and avoiding dragging sharp metal objects across the surface. Hot tyre pickup (where rubber transfers from warm tyres onto the floor surface) is reduced significantly by using a polyaspartic or polyurethane topcoat rather than a standard epoxy clear. That is worth asking about specifically when you are comparing quotes, because it is a common complaint with lower-spec installations.

If you are ready to choose a finish and get a proper price on the work, Get a garage floor coating quote in Hoppers Crossing from Metal and Flake.

Garage Floor Ideas for Essendon Homes: Epoxy, Flake and Beyond

Garage Floor Ideas for Essendon Homes: Epoxy, Flake and Beyond

The best garage floor ideas for Essendon homes combine a hard-wearing coating with a finish that suits the home’s style. Epoxy base coats topped with decorative flake are the most popular choice because they resist oil, tyre scuff and Melbourne’s temperature swings while looking far sharper than bare concrete. Expect a properly installed system to last well over a decade with minimal upkeep.

Why does bare concrete make such a poor garage floor in Essendon?

Bare concrete is porous, which means oil drips, brake fluid and garden chemicals soak straight in and stain permanently. Essendon’s older homes, many built between the 1940s and 1970s, often have slab concrete that has never been sealed. That concrete absorbs moisture, dusts constantly underfoot and starts to spall or flake at the surface after years of traffic and seasonal expansion. Once it gets to that point, sweeping is a battle you never quite win, and the dust ends up on your car, your tools and your workbench. A coated floor fixes all of that in a single job.

What are the most popular garage floor coating options available today?

The most popular garage floor coating options are epoxy base coats, polyaspartic topcoats, vinyl flake systems and polyurea blends. Each suits a different budget and performance need. Epoxy provides excellent adhesion and chemical resistance. Polyaspartic cures faster and handles UV exposure better outdoors. Vinyl flake adds grip and hides minor surface imperfections. Polyurea is extremely durable but typically costs more per square metre.

Here is a quick breakdown of how those options stack up for a typical Essendon double garage (roughly 40 to 50 square metres):

  • Solid epoxy coat: Clean, gloss finish. Great for workshop spaces where you want maximum chemical resistance.
  • Epoxy base with vinyl flake broadcast: The most requested finish. Flakes hide minor surface texture, add slip resistance, and come in dozens of colour blends to match the home’s exterior palette.
  • Metallic epoxy: A single-colour, pearlescent finish that creates a flowing, three-dimensional look. Popular in newer homes where the garage is partly a showroom for the car collection.
  • Polyaspartic topcoat over epoxy base: The two-coat system used by professional applicators. The polyaspartic layer is harder, UV-stable and fully cured in around 24 hours, which matters when you need the car back in the garage quickly.

How does a flake system work for a garage floor coating?

A flake system works by broadcasting small vinyl colour chips into a wet epoxy base coat at a controlled density, then locking them under a clear topcoat. The chips are pressed flat during the topcoat stage, creating a smooth surface that still has subtle texture for grip. Broadcast density can range from a light scatter to a full broadcast that completely hides the base colour underneath.

Full broadcast flake is particularly practical for Essendon homeowners because it hides hairline cracks, minor pitting and the uneven colour that is common in older slabs. The topcoat, usually a polyaspartic or aliphatic urethane, is what gives the floor its gloss level and its resistance to tyre marks. A quality topcoat applied at the right film thickness means tyres can spin on the spot without leaving the black scuffs you see on cheaper single-coat systems.

Colour choice matters more than people expect. Essendon homes tend to run toward classic heritage palettes: Federation reds, cream weatherboards and dark Colorbond roofs. A flake blend in grey, charcoal and white reads as clean and contemporary without clashing with those exterior tones. Warmer blends in beige, tan and brown suit homes with timber garage doors and sandstone render.

What preparation does a concrete slab actually need before coating?

Concrete preparation is the step that determines whether a coating lasts five years or fifteen. Diamond grinding is the industry standard method: it opens the concrete’s pores mechanically so the epoxy bonds at a chemical level rather than just sitting on top. Shot blasting is used on larger commercial floors but is less common in residential garages.

Beyond grinding, the installer needs to check for moisture. Essendon sits on Melbourne’s basalt plain, and many older slabs have no membrane underneath them at all. A simple calcium chloride test or a surface relative humidity probe will reveal whether moisture vapour is migrating up through the slab. If it is, a moisture-tolerant primer goes down before the epoxy base. Skipping this step is the number one reason DIY epoxy kits fail: the coating lifts at the edges within a year because the moisture has nowhere else to go.

Crack repair is the other key prep task. Hairline cracks can be filled and ground flat. Structural cracks, the type that move with the seasons, need a flexible filler rather than a rigid epoxy paste, otherwise the crack telegraphs back through the coating.

How long does a garage floor coating take to install and cure?

A typical residential garage floor coating takes one to two days on-site, with a full return-to-vehicle cure of around 24 to 72 hours depending on the system. Polyaspartic topcoats cure significantly faster than standard epoxy, which is why most professional applicators now use them as the finishing layer. Ambient temperature and humidity on the day affect cure time, and Melbourne’s shoulder seasons (autumn and spring) are generally ideal conditions for epoxy work.

The grinding and prep normally happen on day one. Base coat and flake broadcast go down the same day or early on day two. The topcoat follows once the base has cured to the right hardness. Most homeowners park a light vehicle back on the floor within 48 hours and return to full use within a week.

What are the practical benefits of a coated garage floor for Essendon homeowners?

A coated garage floor in Essendon delivers four clear practical benefits beyond appearance. First, cleaning drops to a quick sweep and occasional mop: oil and grease sit on the surface rather than soaking in. Second, the reflective finish bounces light around the garage, which makes working in the space noticeably safer and more comfortable without adding extra lighting. Third, a professionally installed coating adds tangible value to the property, particularly as Essendon’s real estate market continues to reward well-presented homes. Fourth, the coating protects the slab itself, slowing the deterioration that leaves bare concrete increasingly expensive to repair over time.

For tradies who use the garage as a workshop, the slip resistance built into a flake system is a genuine safety improvement over smooth concrete, especially when the floor gets wet from washing a car or a bit of Melbourne rain blowing in under the door.

Is a garage floor coating a DIY job or better left to a professional?

Garage floor coating is not a straightforward DIY job for most homeowners. The prep work alone, diamond grinding, crack filling, moisture testing, requires equipment that most people do not own and skills that take time to develop. DIY epoxy kits sold at hardware stores use thinner formulations than trade-grade products, and without proper surface preparation the results rarely last more than two or three years before peeling begins. A professional applicator using a proper multi-coat system will charge more upfront, but the cost per year over a 15-plus year lifespan works out considerably lower than patching or redoing a failed DIY attempt.

That said, homeowners can absolutely prepare by clearing the garage completely before the crew arrives, checking for oil stains that might need a degreaser pre-treatment, and deciding on a flake colour blend before the quote visit so the conversation is productive from the start.

Get a garage floor coating quote in Essendon from Metal and Flake.

Epoxy Flake Flooring in Williamstown: Protect Your Garage Near the Bay

Epoxy Flake Flooring Williamstown: Protect Your Garage Near the Bay

Epoxy flake flooring in Williamstown gives garage and workshop floors a hard, sealed surface that resists the salt air, damp and grime that coastal living throws at bare concrete. A broadcast vinyl flake system bonds directly to the slab, locks out moisture and delivers a slip-resistant finish that holds up for years with minimal maintenance.

Why does living near Port Phillip Bay make epoxy flake flooring Williamstown a smart choice?

Coastal air carries salt particles that work into porous concrete and corrode it from within. In Williamstown, homes sit close enough to the bay that garages and outdoor slabs cop a genuine beating from humidity and salt-laden breezes. Epoxy forms a non-porous barrier that stops moisture migrating up through the slab and keeps salt from making contact with the concrete underneath. The result is a floor that does not pit, spall or stain the way bare concrete does over a Melbourne coastal winter.

Bare concrete is more vulnerable than most people realise. Salt crystallises inside the pores of untreated concrete as it dries, and that crystal growth creates micro-fractures over time. Once those cracks form, water gets in, and in a suburb like Williamstown where the bay breeze is almost constant, that cycle repeats every season. A sealed epoxy floor breaks the cycle entirely.

Beyond protection, there is the practical side. A garage near the water tends to double as a boat maintenance area, a bike workshop or a storage zone for sailing gear. All of those uses mean oil, grease, salt water and general grime on the floor. Epoxy wipes down fast, does not absorb spills and does not hold onto the smell of old bilge water the way raw concrete does.

What exactly is a flake epoxy floor system and how does it work?

An epoxy flake floor system is a multi-layer coating applied to a prepared concrete slab. A basecoat of pigmented epoxy resin goes down first, then vinyl flakes (sometimes called colour chips or decorative flakes) are broadcast across the wet surface at full or partial coverage. Once the base cures, excess flakes are scraped back, and a clear topcoat of either polyurethane or polyaspartic is applied over everything to lock the flakes in place and protect the surface.

The flakes do more than just look good. They create a light texture across the surface that improves grip underfoot, which matters in a garage where wet footwear and oil drips are a given. That texture is subtle enough that the floor is still easy to sweep and hose down, but enough to prevent the glassy slip hazard you get with a plain solid-colour epoxy coat.

Polyaspartic topcoats, which have become the industry standard for residential garages, cure much faster than older polyurethane finishes. A quality polyaspartic topcoat can be walked on within a few hours and ready for vehicle traffic inside 24 hours. That means a typical two-car garage in Williamstown can be done and back in use within a day or two rather than a week.

How long does an epoxy flake floor actually last in a coastal environment?

A properly installed epoxy flake floor in a coastal suburb like Williamstown should realistically last 10 to 20 years with normal use before it needs any significant attention. The longevity depends heavily on two things: how well the concrete was prepared before coating, and whether a UV-stable topcoat was used. Skipping either shortens the life considerably.

Concrete preparation is the part that separates a quality job from a floor that peels in two years. The slab needs to be ground or shot-blasted to open up the surface profile so the epoxy can mechanically bond to it. Any cracks, control joints or moisture issues need to be addressed before the first coat goes down. A floor laid over a damp or poorly profiled slab will delaminate, regardless of how good the product is.

UV-stable topcoats matter especially for Williamstown garages with roller doors that face north or west. Epoxy resins on their own yellow and chalk when hit by direct sunlight, but a quality polyaspartic or aliphatic polyurethane topcoat does not. Specifying UV stability is a small detail that makes a visible difference ten years down the track.

Regular maintenance is straightforward: a sweep, an occasional mop with a mild detergent and prompt cleanup of oil or chemical spills. Avoid dragging heavy steel objects across the surface, and the floor will keep its finish for well over a decade.

What should Williamstown homeowners look for when choosing a flake floor installer?

The first thing to look for is proper surface preparation equipment. Any installer who is not using a diamond grinder or shot blaster on the slab before they coat it is cutting corners that will cost you later. Ask directly what prep method they use and what moisture testing they do before they start, especially for a slab that is close to sea level or has any history of damp.

Check that the topcoat being quoted is UV-stable and appropriate for the use. A residential garage that sees daily vehicle traffic needs a harder, more chemically resistant topcoat than a light pedestrian area. Polyaspartic topcoats from reputable manufacturers such as Duram or Sika carry published technical data sheets that list abrasion ratings and chemical resistance, so you can compare products rather than just taking a salesperson’s word for it.

Ask to see examples of completed work in similar coastal conditions, and ask how long the installer has been working in the Melbourne market. Flake systems applied in Sydney or Brisbane do not always account for Melbourne’s specific climate: cool, damp winters followed by hot, dry summers cause more slab movement than in milder climates, and the coating system needs to be flexible enough to handle that without cracking.

Finally, get a written quote that itemises surface preparation, the specific products being used, the number of coats and the warranty terms. A confident, experienced installer has nothing to hide in those details.

What colour flake options work well in a Williamstown garage?

Neutral blends tend to work best in garages because they hide tyre marks and everyday dirt between cleans. Grey-based blends with white and black flakes are the most popular choice for residential garages across Melbourne’s inner west, and they suit Williamstown’s mix of Victorian-era homes and contemporary renovations equally well. Earthy tones with brown and cream flakes are a good option if the garage connects directly to a living area and you want a warmer feel.

Full broadcast coverage (where the flakes cover the entire floor and hide the basecoat completely) gives a more polished, uniform look and is generally easier to clean than partial broadcast. Partial broadcast leaves some of the basecoat colour visible and creates a more terrazzo-like appearance that some homeowners prefer.

Keep in mind that darker basecoats under a full broadcast system make the overall floor read darker, even when the flake blend itself is light. It is worth asking your installer to lay down a small sample area so you can see how the finished colour lands in your specific garage before committing to the full floor.

Ready to get a durable, good-looking floor that stands up to life near the bay? Book an epoxy flake floor installation in Williamstown with Metal and Flake.

Metallic Epoxy Floors in Coburg: Luxury Finish for Your Garage

Metallic Epoxy Floors in Coburg: Luxury Finish for Your Garage

Metallic epoxy in Coburg gives garage floors a deep, three-dimensional sheen that looks far more expensive than standard grey concrete. The coating bonds directly to the slab, hides imperfections, and resists oil, tyre marks and heavy foot traffic. Most residential garages in Coburg are done and ready to walk on within two to three days.

What exactly is a metallic epoxy floor finish?

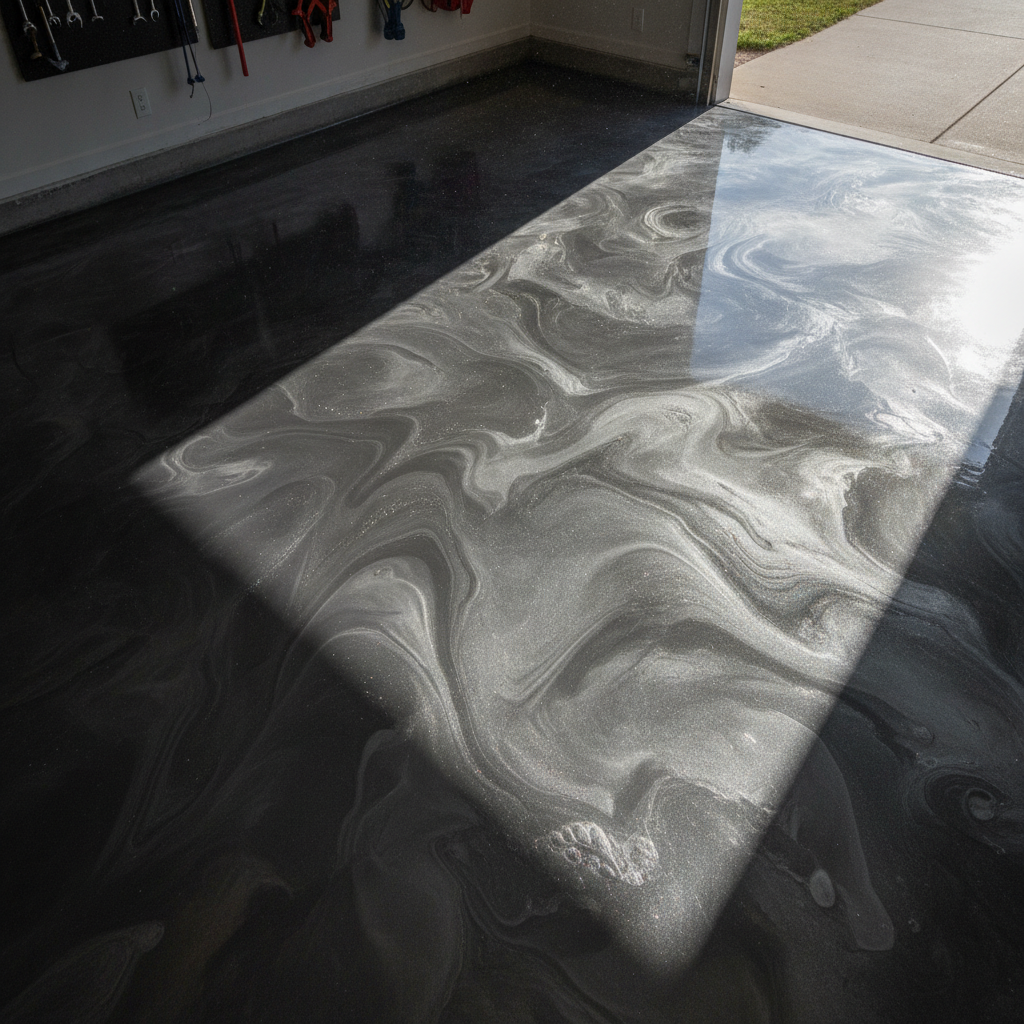
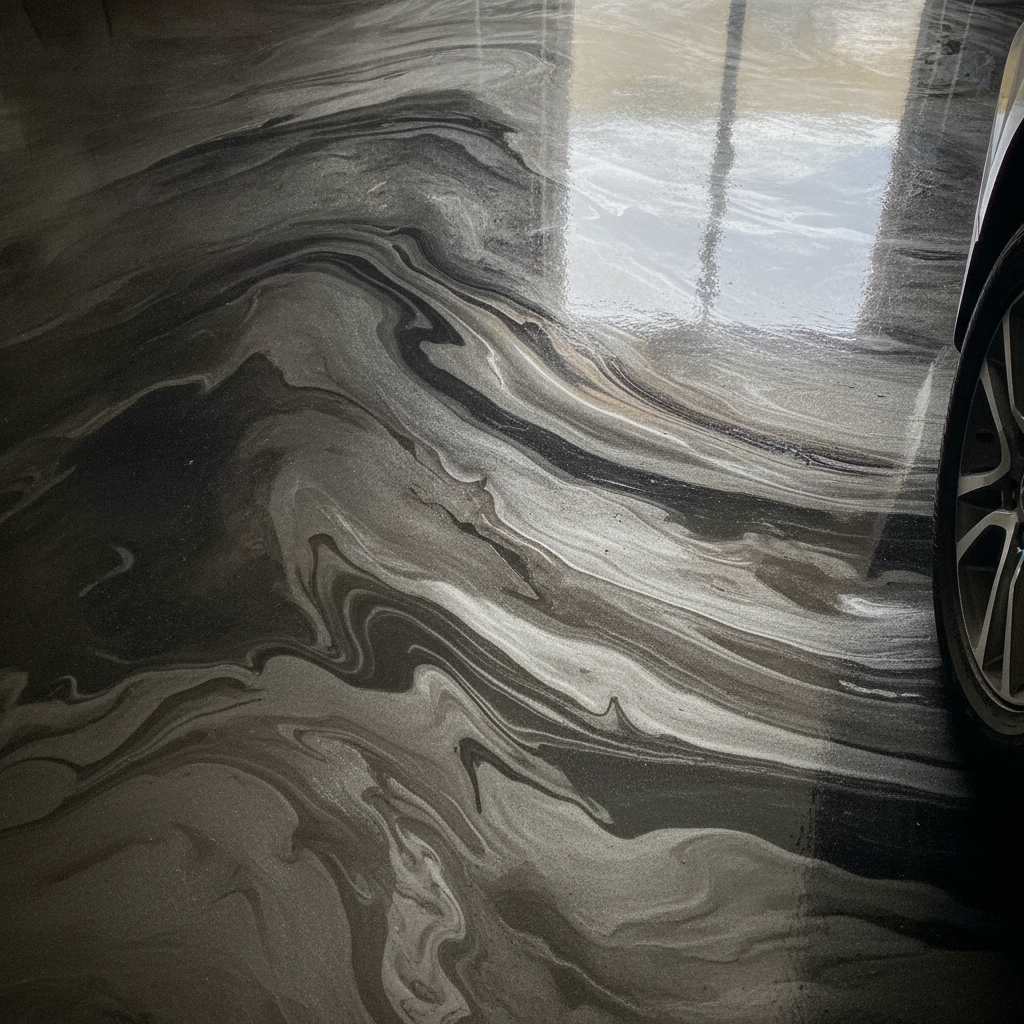
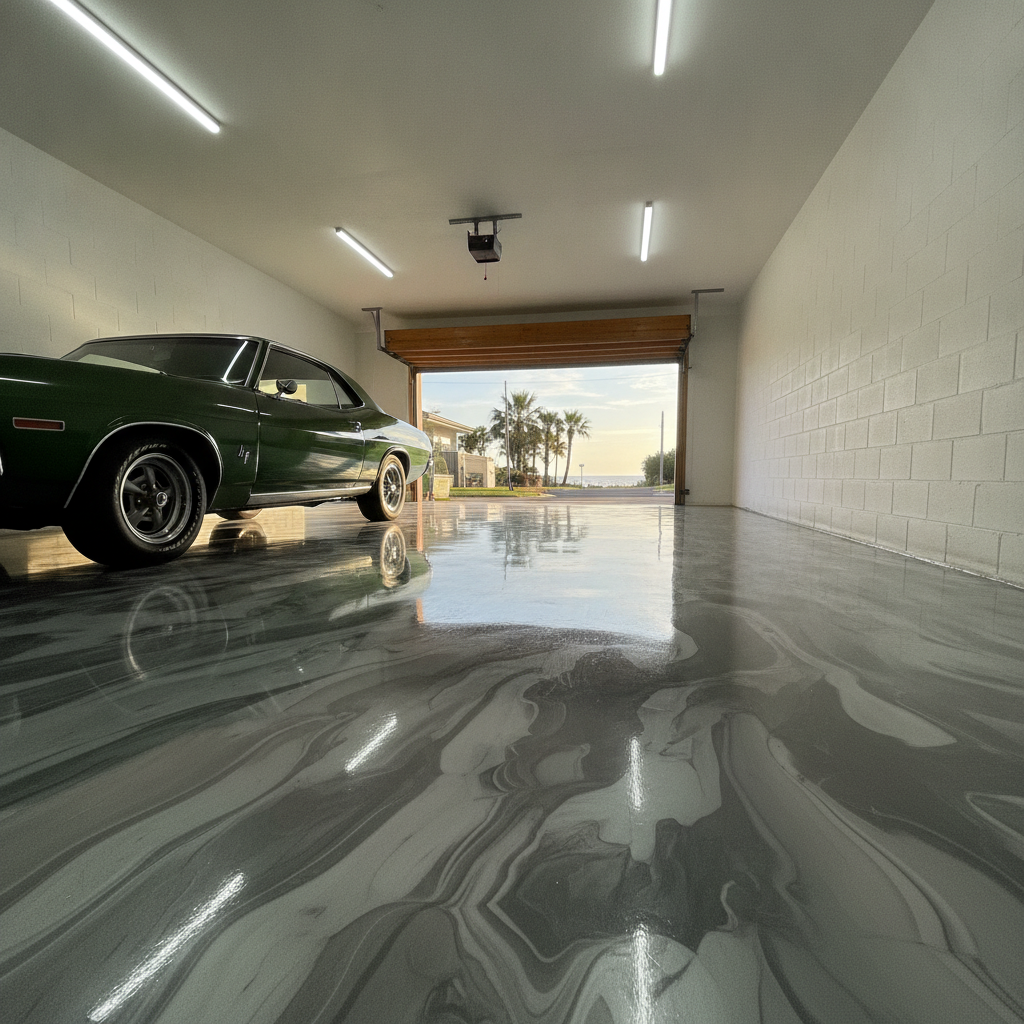
Metallic epoxy is a two-part resin system with fine metallic pigments suspended inside it. When spread across a prepared concrete slab, the pigments swirl and settle into unique wave-like patterns. No two floors ever look the same. The result is a seamless, high-gloss surface that reflects light and gives any space a premium, almost liquid appearance.

The metallic effect comes from how the applicator moves the resin while it is still wet. Using a squeegee, roller or even a heat gun to shift the pigment, the installer creates depth and movement in the coating. That technique is part art, part science, and it is why the skill of the person doing the work matters so much to the final result.

A properly installed metallic epoxy system typically consists of three layers: a primer or base coat that soaks into the concrete and creates a mechanical bond, the pigmented metallic layer itself, and a clear polyurethane or epoxy topcoat that protects the colour and adds durability. That topcoat is what gives the floor its resistance to scuffs, chemicals and UV light over the long term.

Why are Coburg homeowners choosing metallic epoxy for their garages?

Coburg homeowners are choosing metallic epoxy because it upgrades the garage from a purely functional space into something they actually enjoy using. The finish is durable enough for daily vehicle use, easy to clean with a mop, and visually striking enough to double as a workshop, home gym or entertainment area without looking out of place.

Coburg sits in Melbourne’s inner north, and plenty of its homes were built in the mid-twentieth century. Those properties tend to have older concrete slabs with surface staining, small cracks and years of oil drips built in. A metallic epoxy coating covers all of that. Once the concrete is diamond-ground and any cracks are patched, the finished surface looks nothing like what was underneath it.

There is also a practical argument. Bare concrete is porous. It soaks up every oil drip, brake fluid spill and water stain your car tracks in. A sealed epoxy floor means spills sit on the surface and wipe away in seconds. For anyone who works on vehicles, keeps bicycles or stores tools in the garage, that alone is worth the investment.

Colour options are broad. Popular choices for residential garages include gunmetal grey with silver flake, champagne gold, ocean blue with pearlescent tones, and deep charcoal with bronze shimmer. The palette is wide enough that the floor can complement the house’s existing interior palette rather than clash with it.

How does the metallic epoxy installation process work?

Installation follows a clear sequence, and understanding it helps you plan around the work. Surface preparation takes the most time. The installer uses a walk-behind diamond grinder to open the concrete and remove any contamination. This step is non-negotiable: epoxy will peel if it goes onto an unprepared or contaminated slab. Cracks and pitting are filled with a flexible filler and left to cure before any coating goes down.

Once the slab is prepped and vacuumed clean, the primer coat goes on. This soaks into the concrete and creates the foundation the metallic layer bonds to. After the primer cures (usually overnight), the mixed metallic epoxy is poured and worked across the floor. The installer manipulates the pigment to create the desired pattern, then leaves it to cure again.

The final topcoat seals everything in. Most residential jobs in a standard double garage (around 36 to 40 square metres) are completed over two days, with a walk-on cure time of about 24 hours and a full vehicle-weight cure of around 72 hours. That means you are typically back in the garage by day three or four.

Temperature matters during installation. Melbourne’s inner north can get hot in summer, and high ambient temperatures can shorten the working time of the resin mix. Experienced installers account for this by working early in the day during warmer months, or choosing suitable product formulations for the conditions.

How much does metallic epoxy flooring cost in Coburg?

Metallic epoxy costs more than a basic solid-colour epoxy system, and that is a straightforward reflection of the materials and the extra skill involved in creating the metallic effect. For a residential garage in Coburg, pricing generally depends on floor size, the extent of preparation required and the colour system chosen.

As a rough guide, metallic epoxy systems sit at a higher per-square-metre rate than standard flake epoxy coatings, largely because the pigments themselves are more expensive and the application technique is more labour-intensive. A floor with heavy contamination, deep cracks or previous coating that needs grinding off will cost more to prepare than a clean, bare slab.

It is worth being cautious of very cheap quotes. A floor that peels within twelve months because the concrete was not properly prepared costs more in the long run than a quality job done right the first time. Ask any installer what preparation method they use and whether they diamond-grind or shot-blast the surface. Those two questions will tell you a lot about how seriously they take the work.

How long will a metallic epoxy garage floor last in Coburg?

A well-installed metallic epoxy garage floor in Coburg can last ten to twenty years with basic maintenance. The key variables are the quality of the surface preparation, the product system used and how the floor is looked after day to day. UV-stable topcoats are essential for any area that gets direct sunlight through garage doors or windows, as cheaper systems can yellow or chalk over time.

Day-to-day care is straightforward. Sweep or blow out dust and grit regularly, because fine particles act like sandpaper underfoot and dull the topcoat over time. Mop with a neutral pH cleaner and water. Avoid dragging sharp metal objects directly across the surface. If you are parking vehicles, check that the tyres are not leaving hot tyre marks. This happens when tyres heat up on the road and then sit on the epoxy. A quality polyurethane topcoat resists this far better than a standard epoxy clear alone.

If the topcoat does wear in a high-traffic area after several years, it can often be recoated without having to redo the entire floor system. That makes maintenance a sensible, cost-effective option rather than a full replacement.

Is a metallic epoxy floor suitable for Coburg’s climate?

Yes. Coburg’s climate sits firmly within Melbourne’s temperate range, with warm to hot summers and cool winters. Properly formulated and installed epoxy handles this range without issue. The coating is non-porous, so it does not absorb moisture that could cause it to lift during damp winters. The topcoat protects the colour layer from the UV exposure that comes with Melbourne’s summer sun.

The one thing to keep in mind is that the installation itself should not happen on an extremely hot day without adjusting the product choice and working method. A professional installer will know this and plan accordingly. If a quote comes back with no mention of temperature or humidity considerations, that is worth asking about.

Concrete slabs in Coburg’s older homes can also carry residual moisture, particularly if they were poured without a proper moisture barrier. A moisture test before coating is standard practice for any reputable installer, and addressing high moisture vapour emission before coating prevents the delamination issues that can plague floors done without this check.

Ready to see what a metallic epoxy floor can do for your Coburg garage? Request a metallic epoxy floor installation quote in Coburg from Metal and Flake.

Metallic Epoxy Floors in Preston: Design Ideas for Your Garage

Metallic Epoxy Floors in Preston: Design Ideas for Your Garage

Metallic epoxy in Preston garages delivers a high-gloss, three-dimensional finish that looks far more expensive than standard grey paint. It combines metallic pigments with a clear epoxy resin, creating flowing, lava-like patterns that are completely unique to each pour. It is durable, chemical-resistant and easy to clean, making it a practical upgrade for any working garage.

What exactly is a metallic epoxy floor and why is it popular in Preston garages?

A metallic epoxy floor is a two-part epoxy coating mixed with fine metallic or pearlescent pigments. When spread across a prepared concrete slab, the installer uses a squeegee or blower to manipulate the pigments into swirling, wave-like patterns. No two floors look identical. The result is a seamless, high-build surface typically 2 to 3 mm thick that bonds directly to the concrete. Preston homeowners choose it because the suburb has a strong mix of older double-fronted homes with underused garages, and metallic epoxy turns a scruffy slab into a genuine feature space without a renovation-scale budget.

The finish also holds up to the everyday realities of garage life. Motor oil, brake fluid, coolant and even battery acid sit on the surface rather than soaking in. A quick mop and the floor looks factory-fresh again. Compare that to bare concrete, which absorbs every spill and dusts constantly onto tyres and shoes.

Which metallic epoxy colours and design styles work best for a Preston garage?

The most popular metallic epoxy colour choices for Preston garages are charcoal-silver, bronze-copper, midnight blue and gunmetal grey, because they complement the dark brick and weatherboard tones common to homes in the area. Each colour palette can be layered to create depth: a dark base coat with a lighter metallic mid-coat produces the signature three-dimensional shimmer that metallic epoxy is known for.

Beyond colour, there are a handful of design styles worth considering. The first is the classic single-colour swirl, where one metallic pigment is manipulated into organic wave patterns across the whole slab. It reads as clean and modern and suits garages that double as workshops or home gyms. The second is a dual-tone blend, where two complementary pigments (think pewter and copper, or navy and silver) are poured together and swirled into a marble-like effect. This works beautifully in a showroom-style garage where a car or bike is on display. The third option is a veining design, where a thin contrasting colour is dragged through the wet coat using a notched squeegee to mimic natural stone. For a Preston terrace where the garage opens onto a courtyard, veining in white-and-grey can tie the indoor and outdoor areas together visually.

A practical design tip: go lighter in a single-car garage with limited natural light. Lighter metallics like pearl-white or champagne bounce light around a small space and stop it feeling like a bunker. Darker tones like charcoal and bronze are better suited to double garages or spaces with skylights, where there is enough ambient light to show off the depth in the finish.

How does the metallic epoxy installation process work on a Preston slab?

Getting the prep work right is the single biggest factor in how long a metallic epoxy floor lasts. The concrete must be diamond-ground or shot-blasted to open the surface profile, which gives the epoxy mechanical adhesion. Any cracks, spalls or pitting are filled with a flexible repair compound before the first coat goes down. On a standard single-car garage slab of around 20 square metres, thorough prep typically takes the better part of a day.

Once the slab is clean and profiled, the installer rolls or squeegees a primer or base coat. The metallic pigments are then added to the mid-coat and spread quickly before the installer uses a heat gun or leaf blower to push the pigment into the desired pattern. This is where the craftsmanship shows. Getting clean, controlled movement in the pigment requires experience, because the working time on most metallic systems is around 20 to 30 minutes before the coat starts to set. A clear topcoat (usually a polyaspartic or polyurethane) then goes over the whole floor to protect the metallic layer and add the final gloss level. The complete system needs 24 hours before light foot traffic and around 72 hours before parking a vehicle on it.

Temperature matters in Preston. Melbourne’s northern suburbs can push past 35 degrees in summer, which shortens pot life and working time considerably. A professional crew will schedule metallic pours for cooler parts of the day or use a temperature-controlled curing window. That is one reason DIY kits from the hardware store rarely deliver the swirling, seamless result you see in professional photos.

What should a Preston homeowner budget for metallic epoxy in their garage?

Metallic epoxy costs more than a standard solid-colour epoxy system because the pigments, the additional mid-coat layer and the skill required to create the pattern all add to the job price. As a rough reference point, metallic systems in Melbourne typically run from around $80 to $120 per square metre installed, depending on slab condition, the complexity of the design and the number of coats. A 20-square-metre single garage sits roughly in the $1,600 to $2,400 range. A double garage at 40 square metres brings the per-square-metre cost down a little as fixed set-up costs are spread across more area.

The slab condition in older Preston homes is the biggest wildcard. A slab with significant cracking, previous paint coatings or oil saturation will need more prep time and potentially a moisture barrier, which adds cost. That is why a site visit and a firm written quote is always worth getting before committing to any system.

How do you maintain a metallic epoxy floor in a working garage?

Day-to-day maintenance is straightforward. Sweep out grit and sand regularly, because fine abrasive particles underfoot are the main thing that dulls a high-gloss topcoat over time. Mop with warm water and a small amount of pH-neutral cleaner every few weeks. Avoid bleach and acidic cleaners, which can cloud the topcoat finish. If you use car jack stands, put rubber pads under the feet to prevent point-load indentations in the epoxy. The topcoat on a professionally installed system is hard, but it is not indestructible under a concentrated load.

Most professionally installed metallic epoxy floors in a domestic garage setting will hold their gloss and resist staining for ten years or more with basic care. If the topcoat eventually shows wear in high-traffic areas, a recoat of clear polyaspartic is a far less disruptive fix than starting from scratch, because the epoxy base layer underneath remains bonded to the slab.

Preston garages are worth investing in properly. The suburb is tightly held, property values have tracked consistently upward over the past decade, and a well-finished garage adds genuine appeal when it comes time to sell or lease. A metallic epoxy floor is one of those upgrades that looks impressive to visitors but actually earns its keep through low maintenance and long service life.

Ready to see what a metallic finish would look like on your slab? Request a metallic epoxy floor quote in Preston from Metal and Flake.

Metallic Epoxy Floors in Williamstown: Coastal Home Garage Guide

Metallic Epoxy Floors in Williamstown: Coastal Home Garage Guide

Metallic epoxy in Williamstown is a popular garage flooring choice because it combines a high-gloss, three-dimensional finish with a surface tough enough to handle salt air, tyre traffic and the general demands of a coastal home. Installed correctly over prepared concrete, a metallic epoxy system typically lasts well over a decade with minimal upkeep. It suits both single garages and large double bays.

Why do Williamstown homeowners keep choosing metallic epoxy for their garages?

Williamstown homeowners choose metallic epoxy because it holds up against the moisture and salt exposure that come with living close to Port Phillip Bay, while delivering a finish that looks far more polished than a standard grey concrete slab. The swirling, pearlescent effect also photographs well, which matters if you’re renovating ahead of a sale.

Drive down any street near the Williamstown waterfront and you’ll spot garages that have clearly been upgraded. Part of that is the suburb itself: it’s an older, character-rich area where people invest seriously in their homes. Garage floors are no longer an afterthought. They’re part of the overall presentation, and a metallic epoxy system with its liquid-marble look can genuinely make a bland garage feel like an extension of the house.

From a practical standpoint, a fully sealed epoxy floor resists the salt-laden moisture that drifts in off the bay. Bare concrete is porous. It soaks up salt, oil and water over time, which leads to spalling, cracking and staining. A properly applied metallic epoxy system seals the slab completely, so there’s nothing to absorb and nothing to degrade.

What makes coastal concrete in Williamstown different to prep?

Coastal concrete in Williamstown often contains higher residual moisture than inland slabs because of the bay’s humidity and the suburb’s older housing stock. That moisture has to be properly managed before any epoxy coating goes down. Skipping adequate moisture testing and surface preparation is the single biggest reason epoxy floors fail prematurely in coastal environments.

Many Williamstown homes were built between the 1880s and the 1960s, which means the concrete in attached garages or converted stables can be genuinely old. Older slabs were often laid without a moisture barrier underneath, so moisture vapour transmission (MVT) can be a real issue. A good installer will test MVT using a calcium chloride or relative humidity probe before specifying which primer to use. A moisture-tolerant epoxy primer makes all the difference on a slab that reads high.

Surface prep itself typically involves diamond grinding or shot blasting to open up the concrete’s pores and give the epoxy something solid to grip. If the slab has existing paint, oil staining or a hardener finish, that all needs to come off first. Cutting corners here means the coating will delaminate, usually within the first year. On a coastal slab, this is non-negotiable.

Cracks and expansion joints also need to be assessed before the coat goes down. Hairline shrinkage cracks can often be filled and coated over. Structural movement cracks are a different story and need to be addressed properly so the topcoat doesn’t reflect the crack back through the finish later.

What colour and finish options work best for a metallic epoxy Williamstown garage?

For a metallic epoxy Williamstown garage, neutral tones like pearl white, silver, charcoal and warm bronze tend to complement coastal architecture best. These colours reflect natural light well in a garage, which makes the space feel larger. Darker tones like gunmetal or deep blue give a more dramatic finish that pairs particularly well with a dark-stained timber garage door.

The metallic effect itself comes from aluminium-based pigment powder that’s broadcast into a base coat while it’s still wet, then manipulated with a squeegee or blower to create movement. No two floors look identical, which is part of the appeal. You can keep it subtle with a single pigment colour and soft swirling, or go bolder with contrasting pigments and sharper definition in the pattern.

Finish options for the topcoat include a high-gloss polyurethane or a satin polyaspartic. Gloss is the most popular for residential garages because it amplifies the metallic shimmer and is easy to mop clean. A satin topcoat dials back the reflectivity and can reduce the appearance of tyre marks over time. Both are UV-stable, which matters in a garage that gets afternoon sun through a window or an open door.

Anti-slip broadcast is worth discussing with your installer if the garage has an internal entry door or if you park motorbikes near the entry. A fine aggregate broadcast added to the topcoat provides traction without visually breaking up the metallic effect much at all.

How long does a metallic epoxy garage floor installation take?

A standard single-car garage floor installation typically takes two to three days from the start of prep to the final topcoat cure. A double garage or a space with significant repairs or old coatings to remove can run to three or four days. You’ll want to keep the garage clear and dry for at least 24 hours after the final coat before walking on it, and 72 hours before parking a vehicle.

Day one is almost always surface preparation: grinding, cleaning, crack filling and allowing any repair compounds to cure. Day two is the primer coat, which needs its own cure window before the metallic base goes down. Day three is the metallic layer and topcoat. Weather and temperature affect cure times, so a good installer will check conditions before committing to a timeline. Melbourne’s coastal western suburbs can cop a sea breeze that drops the temperature significantly in the afternoon, and that slows down cure.

The floor is functional well before it reaches its full mechanical hardness. Full cure on a polyaspartic topcoat, for example, is typically reached within 24 hours, while a standard polyurethane topcoat needs closer to five to seven days to reach maximum hardness. Your installer should walk you through exactly what you can and can’t do on the floor during each stage.

What should you ask a metallic epoxy installer before booking?

Before booking a metallic epoxy installer, ask whether they include diamond grinding in the quote, how they test for moisture, what brand and system of epoxy they use, and whether they carry public liability insurance. These four questions will tell you a lot about whether you’re dealing with a professional operation or someone who will roll on a cheap floor paint and call it epoxy.

Grinding should always be included. Any installer who quotes a brush or roller application without grinding is not offering a proper bonded epoxy system. Ask specifically what grit they grind to and whether they use a dust-extraction-equipped machine. A dusty prep process means fine silica particles end up in the coating itself, which ruins the finish.

Product transparency matters too. Ask for the technical data sheet on the products being used. Reputable systems from brands that supply the professional trade will have documented compressive and tensile strength specs, cure times and UV-stability ratings. If the installer can’t produce that, push harder or look elsewhere.

References from completed jobs in the local area are valuable. A metallic epoxy floor installed in Altona or Newport a couple of years ago and still looking clean is a far better indicator of quality than a glossy before-and-after photo from an unspecified location.

Williamstown’s coastal setting is one of Melbourne’s best, and a garage floor that matches the quality of the home makes sense both for daily enjoyment and for long-term property value. Getting the right installer makes or breaks the result.

Request a metallic epoxy floor installation quote in Williamstown from Metal and Flake.

DIY Epoxy Garage Floor Coating: What to Know Before You Start

DIY Epoxy Garage Floor Coating: What You Need to Know Before You Start

A DIY epoxy garage floor coating can freshen up a dull concrete slab and costs less upfront than hiring a professional. But the results depend almost entirely on surface preparation, the quality of the product you choose, and the conditions on the day. Get any of those three things wrong and the coating peels, bubbles or wears through within a year or two.

What does a DIY epoxy garage floor coating actually involve?

A DIY epoxy garage floor coating involves cleaning and etching the concrete, mixing a two-part epoxy resin, rolling it out across the floor and leaving it to cure. Most hardware-store kits cover around 40 to 50 square metres and include a base coat, decorative flakes and a clear topcoat. The full process takes a weekend minimum, with mandatory cure time between coats.

It sounds straightforward on the tin, but there are a few realities worth knowing before you crack that lid open. Let’s walk through them one by one.

Why is surface preparation the most critical step in any epoxy garage floor coating project?

Surface preparation is the most critical step because epoxy bonds to the concrete, not to dust, oil, old paint or efflorescence. If the surface is contaminated or not mechanically opened up, the coating will lift. Professional installers typically diamond-grind concrete to create a profile; most DIY instructions only call for acid etching, which is less reliable on dense or sealed slabs.

Here is where most first-time DIYers run into trouble. A concrete grinder is not a common item in the average garage, and hiring one adds cost and time to the project. Acid etching with muriatic acid does open up the pores of the concrete to some degree, but it is a hazardous process that requires proper protective gear, good ventilation and careful neutralising and rinsing afterwards.

Oil stains are a particular headache. Concrete is porous, and if a car has ever leaked on that floor, the oil has likely soaked in over time. No amount of degreaser applied the morning before you start will fully draw that oil out. When epoxy goes over a contaminated slab, delamination is almost guaranteed. You will see it as bubbling or lifting, usually within the first few months of use.

How do DIY epoxy kits compare to professional-grade epoxy products?

DIY epoxy kits sold at hardware stores typically use water-based formulas with a solids content of around 40 to 50 percent. Professional-grade epoxy used by specialist installers generally has a solids content of 90 to 100 percent, meaning a thicker, harder, more durable film once cured. That difference in solids content directly affects how the floor holds up to vehicle traffic, hot tyres and chemical spills.

There is nothing dishonest about retail epoxy kits. They do what they say they will do, under the right conditions, applied correctly. The problem is that they are formulated to be easy for a non-tradesperson to mix and apply, which means they are also thinner and less chemically resistant than commercial products.

Hot tyre pickup is one of the most common complaints about DIY garage floor coatings. When your car has been driven and the tyres are warm, they can literally bond to a thin epoxy coating and pull chunks of it off when you drive out again. Higher-solids professional products are far more resistant to this because the cured film is denser and harder.

Another factor is the topcoat. Many retail kits include a polyurethane or water-based clear topcoat. Professional finishes often use a two-part polyaspartic or high-build urethane clear that is significantly more scratch-resistant and UV-stable. If your garage gets direct sunlight through an open door, a basic topcoat will yellow and chalk over time.

What conditions can ruin an epoxy garage floor coating application?

Temperature and humidity are the two conditions most likely to ruin a DIY epoxy garage floor coating. Epoxy should generally be applied when the concrete temperature is between 10 and 30 degrees Celsius and when the slab temperature is at least 3 degrees above the dew point. Applying epoxy to a cold or damp slab traps moisture under the film and causes blistering as the coating cures.

Melbourne’s climate throws a few curveballs here. A crisp autumn morning can look perfect for a garage project, but if the concrete is sitting at 8 degrees it is too cold for most retail epoxy kits to cure properly. Likewise, a warm summer day with high humidity can cause the topcoat to blush or go milky as it dries.

Timing matters too. Most two-coat epoxy systems require the second coat to go on within a specific recoat window, often 12 to 24 hours after the first coat, depending on the product and conditions. Miss that window and you may need to sand the first coat to give the second coat something to grip. That is not in the instruction pamphlet of most kits.

Is a DIY epoxy garage floor coating actually worth the cost saving?

A DIY epoxy garage floor coating can be worth the cost saving for a small, clean slab with no oil contamination, no existing coating to remove and a homeowner who is genuinely prepared to do the prep work properly. For most garages though, the cost of hiring equipment, buying prep chemicals, and potentially redoing a failed coat brings the total much closer to a professional quote than it first appears.

A standard two-car garage is roughly 36 to 40 square metres. A decent retail kit for that space will set you back anywhere from $250 to $500 depending on the brand and finish. Add in a concrete grinder hire ($80 to $120 per day), acid etch supplies, safety gear and a second kit if your first attempt does not go down cleanly, and you are already well past the $700 mark. At that point you are doing significant physical work, spending a full weekend in a confined space with chemicals, and still ending up with a thinner, less durable product than a professional install.

That is not to say DIY is the wrong call for everyone. If you enjoy that kind of project, you have a small clean slab, and you are happy with a result that may need re-doing in five to seven years, it can absolutely be a satisfying weekend job. Just go in with realistic expectations rather than the aspirational photos on the kit packaging.

What should you check before committing to the DIY route?

Before committing to a DIY epoxy garage floor coating, check three things: whether the slab has any moisture issues, whether there is any existing coating or sealer already on the concrete, and whether the concrete is structurally sound with no cracks or spalling that need attention first. Any of these will significantly change your prep requirements and may tip the balance toward professional installation.

To test for moisture, tape a piece of plastic sheeting to the slab overnight. If there is condensation under the plastic the next morning, moisture is migrating up through the concrete. That is a significant problem for epoxy adhesion and one that a DIY kit cannot solve on its own.

To check for an existing sealer, pour a small amount of water on the slab. If it beads up rather than absorbing, there is likely a sealer present. That sealer needs to be mechanically removed before any epoxy coating will stick, which brings you back to the grinder.

For cracks, hairline surface cracks can usually be filled with an epoxy crack filler before coating. Structural cracks that move or are wider than a few millimetres need assessment before you put any coating over the top of them.

Taking stock of all this before you buy the kit will save you a frustrating and expensive redo six months down the track.

See why a professional epoxy garage floor coating from Metal and Flake outlasts DIY kits

Epoxy Flake Flooring in Hoppers Crossing: What Does It Cost?

Epoxy Flake Flooring in Hoppers Crossing: What Does It Cost?

Epoxy flake flooring in Hoppers Crossing typically costs between $40 and $80 per square metre, depending on floor size, concrete condition, and the number of coats applied. A standard double garage of around 36 sqm will generally land somewhere between $1,500 and $2,800 fully installed, including surface prep, broadcast flake, and a clear topcoat.

What factors push the price of epoxy flake flooring up or down?

The biggest price drivers for epoxy flake flooring are concrete preparation, floor size, and the finish system you choose. A freshly poured slab with no existing coatings costs less to prep than a floor covered in old paint, oil stains, or previous sealers. Larger floors get more cost-efficient per square metre because setup time is largely fixed regardless of size. A two-coat system with a single broadcast is cheaper than a full-build system with a primer, base coat, heavy flake broadcast, and a double clear topcoat. Any of those variables can move your quote noticeably.

Here is a quick breakdown of the main cost drivers you will encounter when getting quotes in the Hoppers Crossing area:

  • Concrete condition. Cracks, spalling, moisture issues, or existing coatings all require extra work before the epoxy goes down. Diamond grinding or shot blasting to open the concrete surface is non-negotiable for a lasting bond, and the time that takes varies a lot slab to slab.
  • Floor size. Most installers have a minimum job rate. A single garage bay of around 18 sqm will carry a higher per-sqm cost than a 60 sqm workshop floor because the mobilisation and setup costs are spread across fewer metres.
  • System build. A broadcast flake system over a single coloured base with one clear sealer is the entry-level option. Full-flake systems, where the flake is broadcast to rejection so no base colour shows through, use significantly more material and require more topcoat to lock everything down flat. That shows up in the price.
  • Topcoat type. Polyurethane and polyaspartic topcoats cost more than a standard epoxy clear but they handle UV exposure and heavy tyre traffic far better. For a Hoppers Crossing garage that gets direct afternoon sun through the door, that upgrade is worth considering.

What is a realistic price range for a garage floor in Hoppers Crossing?

For a standard residential garage in Hoppers Crossing, a fully installed epoxy flake floor runs roughly $1,500 to $2,800 for a double garage (around 36 sqm). Single garages of 18 to 20 sqm tend to fall in the $900 to $1,500 range, though minimum job fees apply. Workshop or shed floors over 60 sqm generally attract a lower per-sqm rate, often settling between $40 and $55 per square metre once the prep costs are diluted across a larger area.

Those figures assume standard concrete in reasonable condition. Add $200 to $500 or more if the slab has heavy oil contamination that needs treatment before grinding, or if there are cracks that need filling and feathering to prevent them telegraphing through the finished surface. One thing worth knowing: a cheap quote that skips proper diamond grinding almost always leads to delamination within a year or two, which ends up costing more to fix than doing it right the first time.

Colour and flake size do not move the price much on their own. There are dozens of flake blends available, from subtle earth tones to bold multi-colour mixes, and most are included at the same price point. Custom or single-colour flake orders can attract a small surcharge if the quantity is below a supplier minimum, but for standard residential jobs this rarely comes up.

How does epoxy flake compare in cost to other garage floor options?

Compared to other hard-wearing floor finishes, epoxy flake flooring sits in a competitive middle ground. Plain concrete sealer is cheaper upfront, typically $15 to $25 per sqm, but offers little protection against oil, tyre marks, or abrasion. Polished concrete can look excellent but generally runs $80 to $120 per sqm and needs periodic maintenance. Rubber or interlocking PVC tiles are a DIY option but they trap moisture underneath, move underfoot, and look noticeably less finished.

Epoxy flake sits at a sweet spot: durable, easy to clean, visually sharp, and mid-range on price. The flake layer adds real texture that helps with slip resistance when the floor gets wet, which matters in a Hoppers Crossing garage where morning dew and car drip are a daily reality. The clear topcoat protects the colour and the flake from UV yellowing and tyre scuffing for years with nothing more than a mop to maintain it.

What should you expect on installation day for epoxy flake flooring?

On installation day for epoxy flake flooring, expect the crew to spend roughly a third to half of the total job time on surface preparation before any product goes down. The concrete is diamond ground or shot blasted to open the pores, then vacuumed thoroughly. Any cracks or holes are filled. The epoxy base coat goes down next, and the flake is broadcast by hand while the coat is still wet. Once cured, excess flake is scraped and vacuumed, then the topcoat is applied. Most residential jobs are complete in one day, with a return cure time of 24 hours before foot traffic and 72 hours before driving on it.

You will need to clear the garage completely before the crew arrives. That means moving the car, the fridge, the toolboxes and the shelving. Most installers will not work around stored items because they need full access to the slab edge to edge. It is worth doing a proper clean-out the day before so there is no delay on the morning.

Weather matters too. Epoxy does not like being applied in extreme heat or when the concrete surface temperature is too cold. In Hoppers Crossing, the summer months can push slab temperatures high enough that an early start is needed. A good installer will check conditions before mixing product and adjust the plan if needed rather than push ahead and risk a compromised finish.

How do you get an accurate quote for epoxy flake flooring in Hoppers Crossing?

To get an accurate quote, you need someone to physically measure the floor and assess the concrete, not just take your word for the square meterage and condition. Photos can help for a ballpark figure, but the prep scope is almost impossible to assess without walking the slab. Look for a company that specifies exactly what the prep process includes, what system build is being priced, and how many coats of topcoat are in the quote. Comparing two quotes where one includes diamond grinding and two clear topcoats and the other includes a light sand and one seal is not a fair comparison, even if the per-sqm rate looks similar.

Ask about the products being used. Solvent-free water-based epoxies are common on the cheaper end of the market and have their place, but 100% solids epoxy systems are thicker, harder, and more durable for high-use garage floors. The answer to that question tells you a lot about what you are actually buying.

Book an epoxy flake floor installation in Hoppers Crossing with Metal and Flake.

Epoxy Flake Flooring in Brunswick: Styles and Costs for Local Garages

Epoxy Flake Flooring Brunswick: Styles and Costs for Local Garages

Epoxy flake flooring in Brunswick suits residential garages, workshops and converted studios well. It bonds to concrete, resists oil and tyre marks, and the colour flake system hides fine surface imperfections that most inner-north Melbourne slabs carry. A standard single-car garage typically costs between $1,200 and $2,200 fully installed, depending on prep requirements and flake density chosen.

What exactly is epoxy flake flooring and why does it suit Brunswick garages?

Epoxy flake flooring is a multi-coat system where decorative vinyl flakes are broadcast into a wet epoxy base coat, then locked in under a clear polyurethane or epoxy topcoat. The flakes add grip, visual texture and depth. For Brunswick garages specifically, the system works well because the suburb’s older Californian bungalow and interwar brick homes tend to have uncoated concrete slabs that absorb spills and stain easily. The flake system seals that concrete completely, making clean-up a matter of a quick mop rather than a scrubbing session.

The other reason it suits the area is aesthetic. Brunswick homeowners often want something that looks sharp without going too industrial. The flake palette ranges from subtle salt-and-pepper grey blends right through to bolder charcoal, white or even multi-colour combinations that suit the eclectic character of the neighbourhood. It’s a floor that works as hard as a workshop coating but looks deliberate and finished.

What styles of epoxy flake flooring are available in Brunswick?

Epoxy flake flooring styles are defined by flake size, broadcast density and the colour blend chosen. Common size options are 1 mm, 4 mm and 6 mm chips. Smaller chips produce a finer, more terrazzo-like appearance, while larger chips give a bolder, more textured look. Broadcast density ranges from a light scatter covering around 30 to 50 percent of the surface, through to a full broadcast where the base coat is completely hidden under a dense layer of flake.

For Brunswick garages, the most popular combinations tend to be a full broadcast in a grey or charcoal blend. This is practical: the denser the flake coverage, the better it hides tyre scuff and dust between cleans. A full broadcast also adds a noticeable anti-slip texture underfoot, which is genuinely useful on a surface that gets wet in winter.

Beyond the standard options, some installers offer metallic-tinted base coats beneath the flake system to add a subtle shimmer when light hits the floor at certain angles. This approach suits people who use their garage as a home gym, workshop or hobby space as much as for parking. The end result looks considerably more considered than a plain grey slab.

How much does epoxy flake flooring cost for a Brunswick garage?

Epoxy flake flooring in Brunswick costs roughly $60 to $100 per square metre for a professionally installed system, including surface preparation. A single-car garage sitting around 20 to 25 square metres will generally land between $1,200 and $2,500 all up. A double garage of 40 to 50 square metres typically runs $2,400 to $4,500, depending on the condition of the existing slab and the flake system selected.

The biggest variable in any quote is surface preparation. Brunswick concrete slabs in older homes often have paint, sealers or adhesive residue from previous floor coverings. Getting that off means mechanical grinding or shot blasting, which adds time and cost. Any installer who skips this step is cutting a corner that will show up within a year or two as peeling or bubbling. Proper diamond grinding opens the concrete’s pores so the epoxy bonds at a chemical level rather than just sitting on top.

Other cost factors include crack repairs (common in slabs over 30 years old), the number of coats in the topcoat system, and whether a moisture barrier primer is needed. Brunswick sits close to the Merri Creek corridor, and some properties have slabs with higher moisture vapour transmission than expected. A moisture test before quoting is worth asking about.

How long does an epoxy flake floor installation take in Brunswick?

A typical single-car or double-car garage epoxy flake installation in Brunswick takes one to two days on site, plus a cure period before you can drive on it. Day one is usually prep: grinding the concrete, filling cracks and letting any patching compound cure. Day two is the coating: primer coat, base epoxy with flake broadcast, then topcoat. Light foot traffic is generally safe after 24 hours. Parking a car on the floor usually requires 48 to 72 hours at minimum, and a full chemical cure takes around seven days.

Weather matters. Epoxy doesn’t cure properly below about 10 degrees Celsius, and Melbourne winters can push garage temperatures close to that threshold at night. Reputable installers will schedule around cold snaps or use formulations suited to cooler conditions. During the warmer months from October through to March, curing is generally faster and more predictable.

How do you maintain an epoxy flake floor in a Brunswick garage?

Epoxy flake floors in Brunswick garages are low maintenance but not zero maintenance. The main tasks are a regular sweep to remove grit (which acts as a fine abrasive underfoot over time) and a mop with a pH-neutral cleaner every few weeks. Avoid bleach-based cleaners, which can dull the topcoat finish over repeated use.

For oil or grease spills, the quicker you wipe them up the better. The topcoat is resistant, not impervious, and leaving a pool of engine oil sitting for a week will eventually penetrate a worn patch if the floor hasn’t had a fresh topcoat in a few years. Most epoxy flake floors benefit from a single maintenance topcoat every five to eight years in a residential garage setting. That single coat refreshes the gloss, reseals any micro-scratches and effectively extends the life of the full system by another decade.

Heavy impacts are the other thing to watch for. Dropping a steel tool from bench height can chip the topcoat and expose the flake layer beneath. Touch-up kits are available, but it’s worth mentioning any heavy use to your installer upfront so they can recommend an appropriate topcoat thickness for the job.

Book an epoxy flake floor installation in Brunswick with Metal and Flake.