Epoxy Resin Flooring Explained: Types, Costs and Benefits

Epoxy Resin Flooring Explained: Types, Costs and Benefits

Epoxy resin flooring is a hard-wearing floor coating made by mixing a resin with a hardener. The two components react chemically and bond tightly to concrete, creating a surface that resists impact, chemicals, moisture and heavy traffic. It comes in several distinct systems, each suited to a different setting, budget and finish preference.

What are the main types of epoxy resin flooring?

The main types of epoxy resin flooring are solid-colour epoxy, metallic epoxy, flake or chip epoxy, mortar epoxy and self-levelling epoxy. Each system uses the same resin-and-hardener chemistry but varies in thickness, aggregate, finish and the kind of surface it produces. Choosing the right type comes down to your space, how it gets used and the look you want.

Here is a plain-language rundown of each one:

  • Solid-colour epoxy. A clean, single-colour coating applied at around 300 to 500 microns. Simple, affordable and works well in workshops, warehouses and utility areas where appearance is secondary to function.
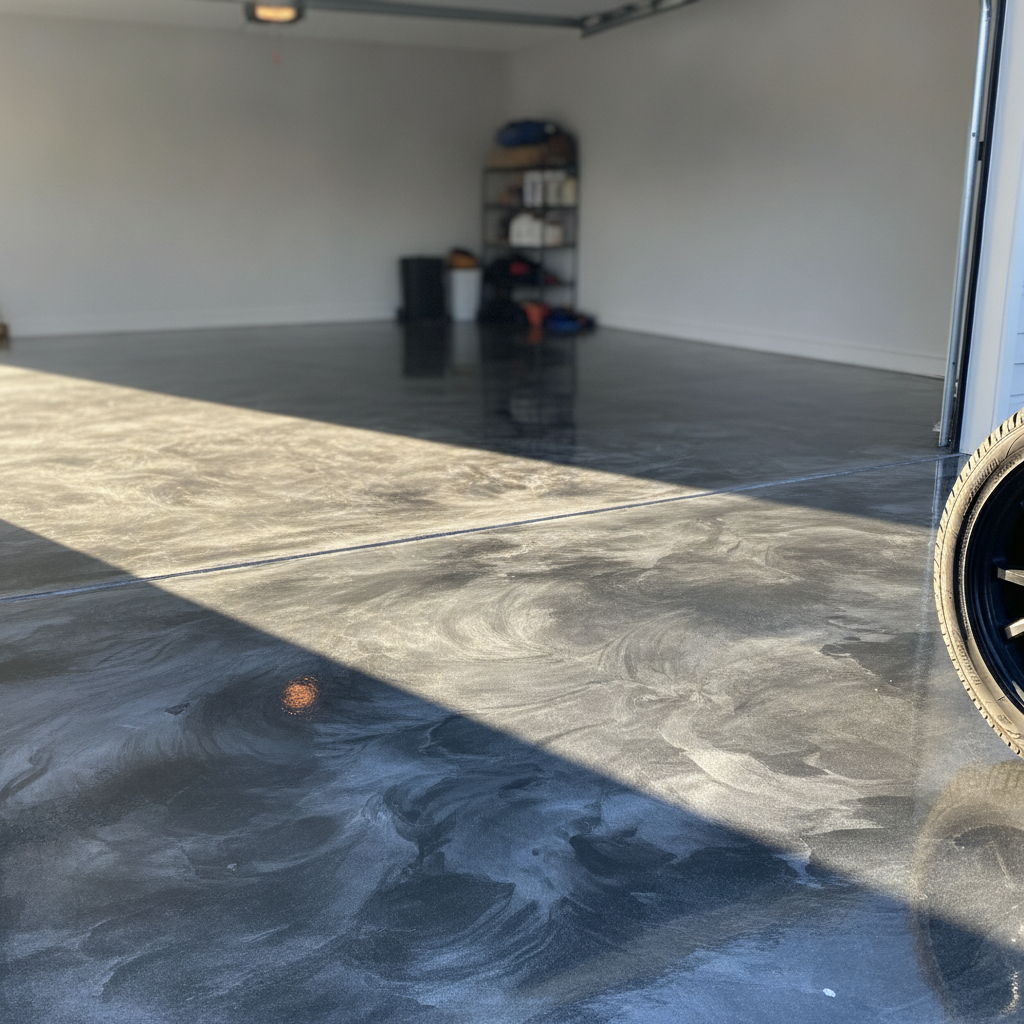
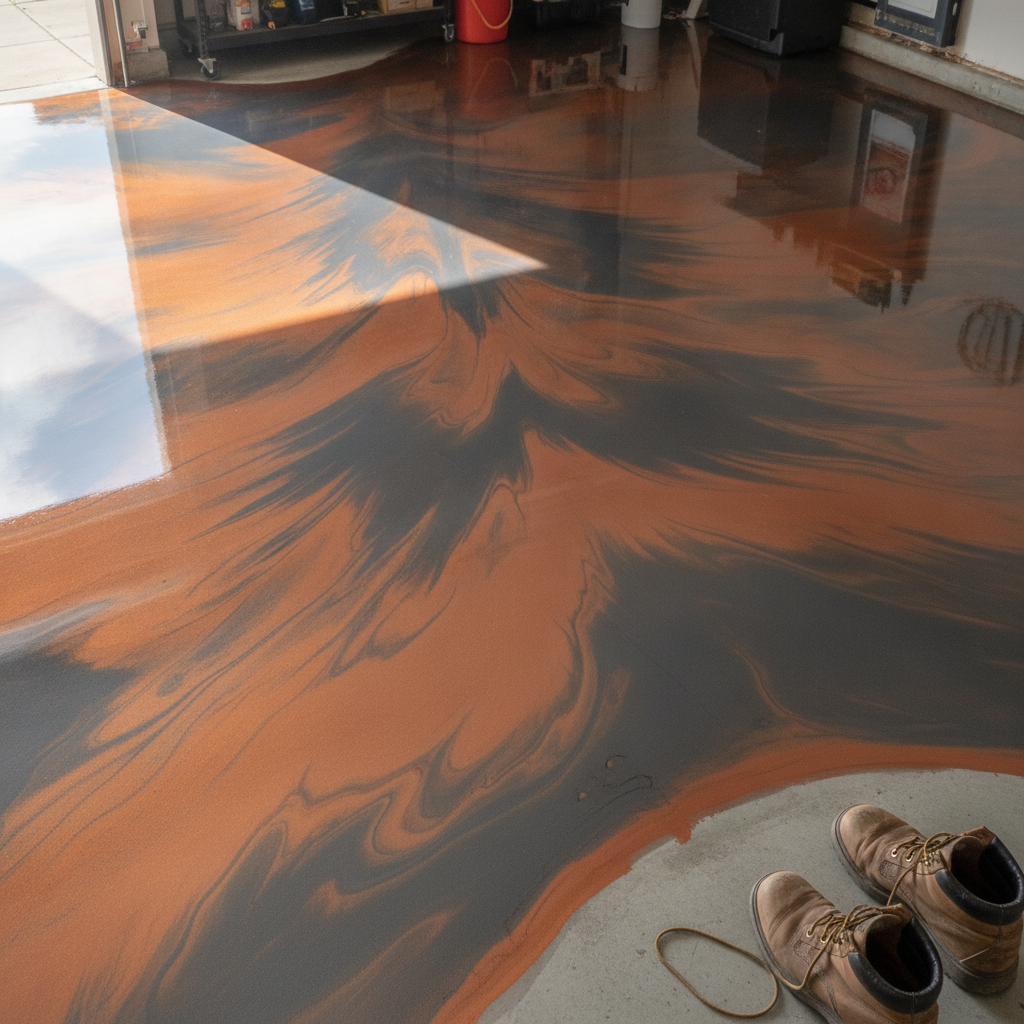
  • Metallic epoxy. A pigmented system that creates flowing, three-dimensional patterns, often resembling polished stone or liquid metal. The pigment moves as the epoxy self-levels, so no two floors are identical. Popular in showrooms, cafes and upmarket residential spaces.
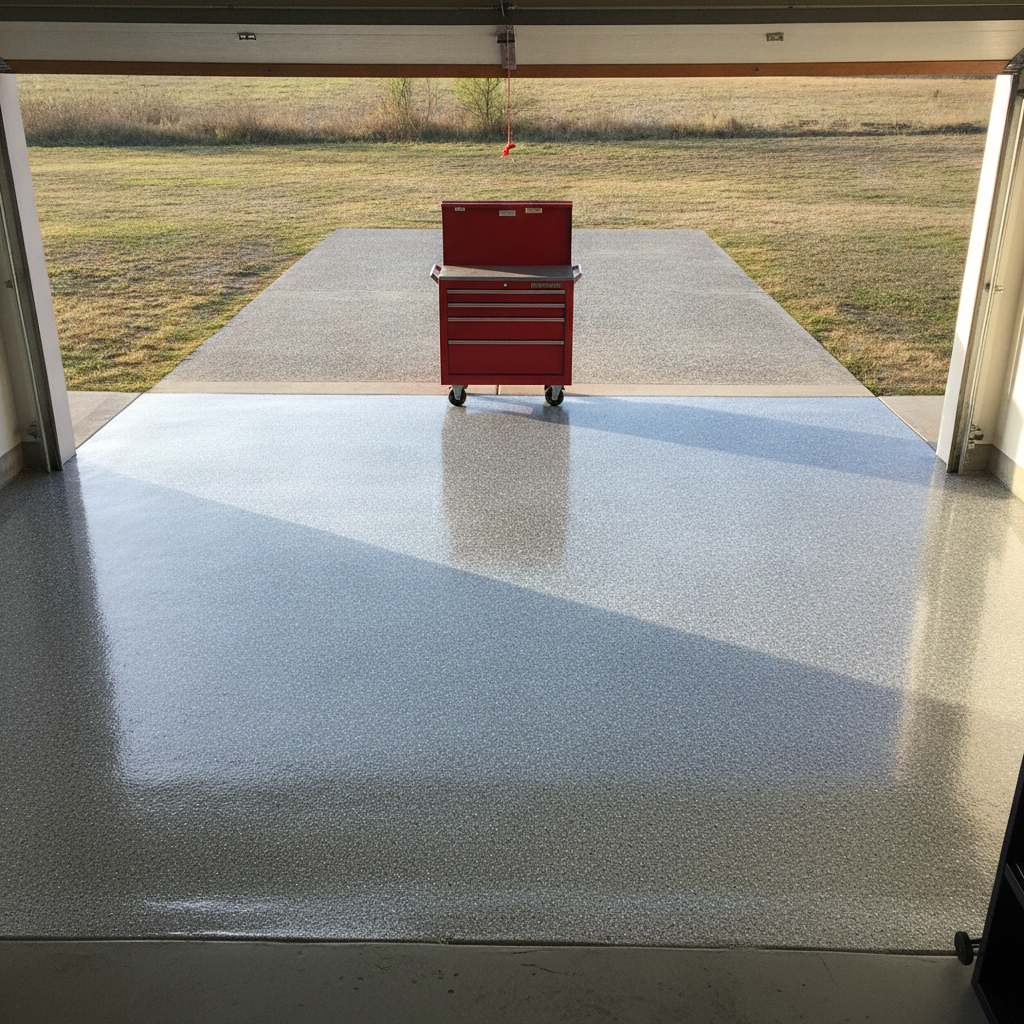
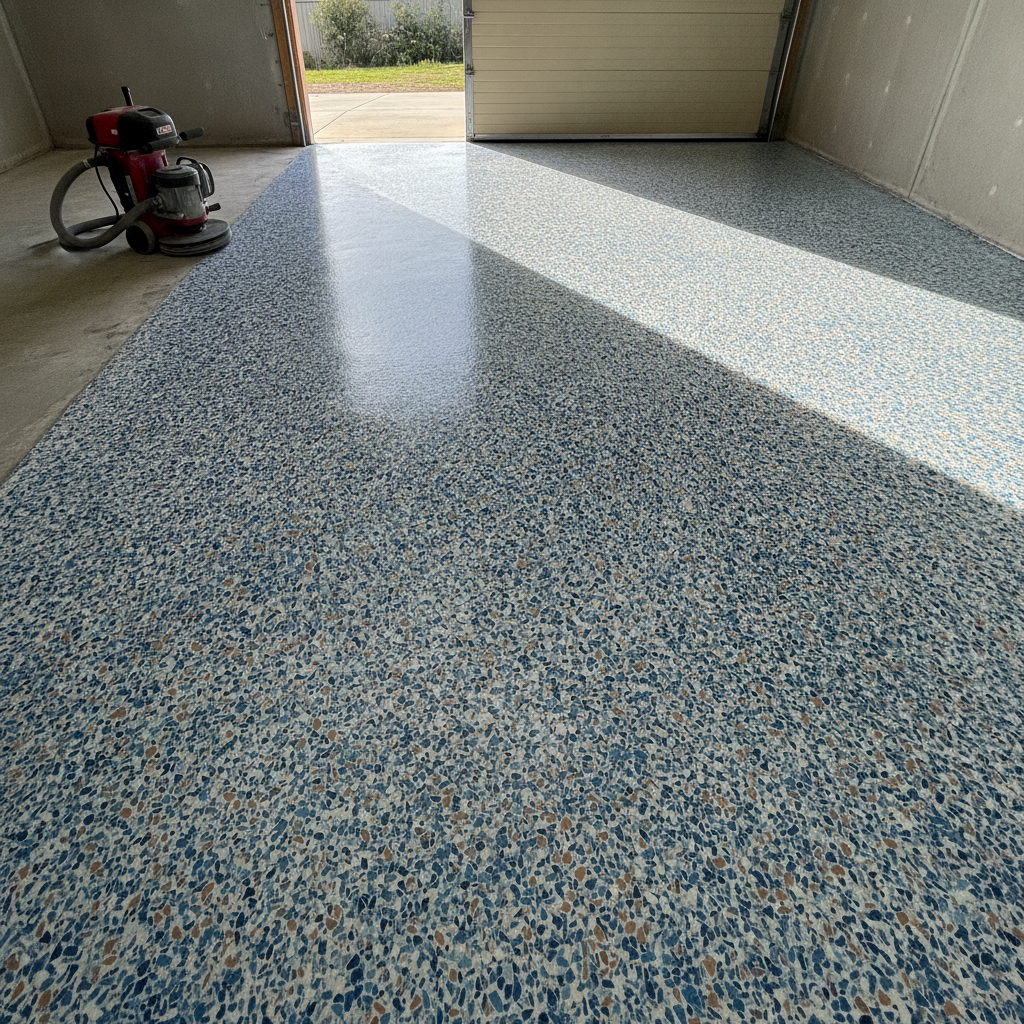
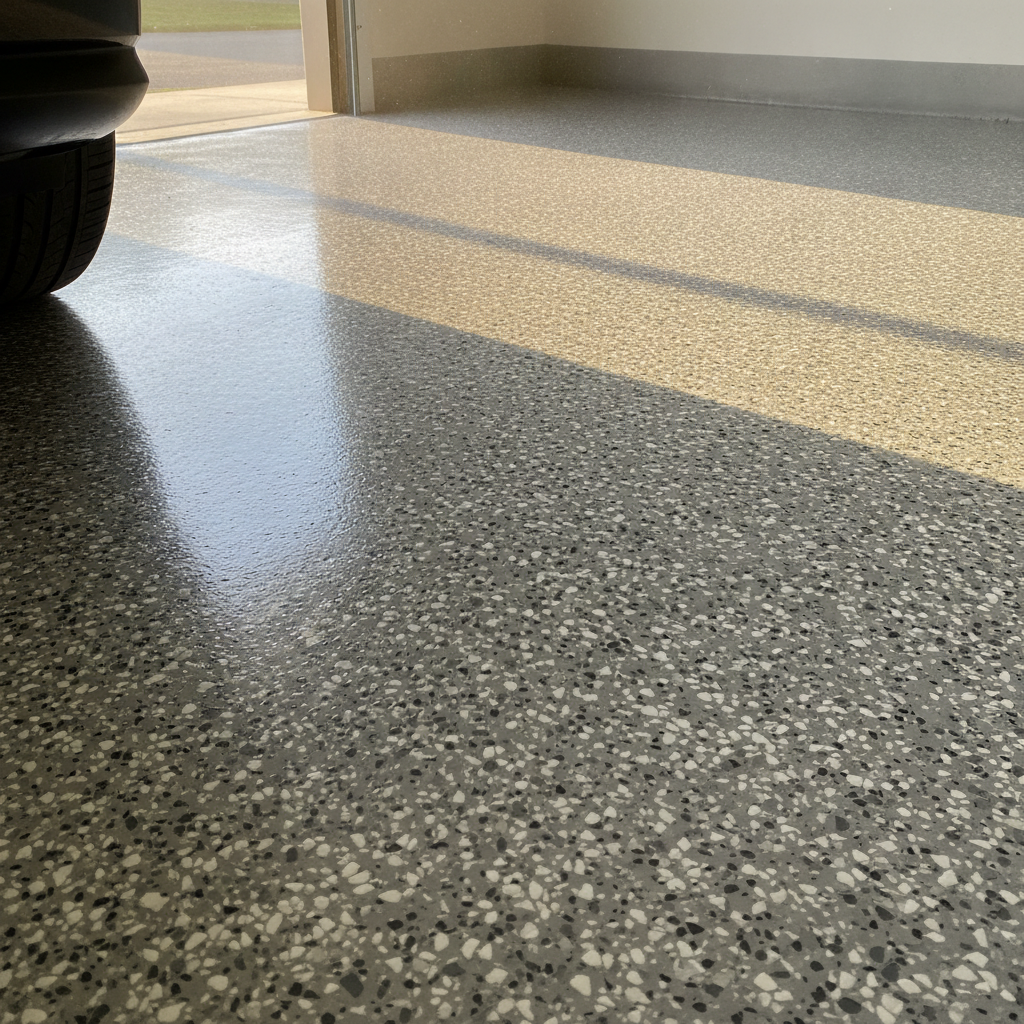
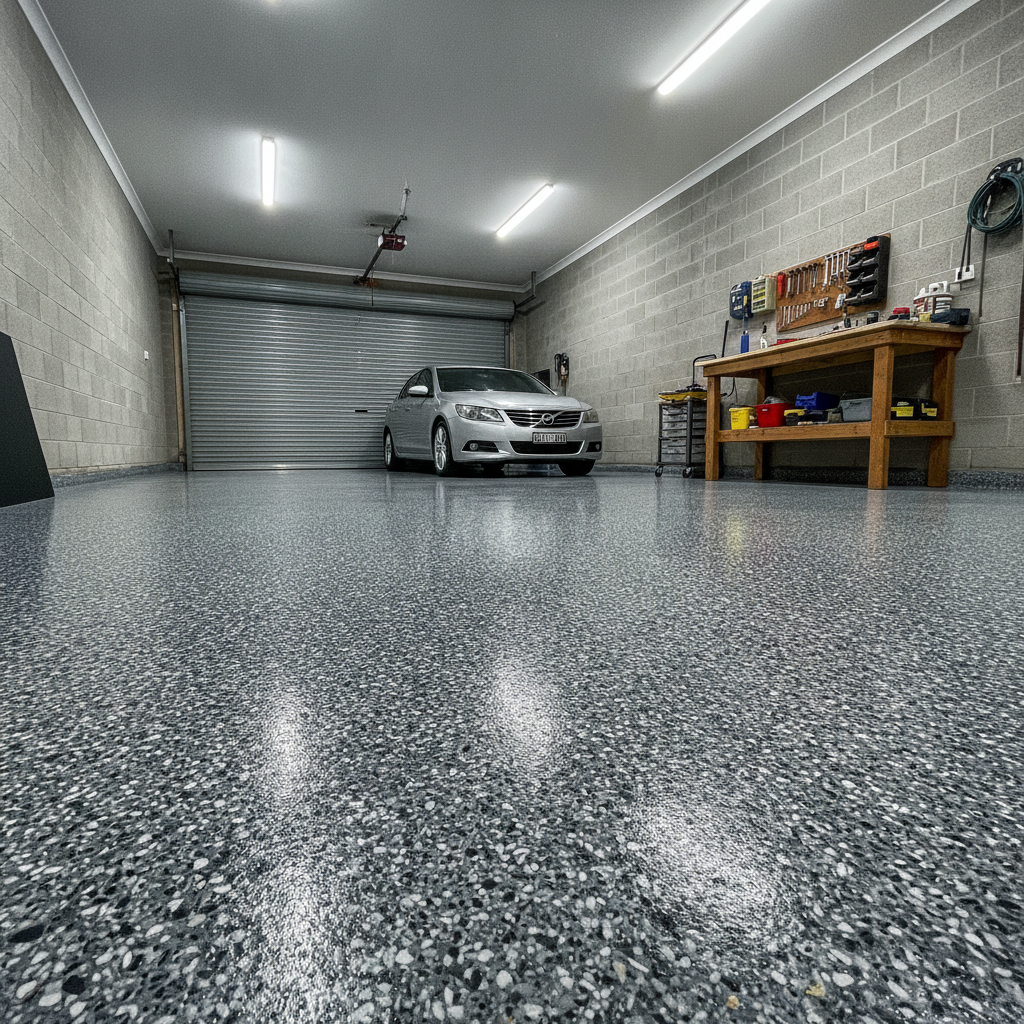
  • Flake or broadcast epoxy. Coloured vinyl flakes are broadcast into a wet epoxy base coat, then locked in under clear topcoats. The result is a slip-resistant, speckle-textured floor that hides dirt well and suits garages, gyms and commercial kitchens.
  • Mortar epoxy. The thickest system, combining epoxy with graded quartz or sand aggregate. Applied at 6 mm or more, it handles the heaviest industrial punishment and can resurface badly damaged concrete.
  • Self-levelling epoxy. A pourable formulation that flows across a substrate and settles into a glassy, seamless finish. Ideal for food production areas and laboratories because there are no joints for bacteria to hide in.

In Melbourne, the most popular residential choice by far is the flake system, partly because it handles the temperature swings between summer heat and winter cold better than a plain solid coat, and partly because it looks sharp in a garage or home gym without breaking the budget.

How much does epoxy resin flooring cost in Melbourne?

In Melbourne, epoxy resin flooring typically costs between $40 and $120 per square metre installed, depending on the system, the condition of the existing concrete and the size of the job. A standard flake system in a double garage of around 36 square metres usually lands in the $1,800 to $3,200 range. High-end metallic systems in smaller, detailed spaces can push beyond $120 per square metre.

Several variables move the price up or down:

  • Concrete preparation. Diamond grinding is non-negotiable for proper adhesion. If the slab has old paint, sealers, cracks or moisture issues, prep work takes longer and costs more. Skipping prep is the single biggest reason epoxy floors peel within a year.
  • Number of coats. A quality job includes a primer, one or two base coats and at least one clear topcoat. Budget quotes often cut one of those layers, which shows up as early wear.
  • Product grade. Solvent-free, 100 percent solids epoxy costs more to purchase than water-based alternatives, but it bonds harder, lasts longer and does not shrink as it cures.
  • Access and obstacles. Working around built-in shelving, floor drains or existing fitout adds time.

It is worth getting at least two detailed quotes that specify the system, the number of coats and the prep method. A quote that does not mention surface preparation is a red flag worth taking seriously.

What are the practical benefits of epoxy resin flooring?

The practical benefits of epoxy resin flooring include exceptional durability, chemical resistance, ease of cleaning, slip resistance (when textured aggregate is added) and a lifespan that routinely reaches 10 to 20 years with basic maintenance. It also seals porous concrete against oil stains, dusting and moisture vapour, which alone makes it worth considering for any working garage or warehouse.

Let us break those benefits down into everyday terms:

It handles real punishment. A properly installed flake or mortar epoxy system can carry forklift traffic, steel tool trolleys and vehicle loads without cracking or chipping. Residential garage floors take car jacks, dropped spanners and spilt engine oil in their stride.

It stops concrete dust. Bare concrete sheds fine grey dust constantly. That dust settles on everything in the space and plays havoc with machinery filters. A sealed epoxy floor eliminates the problem completely.

It is genuinely easy to clean. A sealed epoxy surface has no pores for grime to grip. A mop with warm water and a pH-neutral cleaner is all you need for most spills. Petrol, brake fluid and cooking grease wipe off without staining.

It reflects light. A glossy epoxy finish can meaningfully brighten a dim garage or workshop by bouncing overhead lighting around the room, which reduces the need for additional fittings.

It adds value. A well-presented garage or commercial fitout photographs better and reads as more professional to buyers, tenants or customers. For a relatively modest outlay, you are improving both the function and the presentation of a space.

How long does epoxy resin flooring actually last?

Epoxy resin flooring installed over properly prepared concrete typically lasts 10 to 20 years in residential settings and 5 to 10 years in high-traffic commercial or industrial environments before a topcoat refresh is needed. The biggest factors affecting longevity are surface preparation quality, product grade and UV exposure, since standard epoxy yellows under direct sunlight without a UV-stable polyurethane topcoat.

A few maintenance habits extend the life significantly. Felt pads under heavy furniture legs stop point-load scratches. Cleaning up chemical spills promptly, especially anything acidic, protects the topcoat. And avoiding dragging sharp metal edges across the floor keeps the finish looking sharp for years longer.

If yellowing under sunlight is a concern, your installer should be specifying a polyaspartic or polyurethane clear coat rather than a straight epoxy topcoat. Those products handle UV far better and are now standard practice in quality commercial installs.

Is epoxy resin flooring right for your space?

Epoxy resin flooring suits most concrete slabs in garages, workshops, warehouses, gyms, showrooms and commercial kitchens. It is not ideal for timber subfloors, for slabs with active rising damp that has not been addressed, or for outdoor areas with constant direct sun unless paired with a UV-stable topcoat. When those conditions are met, it is one of the most cost-effective floor upgrades available.

The spaces where it really earns its money are the ones that see daily use: a home garage that doubles as a workshop, a gym floor that takes rubber weights and machine feet, or a commercial kitchen that needs a seamless, chemical-resistant surface that passes a health inspection without drama.

If you are weighing up whether your specific slab and space are good candidates, the honest answer is that a quick site visit tells you far more than any online guide. Concrete condition, moisture readings and the existing surface all matter, and they can only be assessed in person.

Book a free epoxy flooring consult
Coloured Epoxy Flooring: Choosing the Right Finish for Your Space

Coloured Epoxy Flooring: Choosing the Right Finish for Your Space

Coloured epoxy flooring lets you pick a hard-wearing, seamless surface in almost any shade or finish, from solid block colours to multi-tone flake blends and metallic swirls. The right choice depends on the room’s purpose, the amount of foot or vehicle traffic it takes, and the look you want to live with every day. Getting those three factors lined up before you commit saves a lot of regret.

What colour options are available with epoxy flooring?

Epoxy flooring is available in hundreds of solid colours as well as blended vinyl flake systems that mix two, three or even four colours into the one floor. Metallic epoxy adds a pearlescent, flowing effect that makes every pour unique. Most professional applicators offer colour sample charts, and the final cured result can vary from the wet sample, so always view cured reference photos before deciding.

Broadly speaking, coloured epoxy floors fall into a few categories worth understanding before you start scrolling through sample charts.

Solid colour epoxy is the most straightforward option. You pick a RAL or proprietary colour, and the applicator lays a pigmented base coat with a clear top coat over it. Greys, charcoals and slate tones are consistently the most popular choice for Melbourne garages, largely because they hide tyre marks and grime between cleans without looking tired. Lighter tones like white or off-white work well in commercial kitchens and warehouses where you want to maximise reflected light.

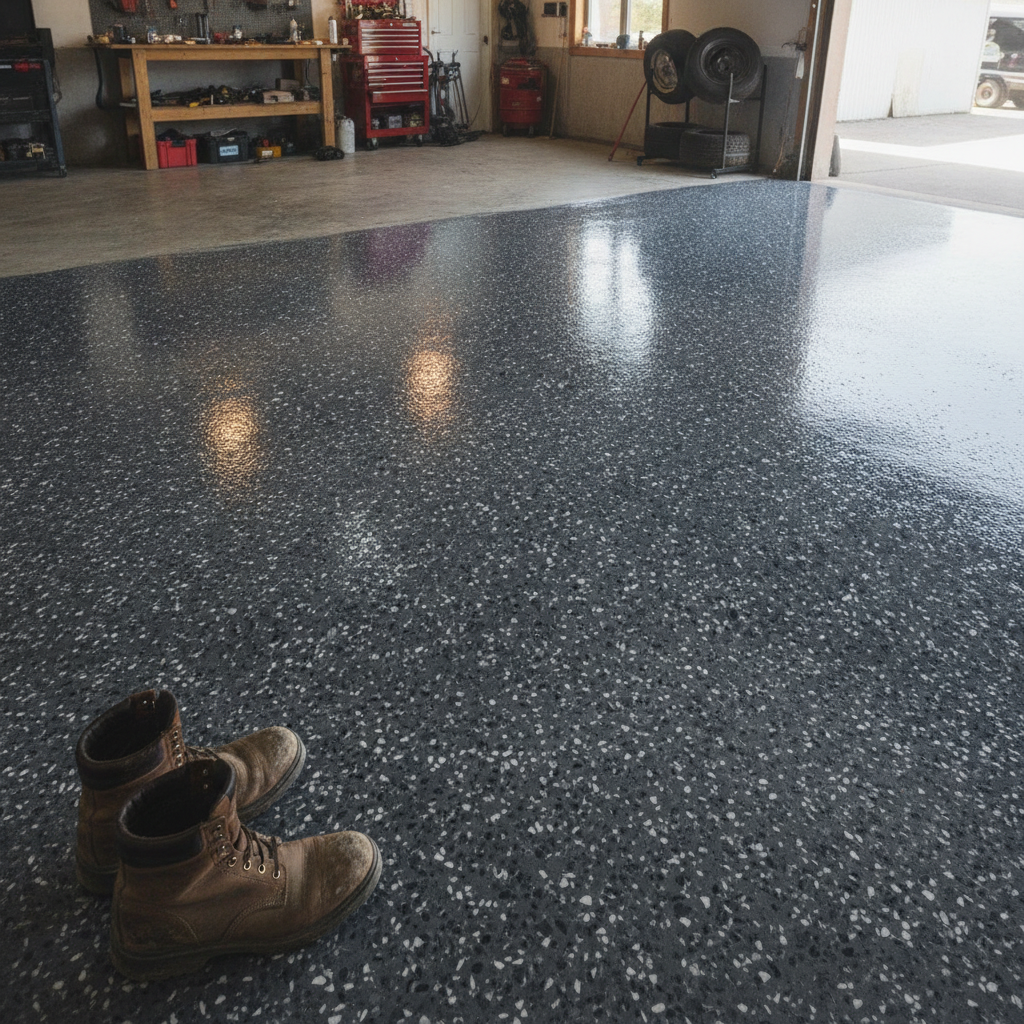
Vinyl flake (or decorative flake) systems broadcast coloured acrylic chips into a wet base coat, then seal the whole lot under a clear urethane or epoxy top coat. The chips create a speckled, terrazzo-style appearance and, practically speaking, give the surface a slip-resistant texture. You can dial the chip density up for near full coverage or down for a lighter scattered look. Flake also does a good job of hiding small surface imperfections in an older slab.

Metallic epoxy uses pigmented metallic powders suspended in the base coat. During application the installer manipulates the wet material to create movement, depth and a three-dimensional look. No two metallic floors come out identical. Golds, silvers, coppers and ocean blues are popular, and the finish genuinely looks like polished stone or molten metal once the clear coat goes down.

How do you choose the right coloured epoxy flooring finish for your specific space?

Match the finish to three things: traffic type, lighting conditions and the visual weight you want in the room. High-traffic areas with vehicle use suit flake or solid mid-tones because they mask wear patterns. Spaces with low natural light benefit from lighter, high-gloss finishes that bounce light around. Showrooms or feature areas where appearance is the priority are ideal candidates for metallic epoxy.

Here is a practical breakdown by space type.

Residential garage: This is where flake epoxy earns its keep. A mid-grey or charcoal base with a grey and black flake blend hides the inevitable oil drip and brake dust. The texture from the chips also gives grip when you step out of the car on a wet day. A high-gloss clear coat keeps it looking sharp without demanding constant attention.

Indoor living area or alfresco: Solid colour or metallic finishes work better here because they read as a deliberate design choice rather than a utility floor. Warmer tones, concrete-look greys or a subtle metallic effect all complement indoor furniture. Keep the sheen level in mind too. Full gloss looks polished and easy to clean but shows every footprint. A satin or matte top coat is more forgiving in a heavily used family space.

Commercial workshop or warehouse: A solid mid-grey or safety-yellow zone marking system over a grey base is the practical call. The floor needs to handle forklift tyres, chemical spills and constant foot traffic. Bright or pale colours will look grubby within months unless the cleaning regime is serious.

Retail or showroom: This is where you can push into more decorative territory. A metallic floor in a car dealership or a boutique creates a strong visual impression. The seamless, continuous surface also reads as premium compared to tiles or vinyl planks.

Does the colour affect how durable the epoxy floor is?

The colour itself does not change the structural durability of an epoxy floor. What affects longevity is the system thickness, the number of coats, the quality of the top coat and how well the slab was prepared beforehand. That said, very light colours and very dark solid colours can show UV yellowing more obviously over time if the top coat is not UV-stable, so always confirm that a UV-resistant urethane clear coat is part of the system.

One practical note worth mentioning: darker solid colours tend to show dust and light scratching more readily than a mid-tone flake system, which has natural visual noise built into it. If you are installing a floor in a space where low-maintenance appearance matters, a flake blend in a mid-range palette is a smart hedge.

Preparation is the other factor that colour tends to expose. A floor that looks seamless and flat in a dark colour will show every hollow, crack or patch if the prep work was rushed. Diamond grinding or shot blasting the slab before application is not optional if you want the finish to look as good in five years as it does on day one.

What sheen level works best for coloured epoxy floors?

High-gloss finishes reflect the most light and give the deepest colour payoff, making them ideal for garages, showrooms and commercial spaces where visual impact matters. Satin finishes reduce glare and hide footprints better, suiting living areas and offices. Matte top coats are the least common but work well in spaces where a more industrial or understated aesthetic is the goal.

Gloss level is worth discussing with your applicator because it is usually determined by the top coat product rather than the base colour. Most residential installs in Melbourne land on a high-gloss clear coat because it is the easiest to mop clean and holds up well against the grit dragged in from outdoor areas.

How do you finalise your colour choice before the job starts?

Ask your applicator for cured samples, not just wet chips or printed colour cards. Epoxy colours shift slightly as they cure, and the gloss level of the sample should match the finish you are ordering. Hold the sample in the actual space at different times of day, because artificial lighting and natural light read the same colour very differently. If you are choosing a flake blend, ask for a larger sample board rather than a loose handful of chips, since the overall effect only reads properly at floor scale.

Committing a couple of hours to the colour selection process before the install saves the frustration of a floor that looks great in the brochure and wrong in your garage. Most good applicators will walk you through this step as part of the quoting process.

View colour options and get a quote

Is Epoxy Flooring Right for Your Garage? A Practical Guide

Is Epoxy Flooring Right for Your Garage? A Practical Guide

Epoxy flooring for garages is one of the most practical upgrades an Australian homeowner can make. It seals raw concrete against oil, water and tyre marks, adds a clean finished look, and typically lasts 10 to 20 years with normal use. Whether it suits your garage comes down to slab condition, budget and how you actually use the space.

What makes epoxy flooring for garages different from a standard paint job?

Epoxy is a two-part resin system, not a paint. When the resin and hardener combine, they cure into a rigid, chemically bonded layer that fuses to the concrete surface. Standard floor paint sits on top and peels away over time. Epoxy becomes part of the slab, which is why it handles heavy vehicle traffic, dropped tools and pooled water in ways that paint simply cannot match.

The practical difference shows up fast. A painted garage floor can start lifting within a year, especially in Melbourne where summer heat and humidity cause the concrete to expand and contract. A properly installed epoxy system stays put because the bond strength is measured in MPa, not just adhesion. Most residential epoxy systems achieve a bond strength of around 25 to 35 MPa, well above the pull-off strength of the concrete itself. That means if something fails, it will be the concrete, not the coating.

Colour and texture options also go further with epoxy. The metallic and flake finishes that have become popular in home garages are only achievable with an epoxy base coat. You cannot get that depth of finish or the slip-resistant texture of a broadcast flake floor from a roller-applied paint.

What condition does your concrete need to be in before an epoxy coat?

Your concrete slab needs to be structurally sound, clean and properly profiled before any epoxy system will perform as it should. Cracks, spalling, oil contamination and laitance (that powdery surface layer on new concrete) all prevent a good bond. A professional installer will assess moisture vapour transmission, surface hardness and existing contamination before committing to a coating system.

This is the part that catches a lot of DIYers out. A bag of hardware store epoxy applied over an unprepped slab will bubble, peel and delaminate within months. Proper surface preparation usually means diamond grinding the concrete to an open, textured profile (the industry standard is a CSP 2 or CSP 3 profile for most epoxy systems). This creates the mechanical key the epoxy needs to lock into.

Active cracks need attention too. Hairline cracks that are stable can be filled with a flexible epoxy filler before coating. Moving cracks, sometimes called live cracks, are a different problem and require a different repair strategy before any coating goes down. A quick look at your slab during wet weather will tell you a lot: if water is pushing up through the floor or pooling under the surface, a moisture management primer needs to go in first.

The short version: most garage slabs in suburban Melbourne are fine for epoxy. Older homes with significant oil history or slabs that have heaved may need extra prep work, but that is rarely a reason to walk away from the job entirely.

How long does a garage epoxy floor actually last?

A professionally installed garage epoxy floor realistically lasts 10 to 20 years in a domestic setting, sometimes longer with basic maintenance. The lifespan depends on three things: the quality of the prep work, the coating system chosen, and how the floor gets used day to day.

A single-car garage used for storage and occasional weekend work is a very different environment from a four-car workshop where cars go up on jack stands and angle grinders run regularly. In the second scenario, a thicker broadcast flake system with a polyurethane or polyaspartic topcoat makes more sense than a thin self-levelling metallic floor. Matching the system to the use is something an experienced installer will guide you through.

UV exposure is worth mentioning for garages with large roller doors that stay open. Standard epoxy resins yellow over time under direct sun. A UV-stable polyaspartic or polyurethane topcoat prevents that, keeping the floor looking sharp for years rather than going patchy and amber in high-exposure spots.

Maintenance is simple: sweep out grit regularly (grit acts like sandpaper underfoot), mop with a neutral pH cleaner, and avoid harsh solvents. Wipe up petrol and brake fluid quickly because they can soften the topcoat with prolonged contact. Do those basics and a quality epoxy floor will outlast most other things you put in a garage.

Is epoxy flooring for garages worth the cost compared to other options?

Epoxy flooring for garages is worth the cost for most homeowners when you factor in longevity, low maintenance and the protection it gives the slab. Alternatives like interlocking rubber or PVC tiles cost less upfront but do not seal the concrete, can trap moisture underneath, and typically need replacing within five to ten years. Polished concrete is a premium option but requires more ongoing care and is better suited to indoor living spaces than a working garage.

The honest answer on price: a professionally installed garage epoxy floor in Melbourne typically falls in the range of $50 to $100 per square metre for a standard single or double garage, depending on the system, the prep required and any repairs needed. Metallic finishes and multi-layer flake systems sit toward the higher end of that range. It is a meaningful spend, but one that adds real value to a property and eliminates the ongoing frustration of a bare concrete floor that stains, dusts and never looks clean.

The comparison to doing it yourself is where people sometimes trip up. DIY kits look affordable on the shelf, but the cost of hiring a grinder, buying the right products, dealing with a botched first attempt and losing a weekend or two often brings the total much closer to the professional quote than it seemed at the start. And a DIY job that peels in 18 months costs twice as much in the end.

What should you ask an epoxy installer before they start?

Before any installer lays down a drop cloth, ask them how they prepare the surface. Diamond grinding is the professional standard. Acid etching alone is not sufficient for most modern epoxy systems and is a signal to keep asking questions. A good installer will talk you through their process without hesitation.

Ask about the coating system they recommend and why. A reputable company will match the system to your slab, your environment and your use case, not just default to one product for every job. Ask about the topcoat specifically: is it standard epoxy, polyurethane or polyaspartic? That matters for UV resistance, scratch resistance and cure time.

Find out how long you will need to stay off the floor. Most epoxy systems are walkable within 24 hours but need 72 hours before you drive a vehicle on them. Some faster-cure polyaspartic systems can take a car the same day. Knowing the timeline helps you plan, especially if the garage is your main storage or parking space.

Finally, ask for examples of similar jobs they have done. A company that does garage floors regularly will have photos of finished work, and references are not unreasonable to request for a job of this size.

Metal and Flake specialise in epoxy garage floors across Melbourne and surrounds. If you want a floor that looks sharp, holds up hard and does not need babying, reach out today. Get a free garage floor quote

Garage Floor Epoxy in Melbourne: What You Need to Know

Garage Floor Epoxy in Melbourne: What You Need to Know

Garage floor epoxy is a two-part resin coating that bonds directly to concrete, creating a tough, seamless surface that resists oil, tyre marks, abrasion and moisture. For Melbourne homeowners, it turns a cracked, dusty slab into a clean, durable floor that holds up to daily use and still looks sharp years later.

What exactly is garage floor epoxy and how does it work?

Garage floor epoxy is a thermosetting resin made by mixing a resin base with a hardener. When the two parts combine and are applied to prepared concrete, a chemical reaction creates a rigid, plastic-like surface that is far harder and more adhesion-resistant than paint or sealers. The cured coating bonds at a molecular level with the concrete, which is why proper surface preparation is what separates a coat that lasts a decade from one that peels within a year.

There are a few main product types you will come across. Water-based epoxy is easier to apply and low in odour, but it is thinner and best suited to light foot traffic or as a primer coat. Solvent-based epoxy is stronger and more chemical-resistant, but the fumes require serious ventilation. 100% solids epoxy has no solvents at all: every drop you put down stays down, giving you the thickest, hardest-wearing film. Most professional garage floor jobs in Melbourne use 100% solids as the base coat for exactly that reason.

Why does surface preparation matter so much for garage floor epoxy?

Surface preparation is the single biggest factor in whether a garage floor epoxy coating succeeds or fails. Epoxy needs a clean, open, slightly rough concrete profile to grip onto. Without it, moisture vapour, oil contamination or a sealed surface will cause the coating to delaminate, often within months. No amount of premium product fixes bad prep.

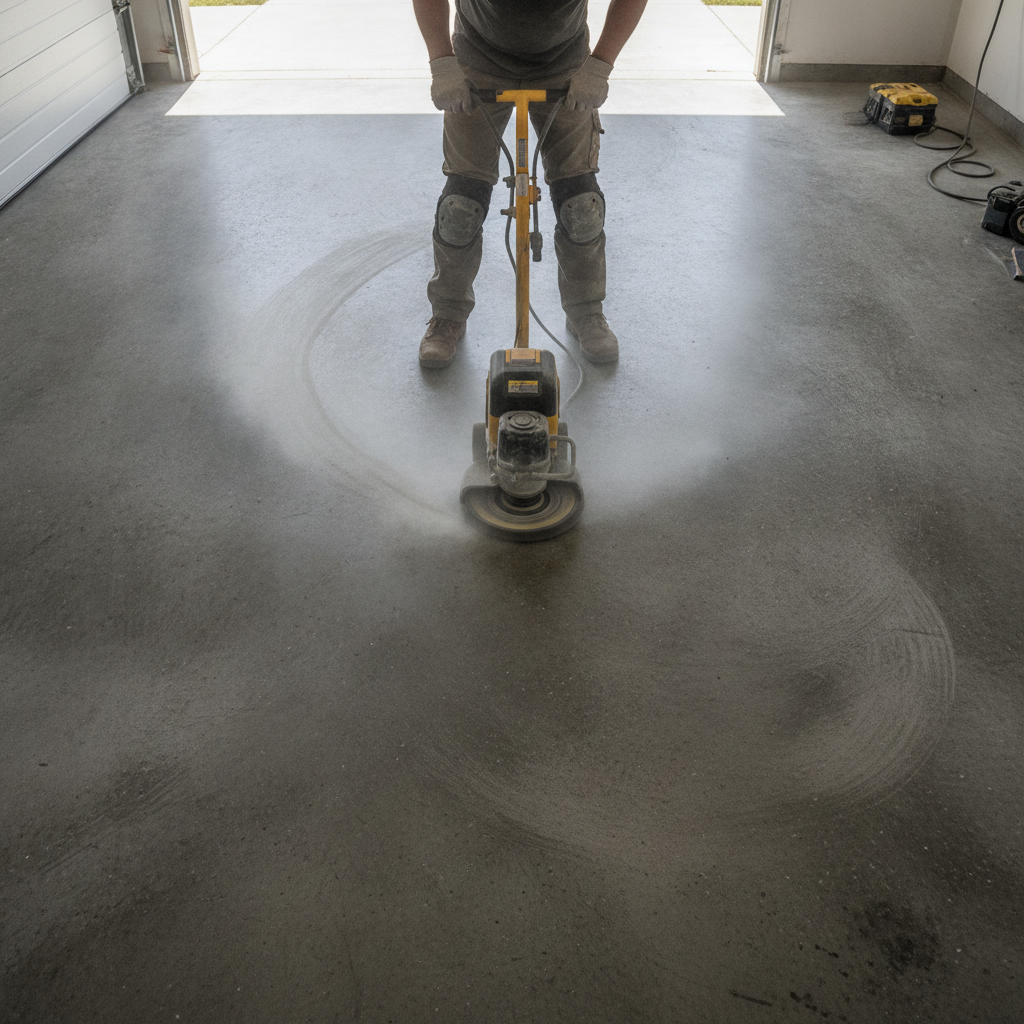
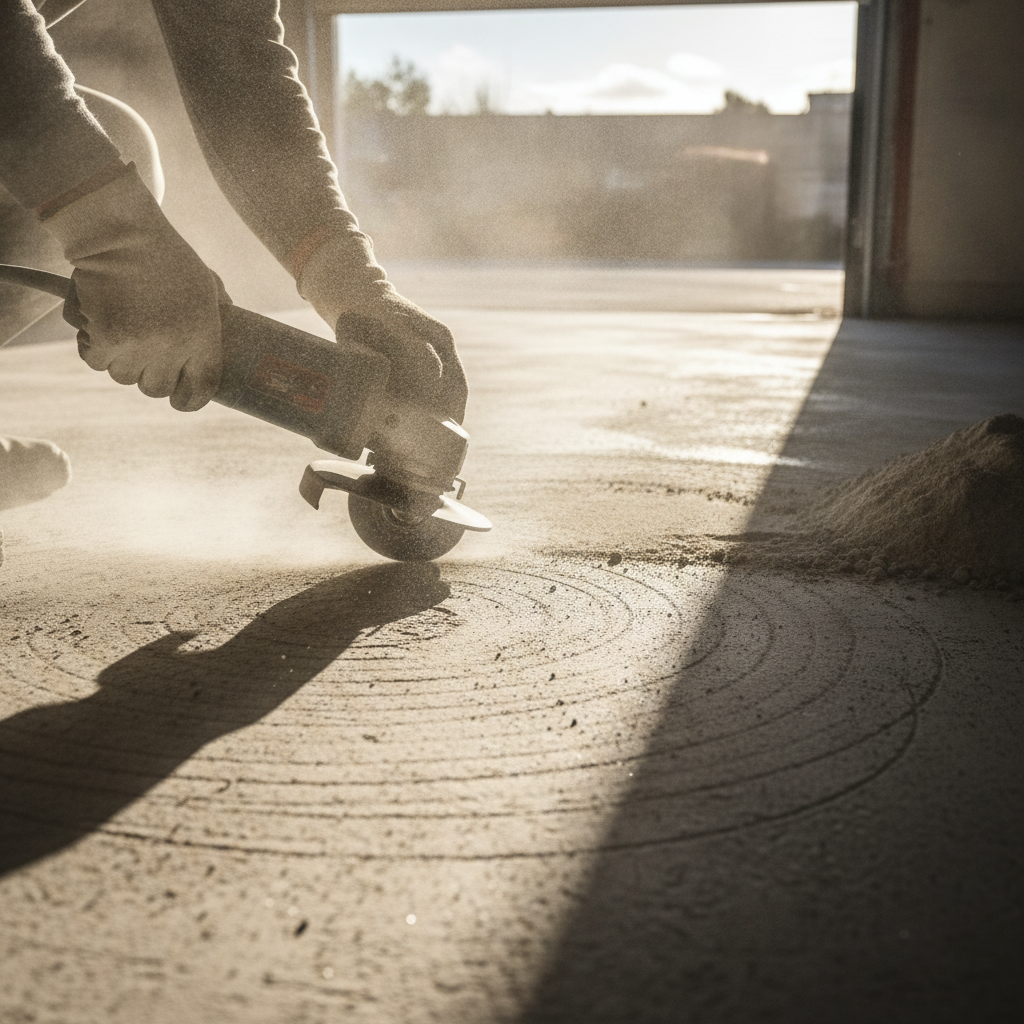
The standard professional method is diamond grinding. A walk-behind grinder with diamond-segment heads cuts back the top surface of the slab, opens up the concrete pores and removes any previous sealers, paint, adhesive residue or surface laitance. Shot-blasting is another method used on large areas. Both produce what the industry calls a Concrete Surface Profile (CSP) of around CSP 2 to CSP 3, which is the texture range most epoxy manufacturers specify for a reliable bond.

Cracks and spalling need to be filled before coating. Small hairline cracks can be routed out and filled with a rigid epoxy filler. Larger structural movement cracks are a different story: an epoxy coating will not bridge active movement, so those need assessment before any coating work starts. Oil stains are the other common headache in a garage environment. Even a stain that looks dry can hold enough petroleum residue below the surface to prevent adhesion. Degreasing and sometimes grinding back through the contaminated zone is the only reliable fix.

What finish options are available for a garage floor epoxy?

The most popular choice for Melbourne garages is a flake or chip finish, where coloured vinyl flakes are broadcast into the wet epoxy base coat and then sealed under a clear polyurethane or polyaspartic topcoat. Flake floors hide minor imperfections, add grip underfoot and come in hundreds of colour combinations. A metallic epoxy finish is the other standout option: metallic pigments swirled through the wet resin create a three-dimensional, almost liquid look. Both are sealed with a topcoat that determines the final sheen level, from satin to a high-gloss mirror finish.

For garages that see heavy vehicle traffic, a polyaspartic topcoat is worth knowing about. Polyaspartic cures faster than traditional epoxy topcoats (some formulas reach 80% hardness within a few hours), resists UV yellowing better and handles temperature extremes well. Melbourne’s swinging seasons, from freezing Dandenong Ranges mornings to scorching 40-plus-degree western suburbs afternoons, make UV and thermal stability genuinely useful features rather than marketing talk.

How long does garage floor epoxy take to install and when can you use it?

A professional garage floor epoxy installation in a standard double garage (roughly 36 to 40 square metres) typically takes one to two days on site, spread across two visits. Day one covers grinding, crack repair and the base coat. Day two, once the base has cured to a tack-free state, covers the topcoat. Light foot traffic is usually possible 24 hours after the final coat. Vehicle traffic needs to wait longer: most product data sheets specify 72 hours before driving on the floor, and a full seven-day cure before returning heavy items or parking a vehicle that sits stationary for extended periods, such as a classic car on jack stands.

Temperature matters during application. Epoxy should not be applied when the slab or air temperature is below 10 degrees Celsius, because the chemical reaction that drives curing slows dramatically in the cold. Melbourne winters can push morning slab temps well under that threshold, especially in south-facing garages. A good installer will check slab temperature with a contact thermometer before mixing product, not just glance at the weather app.

What does garage floor epoxy cost in Melbourne?

Professionally installed garage floor epoxy in Melbourne generally ranges from around $50 to $120 per square metre, depending on the system chosen, the condition of the existing slab and the complexity of the job. A basic single-colour system with minimal prep sits at the lower end. A full flake or metallic system with diamond grinding, crack repairs and a polyaspartic topcoat sits toward the upper end.

DIY kits are available from hardware stores for well under $200, but the trade-off is a thinner film, limited colour options and the very real risk of peeling if the prep is rushed or the product is applied outside its temperature window. A professional coating applied correctly is expected to last 10 to 20 years with basic maintenance. A poorly applied DIY coat may need stripping and redoing within two to three years, which costs more in the long run than getting a professional in from the start.

How do you maintain a garage floor epoxy once it is down?

Maintaining a garage floor epoxy coating is refreshingly low-effort compared to bare concrete. Regular sweeping or blowing out dust and debris is the main task. For deeper cleaning, a mop with warm water and a pH-neutral cleaner is all you need. Avoid bleach-based cleaners and strong solvents: they can dull the topcoat over time. Oil drips from a leaky vehicle should be wiped up promptly rather than left to sit, not because they will penetrate a cured epoxy surface, but because they make the floor slippery and can stain the finish if they soak into a topcoat scratch.

Placing rubber mats under motorcycle side-stands or jack stands is a good habit. Concentrated point loads from sharp metal edges can dent or scuff any floor coating. Furniture leg pads under shelving units and tool cabinets serve the same purpose. Beyond that, an epoxy floor largely looks after itself.

If you are ready to stop sweeping dust off bare concrete and start actually enjoying your garage, Book a garage floor epoxy consult.

Epoxy Flooring Installation Cost in Melbourne: 2024 Guide

Epoxy Flooring Installation Cost in Melbourne: 2024 Guide

Epoxy flooring installation cost in Melbourne typically runs between $30 and $120 per square metre, depending on the system you choose, the condition of your existing slab and the size of the job. A standard single-car garage in a solid metallic or flake finish generally lands between $1,500 and $3,500 all in. More decorative or commercial-grade systems push higher.

What factors affect the epoxy flooring installation cost the most?

The epoxy flooring installation cost is shaped primarily by four things: the type of epoxy system chosen, the square metreage, the condition of the concrete slab underneath, and the level of prep work required. A floor that needs crack repairs, moisture mitigation or heavy degreasing before coating will always cost more than a clean, sound slab ready to go.

Here is a plain-language breakdown of what moves the needle:

  • System type. A basic single-coat epoxy seal is the cheapest option. Mid-range flake or quartz broadcast systems sit in the middle. Full metallic epoxy or multi-layer decorative systems are at the top end because of the extra product, time and skill involved.
  • Slab condition. Concrete that is cracked, contaminated with oil, or has high moisture readings needs remediation before any coating goes down. That prep work adds cost but skipping it is a false economy because the coating will fail.
  • Square metreage. Larger floors cost less per square metre because the mobilisation, equipment and set-up cost is spread across more area. A 20 sqm laundry room will cost more per metre than a 200 sqm warehouse floor.
  • Number of coats and topcoat type. A polyurethane or polyaspartic topcoat adds durability and UV stability, and adds to the price. For a garage or commercial floor exposed to traffic, it is worth every cent.
  • Access and complexity. Columns, floor penetrations, drains and tight corners all slow the job down and add labour time.

What are the typical epoxy flooring price ranges for common Melbourne jobs?

For most residential and light-commercial jobs in Melbourne, epoxy flooring sits in a fairly predictable band once you know the system. A single-car garage (around 20 to 25 sqm) with a flake broadcast finish and topcoat runs roughly $1,500 to $2,500. A double garage (40 to 50 sqm) in a metallic system typically comes in between $2,800 and $5,000. Warehouse and commercial floors over 200 sqm can drop to $30 to $50 per metre for solid-colour industrial coatings.

To give you a more concrete feel for what you get at each price point:

  • $30 to $50 per sqm: Basic solid-colour epoxy, one to two coats, minimal prep. Suited to utility areas and light industrial floors where appearance is secondary to protection.
  • $50 to $80 per sqm: Flake or quartz broadcast systems with a clear polyurethane topcoat. This is the sweet spot for residential garages, workshops and showrooms. Good slip resistance and a clean finish.
  • $80 to $120+ per sqm: Full metallic epoxy, custom blends or multi-layer systems. Used in display spaces, high-end residential interiors and commercial fit-outs where the floor is part of the look.

These figures assume standard Melbourne metro conditions. Regional jobs may carry a travel or mobilisation fee on top.

Why does concrete preparation add to the cost, and can you skip it?

Concrete preparation adds to epoxy flooring installation cost because it is labour and equipment intensive. Diamond grinding, shot blasting or scarifying the surface opens up the concrete’s pores so the epoxy forms a mechanical bond rather than just sitting on top. Without this, even a high-quality epoxy system will peel, bubble or delaminate within months of installation.

The short answer is no, you cannot skip proper prep if you want the floor to last. A reputable installer will diamond grind the slab as a minimum. If moisture testing reveals a high reading (above 75% relative humidity in the slab is a common industry threshold), a moisture-tolerant primer or DPM layer is needed before the decorative coats go down. These are not upsells. They are the difference between a ten-year floor and a floor that starts peeling by next winter.

Oil contamination from old vehicles is one of the most common issues in Melbourne garages. Surface degreasing alone rarely fixes it. Grinding below the contamination line and, in bad cases, applying an epoxy-based oil-tolerant primer is the correct fix. Factor this into your budget if your garage has seen years of car storage or mechanical work.

How do you compare epoxy flooring quotes fairly in Melbourne?

Getting three quotes is sensible, but only if you compare them on the same scope. Epoxy flooring quotes can look very different on paper because installers do not all specify the same things. A quote that lists “epoxy floor coating supplied and installed” tells you almost nothing. A quote that details the system brand, number of coats, dry film thickness, prep method and topcoat type gives you something you can actually compare.

Ask every installer these four questions before you accept their price:

  1. What surface preparation method will you use, and will you diamond grind?
  2. What brand of epoxy are you using, and what is the total dry film thickness of the finished system?
  3. Does the price include a topcoat, and if so, polyurethane or polyaspartic?
  4. What is your warranty on both materials and workmanship?

A cheap quote that skips grinding and uses a thin, single-coat system will cost you more in the long run once you factor in the re-coat or replacement. The best value is a correctly specified system installed by someone who knows the product and the substrate, not the lowest number on a page.

Are there ways to reduce epoxy flooring installation cost without cutting corners?

Yes. The most effective way to keep costs down is to prepare well before the installer arrives. Clear the floor completely of shelving, vehicles, stored goods and anything else. The cleaner and more accessible the slab, the less time the crew spends on non-coating work, and some installers price that into their quote.

Timing also matters. Winter is generally quieter for floor coaters in Melbourne, and some installers offer better rates for jobs booked in the off-peak window. Combining a garage and a shed or workshop in a single visit spreads the mobilisation cost across more square metres and brings your per-metre price down.

Choosing a proven mid-range system over a boutique decorative finish is another sensible move if budget is tight. A well-applied flake broadcast system with a polyurethane topcoat will outlast a poorly applied metallic at twice the price. The system is only as good as the installation.

Finally, do not over-specify for the use case. A home garage does not need the same heavy-duty industrial coating as a food processing plant. A good installer will recommend the right system for the actual traffic and conditions, not the most expensive option on the menu.

If you are ready to find out exactly what your floor will cost, Get a free epoxy flooring quote from the team at Metal and Flake Melbourne today.

Epoxy Floors 101: Everything You Need to Know Before You Buy

Epoxy Floors 101: Everything You Need to Know Before You Buy

Epoxy flooring is a resin-based coating applied directly to concrete. Two components, a resin and a hardener, are mixed on site and spread over a prepared slab. They react chemically, curing into a hard, seamless surface that bonds tightly to the concrete beneath. Done right, it lasts well over a decade and handles heavy traffic, chemical spills and daily wear without complaint.

What exactly is epoxy and how does it differ from a regular floor paint?

Epoxy is a two-part thermosetting polymer, not a paint. Standard floor paint is a single-component product that sits on top of concrete and peels under load. Epoxy undergoes a chemical cure that fuses it to the slab at a molecular level. The cured film is typically two to three millimetres thick for a full broadcast system, compared to the thin coat of paint that can be scraped off with a key. The difference in durability is enormous.

Regular floor paint is water or solvent-based and relies on evaporation to dry. Epoxy relies on a catalytic reaction between the resin and the hardener. Once those two parts are mixed, the clock is ticking. You have a working window, usually 20 to 40 minutes depending on temperature, to get the product laid out. That is why surface preparation and job planning matter so much with epoxy work.

In practical terms, paint bubbles, flakes and fades within a year or two on a garage floor. A properly installed epoxy system with colour flakes and a polyurethane topcoat will still look sharp after ten or fifteen years of daily use. That is the value proposition in plain terms.

What types of epoxy floor systems are available?

There are several epoxy floor systems, and the right one depends on your use case. A solid-colour self-levelling epoxy suits commercial kitchens and workshops where hygiene and chemical resistance matter most. A decorative flake system, where vinyl colour chips are broadcast into the wet epoxy, suits garages, showrooms and living areas where appearance counts. Metallic epoxy uses pigmented mica powder to create a three-dimensional swirl effect. Each system has different performance characteristics and price points.

The most common system in residential Melbourne is the full broadcast flake floor. You get a base coat of epoxy, a full scatter of colour flakes across the whole surface, a grout coat of clear epoxy to lock the flakes in, and a polyurethane or polyaspartic topcoat for UV stability and scratch resistance. The topcoat layer is what protects the floor long-term. Skipping it or using a cheap version is where many budget jobs fall apart within a couple of years.

Metallic epoxy floors have grown in popularity for living areas, retail spaces and feature rooms. The product is more sensitive to temperature and humidity during application, so the installer needs experience with it. A botched metallic floor shows every mistake because the swirl pattern makes texture and fish-eyes very obvious.

How important is surface preparation for an epoxy floor?

Surface preparation is the single most important step in any epoxy floor installation. If the concrete is not properly opened up and cleaned before the epoxy is applied, the coating will fail. The industry standard is diamond grinding or shot blasting to create a concrete surface profile of CSP 3 to CSP 4. That roughness gives the epoxy something to mechanically bond to. Acid etching alone is not sufficient for a system expected to last.

Concrete moisture is the other big killer. Epoxy does not bond well to damp concrete. A reliable installer will test moisture vapour emission before they mix a drop of product. If moisture levels are too high, a moisture-tolerant primer or a surface DPM (damp-proof membrane) goes down first. Rushing past this step is the reason so many epoxy floors bubble and delaminate within twelve months.

Cracks and joint lines also need to be addressed before the epoxy goes down. Fine shrinkage cracks can be filled with an epoxy crack filler or flexible polyurethane. Expansion joints should be maintained through the coating rather than buried under it, because the concrete will still move and the floor will crack along those lines regardless of what is sitting on top.

How much does an epoxy floor cost in Melbourne?

Epoxy floor pricing in Melbourne typically ranges from around $30 to $80 per square metre depending on the system chosen, the condition of the existing concrete and the size of the job. A basic two-coat solid-colour system for a single garage of 35 to 40 square metres will come in at the lower end. A full broadcast flake system with polyurethane topcoat on the same area sits in the mid-range. Metallic epoxy or multi-colour custom work pushes toward the upper end.

What drives costs up is concrete remediation. A slab with significant cracking, laitance, old paint, or previous coatings takes more preparation time. Grinding out old coatings, filling cracks and dealing with contamination all add labour hours before a single litre of epoxy is mixed. Always ask your installer to inspect the slab before providing a fixed price. A quote given over the phone without a site visit is not a reliable number.

It is also worth asking what topcoat is included. Some entry-level quotes use a single clear epoxy topcoat rather than a dedicated polyurethane or polyaspartic product. The latter two are UV-stable and far more abrasion-resistant. Over a ten-year horizon, paying a bit more upfront for a quality topcoat is straightforward value.

How long does an epoxy floor take to install and cure?

Most residential epoxy floor jobs in Melbourne take one to two days on site. The preparation work, including grinding and any crack repairs, is done on day one. The epoxy base coat, flake broadcast and grout coat follow. The topcoat is applied once the system has cured sufficiently, usually the next morning. Light foot traffic is typically possible after 24 hours. You should keep vehicles off a new floor for at least 72 hours, and avoid dragging heavy objects across it for a week to allow the full chemical cure to complete.

Temperature affects cure times significantly. In Melbourne winters, a cold slab below 10 degrees Celsius can slow curing and cause amine blush, a waxy surface film that affects adhesion of subsequent coats. A good installer will check slab temperature and ambient conditions before they start and adjust their timing accordingly.

What should you look for when choosing an epoxy floor installer?

Ask about their preparation method first. If the answer is acid wash or a light sand, walk away. Diamond grinding with a commercial grinder is the baseline for a lasting job. Ask what brand of products they use and whether those products are designed for the system being installed, base coat, broadcast medium and topcoat should all be compatible and ideally from the same manufacturer’s system.

Look at their previous work in person if you can. Photos on a phone are easy to stage. An actual floor you can walk on and inspect in natural light tells you far more about their finishing quality. Ask how they handle moisture testing and what their process is if moisture levels come back too high. A contractor who has a clear answer to that question has dealt with it before and knows what they are doing.

References from previous residential or commercial clients in Melbourne are worth chasing. A one-year-old floor in a Melbourne garage tells you a lot more about longevity than a freshly installed showroom floor does.

Ready to move forward? Get a quote for epoxy flooring in Melbourne

5 Garage Floor Coating Options Compared for Melbourne Homes

5 Garage Floor Coating Options Compared for Melbourne Homes

Garage floor coatings protect concrete from oil, moisture, tyre marks and daily wear while making your space look sharp. The five main options are epoxy, polyurea, polyaspartic, concrete paint and interlocking floor tiles. Each suits a different budget, use case and timeline, so comparing them side by side saves you from a costly redo down the track.

What makes epoxy the most popular garage floor coating in Melbourne?

Epoxy is the most popular garage floor coating because it bonds directly to concrete, creates a hard and seamless surface, and handles heavy vehicle and foot traffic over the long term. It can be finished with decorative flake or metallic pigments, giving a professional result at a price point that works for most residential garages in Melbourne.

Epoxy is a two-part system: a resin and a hardener. When mixed and applied to prepared concrete, a chemical reaction creates a surface that is far tougher than anything that comes out of a paint tin. A standard broadcast flake epoxy system typically runs between 2 mm and 3 mm thick when you include the base coat, broadcast layer and topcoat, compared to a coat of floor paint that might be 0.1 mm at best.

The flake finish that Metal and Flake specialise in serves a practical purpose too. The texture from the flake broadcast adds a non-slip element underfoot, which matters in a Melbourne garage where morning condensation and the odd water splash are facts of life. You can also choose full-flake coverage to hide minor imperfections in the slab, or a partial broadcast for a speckled look that shows more of the base colour.

Cure time is the main thing to plan around. A properly catalysed epoxy system needs around 24 hours before foot traffic and at least 72 hours before you drive a car back in. Rush that and you risk tyre marks that become permanent. Done right, a quality epoxy floor in a residential garage can last 10 to 20 years with minimal maintenance.

How does polyurea compare to epoxy as a garage floor coating?

Polyurea is a flexible, fast-curing coating that reaches full hardness in a matter of hours rather than days, and handles UV exposure better than standard epoxy. It is often used as a topcoat over an epoxy base coat in a hybrid system, combining the adhesion and build of epoxy with the durability and speed of polyurea to get the best of both materials.

On its own, pure polyurea is harder to apply than epoxy because it cures so quickly. Professional applicators need to move fast, which is why it is rarely a DIY job. Its flexibility also means it can handle concrete that expands and contracts slightly with Melbourne’s seasonal temperature swings without cracking or delaminating, which is a real advantage in older slabs.

Cost tends to be higher than a straight epoxy system, but the trade-off is a faster return to service and a surface that won’t yellow under the harsh UV that comes through uninsulated garage roller doors. If you use your garage daily and can’t afford downtime, the faster cure is genuinely worth the extra spend.

What is a polyaspartic coating and is it worth it for a home garage?

Polyaspartic coatings are a subgroup of polyurea chemistry. They cure fast like polyurea but are a little more forgiving to apply, making them suited to single-coat or thin-build systems. They are UV-stable, highly scratch-resistant and can often be applied and walked on the same day, which is useful for homeowners who need their garage back quickly.

The catch is that polyaspartic is a thinner build than a full epoxy system. On a rough or pitted slab, a polyaspartic coat alone may not fill imperfections the way a multi-coat epoxy system can. For a well-prepared, relatively smooth slab it works brilliantly. For a garage that has seen years of oil spills and concrete repairs, a thicker epoxy base coat underneath is the smarter starting point.

How do concrete paint and floor tiles stack up against proper garage floor coatings?

Concrete paint and interlocking floor tiles are the two budget-entry options for garage floors, but both come with significant limitations compared to a bonded coating system. Paint peels, tiles shift and lift, and neither provides the seamless, chemical-resistant surface that a professionally applied coating delivers over the long run.

Concrete paint, often sold at hardware chains as a one-pot solution, is the cheapest option upfront. It’s easy to apply over a weekend, but it sits on the surface rather than bonding chemically into the concrete. In a working garage, you’ll typically see peeling and tyre marks appear within one to three years, especially in a Melbourne climate where temperature cycles are pronounced. Most people who go this route end up paying for a proper coating anyway, so the savings are short-lived.

Interlocking PVC or rubber tiles solve the problem of installation time. You can lay them in a few hours, and they don’t require any curing. They’re easy to replace if one tile cracks or stains. The downside is that grit and moisture get under the tiles over time, which can breed mould on the concrete below and is unpleasant to deal with. They also move underfoot in a way that a bonded coating never does, and they don’t add much to the visual appeal of the space.

Which garage floor coating is the right choice for a Melbourne home?

For most Melbourne homeowners, an epoxy base coat with a polyurea or polyaspartic topcoat is the best all-round garage floor coating. It delivers durability, chemical resistance, UV stability and a finish that holds up to daily driving, Melbourne’s seasonal temperature swings and the occasional oil spill, all while looking far better than bare concrete or painted floors.

Here’s a quick practical comparison to help you decide:

  • Epoxy (standard or flake): Best value for a long-lasting, good-looking finish. Needs 72-hour cure before vehicle use. Suits most residential garages.
  • Polyurea topcoat over epoxy: Best overall system. Fast return to service, UV-stable, flexible. Ideal if you want the floor done right the first time.
  • Polyaspartic single-coat: Good for smooth, well-prepared slabs where speed is the priority. Same-day return to foot traffic.
  • Concrete paint: Cheapest upfront, shortest lifespan. Expect to redo within a few years in a working garage.
  • Interlocking tiles: No cure time needed, easy DIY install, but grit and moisture accumulate underneath and the look is hard to match with a quality coating finish.

Surface preparation is the single biggest factor in how long any coating lasts. A diamond grind of the concrete opens up the pores and gives the coating something to grip. Skip that step and even the best product will fail ahead of schedule. Moisture testing matters too: concrete in Melbourne can trap rising damp, and applying a coating over a wet slab without the right primer leads to bubbling and delamination.

If your garage floor is stained, cracked or just looking tired, a professional coating applied over a properly prepared surface will transform how the whole space feels. It’s one of the higher-return upgrades you can make to a home, and it’s a lot more affordable than most people expect when they get an actual number in front of them.

Get a quote for garage floor coating

Epoxy Resin Garage Floors: What Melbourne Homeowners Should Know

Epoxy Resin Garage Floors: What Melbourne Homeowners Should Know

Epoxy resin garage floors are a two-part coating system, a resin and a hardener, that bond chemically to concrete and cure into a hard, seamless surface. They resist oil, tyre marks, moisture and abrasion far better than bare concrete. For Melbourne homeowners, they are one of the most cost-effective ways to upgrade a garage and protect the slab long-term.

What exactly are epoxy resin garage floors made of?

Epoxy resin garage floors are made from two components mixed together just before application: an epoxy resin and a polyamine hardener. When they react, they form a thermoset polymer that bonds tightly to the concrete substrate. The result is a surface that is typically two to three millimetres thick, dense enough to handle vehicle traffic, dropped tools and chemical spills without cracking or peeling under normal conditions.

There are several product types used in residential garages. Water-based epoxy is thinner and easier to apply but less durable over time. Solvent-based epoxy gives a thicker, harder film. 100 percent solids epoxy, the kind used by professional installers, contains no water or solvent at all, so almost none of the material evaporates during curing. That means you get the full thickness you paid for, which matters a lot when you are parking a car on it every day.

On top of the base coat, decorative elements like colour flake (also called vinyl flake or chip) are broadcast into the wet resin. This is what gives the classic speckled finish you see in showrooms and modern homes. A clear topcoat then seals everything in, adding gloss and another layer of protection.

Why do Melbourne garages in particular benefit from an epoxy resin floor?

Melbourne garages benefit from epoxy resin floors because the city’s climate puts concrete under real stress. Temperature swings between summer heat and winter cold cause concrete to expand and contract, which can lift or delaminate poorly prepped coatings. A properly installed epoxy system, especially one with a mechanical surface profile from diamond grinding, bonds at a level that moves with the slab rather than fighting it.

Melbourne also sits in a zone where moisture migration through slabs is common, particularly in older homes built before damp-proof membranes were standard practice. Moisture vapour rising through a slab is the number one cause of epoxy delamination. A good installer will test the slab with a moisture meter before they mix a drop of product. If moisture readings are too high, a moisture-tolerant primer goes down first. Skip that step and the coating will bubble and peel within months.

Beyond the technical reasons, there is a practical lifestyle one. Melbourne homeowners use their garages hard: storing bikes, gym gear, workshop tools, and second vehicles. A sealed epoxy floor is easy to sweep and hose down, and it does not harbour the dust that bare concrete constantly sheds. That dust gets tracked into the house, so sealing the garage floor is actually a small improvement to the whole home.

How does surface preparation affect the final result on epoxy resin garage floors?

Surface preparation is the single biggest factor in how well epoxy resin garage floors perform over time. A poorly prepped slab will cause even premium epoxy to fail, while a well-prepped slab gives a budget-friendly product a fighting chance. The standard for professional installation is mechanical grinding with a diamond-cup grinder, which opens the pores of the concrete and creates a surface profile that the resin can grip.

Acid etching, the DIY method sold in hardware kits, is a much weaker alternative. It removes surface laitance but does not create the same profile depth. Consumer-grade kits from hardware stores typically use water-based epoxy at around 30 to 50 percent solids, which means up to half the product evaporates before it cures. The finished film is thin, often under one millimetre, and lacks the abrasion resistance of a professionally applied 100 percent solids system.

Cracks and expansion joints need attention before coating too. Small hairline cracks can be filled with an epoxy mortar or polyurethane filler. Wide or moving cracks are a different story; if the crack is still active (still opening and closing with temperature), no rigid coating will bridge it permanently. A professional will be honest with you about what is achievable versus what is cosmetic.

What finishes and colours are available for epoxy resin garage floors?

The most popular finish for residential epoxy resin garage floors in Melbourne is the flake or chip system, where coloured vinyl flakes are scattered across the base coat in a blend that suits the homeowner’s taste. Blends range from subtle tones like grey, charcoal and beige through to bold combinations with black, white and terracotta. The density of the flake broadcast also changes the look: a full broadcast (where flakes cover the entire surface) gives a uniform texture and hides imperfections in the concrete, while a partial broadcast lets some of the base coat colour show through for a more layered effect.

Metallic epoxy is another option that has grown in popularity. Fine metallic pigments are mixed directly into the resin and manipulated with a squeegee or roller to create flowing, three-dimensional patterns that look almost like polished stone or liquid metal. The finish varies with every install, which means each floor is genuinely unique. It is a more demanding application requiring skill and experience to get right, but the visual result is striking in a finished garage or workshop space.

For homeowners who prefer a clean, industrial look, a solid-colour base with a high-gloss clear topcoat is always an option. Light colours like battleship grey or light stone reflect more light and make a dark garage feel noticeably brighter, which is worth considering if your garage doubles as a workspace.

How long do epoxy resin garage floors last and what maintenance do they need?

A professionally installed epoxy resin garage floor on a properly prepared slab can last ten to twenty years before needing a recoat, depending on traffic levels and how well it is maintained. Consumer-grade DIY systems typically last two to five years before they start to peel or wear through in high-traffic zones like tyre tracks.

Day-to-day maintenance is straightforward. Sweep or blow debris off regularly to stop fine grit acting as an abrasive underfoot. Mop spills promptly, especially petrol, oil and brake fluid, which can stain if left. A diluted neutral-pH cleaner is fine for periodic mopping. Avoid harsh solvents and abrasive pads on the topcoat.

Using furniture pads under heavy workshop equipment or storage shelving prevents point-load indentations over time. Putting a small rubber mat under a motorcycle or car jack stand is a sensible habit too. These are minor habits that add years to the life of the coating.

Recoating is straightforward when the time comes, provided the original install was done correctly. A professional can apply a fresh topcoat over a sound existing epoxy layer without stripping everything back to concrete, which keeps the cost and disruption down significantly compared to a full reinstall.

What should Melbourne homeowners ask a contractor before booking?

Before booking any contractor for epoxy resin garage floors in Melbourne, ask four things directly. First, will you grind the slab with a diamond grinder, or are you using acid etch? The answer tells you immediately about their standard of preparation. Second, what percentage solids is the epoxy product you use? Anything below 70 percent is a sign you are getting a thin, consumer-grade system. Third, do you test for moisture before you start? If they look blank at this question, walk away. Fourth, can you show me examples of finished garages you have done in Melbourne, ideally ones that are two or more years old?

A contractor who answers those questions clearly and confidently, and who can back them up with real photos and references, is worth your time. One who avoids them or gives vague answers is likely to give you a floor that looks great on day one and disappoints you by year two.

Get a quote for epoxy resin garage floors in Melbourne

Self-Levelling Concrete: When to Use It Before Epoxy Floors

Self-Levelling Concrete: When to Use It Before Epoxy Floors

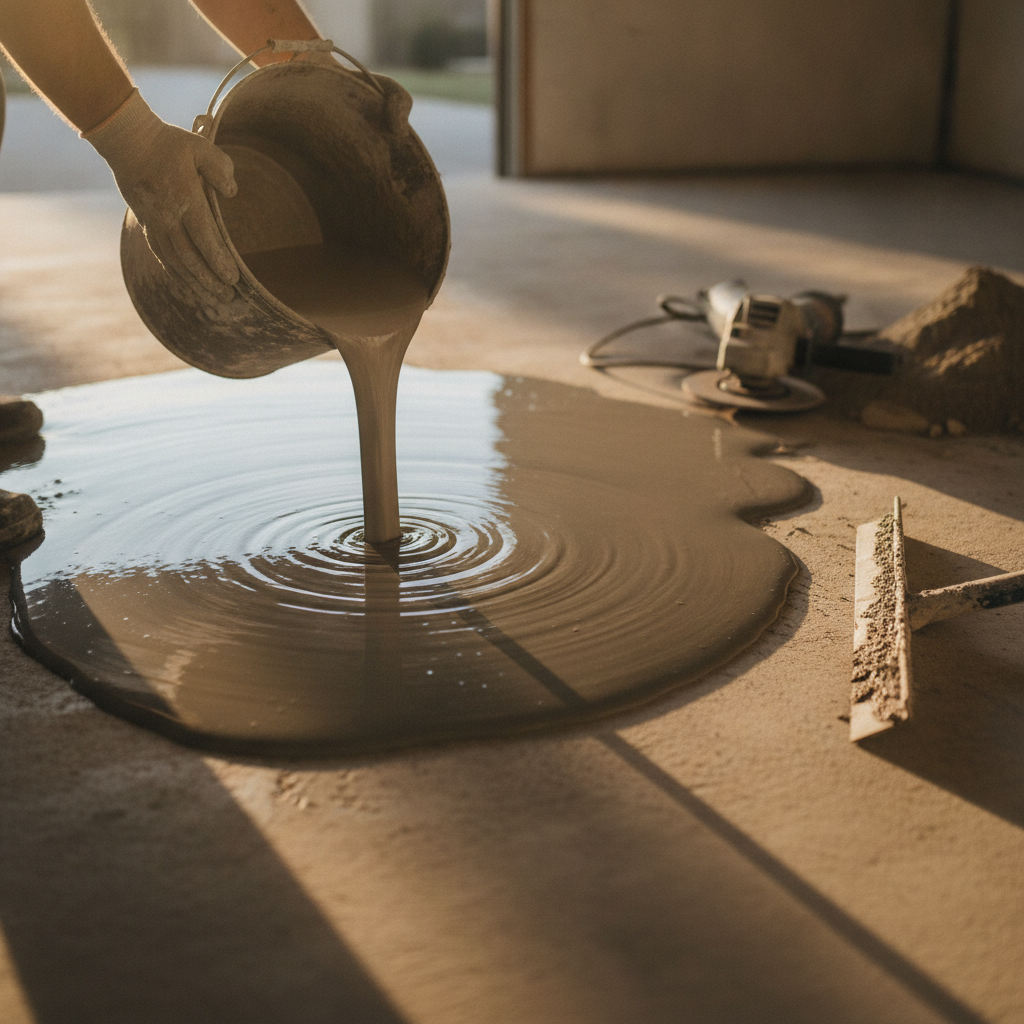
Self levelling concrete is a pourable, cement-based compound that flows across a floor and settles flat under its own weight. You use it before epoxy coating when the existing slab has low spots, uneven sections or surface dips greater than about 3 mm. It fills irregularities that would otherwise telegraph through the finished epoxy coat and cause pooling, cracking or a patchy final appearance.

What exactly is self levelling concrete?

Self levelling concrete is a modified, polymer-reinforced underlayment compound mixed to a pourable consistency. Unlike standard concrete, it contains plasticisers that let it spread and self-smooth without trowelling. Once cured, it provides a hard, flat substrate rated for foot traffic within 24 hours and ready for coating within 24 to 48 hours depending on depth and ambient temperature.

The product is often sold in 20 kg bags and mixed with a measured amount of water before being poured from one end of the room. A gauge rake or smoother pin keeps the depth consistent, usually between 3 mm and 50 mm per pour. Deeper repairs may need two passes. It is not the same as a skim coat or a patch mortar, and it is worth knowing the difference before committing to either.

A skim coat sits at around 1 to 2 mm and is designed to take out surface texture, not height variation. Patch mortar is stiff and is pressed into holes. Self levelling compound sits in between: it handles genuine height changes across a floor that would make a smooth topcoat impossible.

When does a concrete slab actually need self levelling compound before epoxy?

A slab needs self levelling concrete before epoxy when surface variation across any 3-metre span exceeds 3 mm. Below that threshold, diamond grinding and proper surface prep are usually enough. Above it, the epoxy will pool in low areas, cure at uneven thicknesses, and risk peeling or stress cracking within months of installation.

Here are the scenarios where self levelling compound earns its place:

  • Settlement dips. Older Melbourne homes and garages often have slabs that have settled unevenly over decades. A low corner or a gradual slope toward the centre is common in post-war brick veneer construction. No amount of grinding fixes that. You need to bring the low side up.
  • Grinding scars from previous coatings. If someone has already ground back a painted or tiled floor and left ridges or low lanes where the machine tracked, a levelling compound smooths the whole surface back to one plane.
  • Tiled floors where tiles have been removed. Tile adhesive leaves lumps and the tile bed sits higher than the surrounding slab. Skim over the whole area with self levelling compound and you eliminate every high point and low point in one step.
  • Industrial slabs with traffic wear channels. Forklifts and pallet jacks travelling the same path for years wear grooves. These can be several millimetres deep and several hundred millimetres wide, well beyond what a squeegee-applied epoxy basecoat can fill.

What won’t self levelling concrete fix?

Self levelling concrete will not fix structural cracks, active movement joints, contaminated concrete or a slab with moisture coming up from below. Pouring compound over any of those problems traps the issue under the surface. The compound will delaminate, crack through or bubble, and the epoxy coat on top will fail along with it.

Structural cracks need to be routed out and filled with a semi-rigid polyurethane or epoxy crack injection product before any levelling work begins. Movement joints need to be respected and carried through the compound layer. A slab with a positive moisture reading above the threshold recommended by the compound manufacturer needs proper moisture mitigation first. Pouring compound over a wet slab is one of the most common reasons DIY floor prep jobs fail.

Surface contamination is the other silent killer. Oil, grease, paint, curing compounds and adhesive residue all need to be removed before the compound is poured. If they are not, the compound sits on the contamination rather than bonding to the concrete, and it will lift in sheets. The prep steps before self levelling compound are almost identical to the prep steps before epoxy: mechanical scarification or diamond grinding, cleaning, and a priming coat to seal the concrete surface and help the compound key in.

How does self levelling concrete fit into proper floor preparation for epoxy?

Self levelling concrete is one step in a broader floor preparation process, not a standalone solution. For an epoxy coating to last, the slab needs to be structurally sound, clean, dry, flat and mechanically profiled. Self levelling compound addresses flatness. The other requirements need to be met independently before and after the pour.

A typical prep sequence that includes self levelling compound looks something like this:

  1. Inspect the slab for cracks, movement, moisture and contamination.
  2. Repair cracks and fill deep voids with appropriate products.
  3. Grind or scarify the surface to remove coatings, laitance and contamination, and to open the concrete profile.
  4. Vacuum and clean thoroughly.
  5. Apply a bonding primer to the prepared concrete.
  6. Pour the self levelling compound to the required depth and allow to cure fully.
  7. Light sand or grind the compound surface if needed to remove any pin-holes or ridges.
  8. Apply the epoxy basecoat, broadcast any decorative flake or metallic aggregate, and finish with topcoats.

Skipping or rushing any of those steps is where things go wrong. The self levelling pour looks simple but it is unforgiving. Once it is down and setting, you have a narrow window to fix any coverage gaps or air bubbles before the compound locks in. Experienced installers work quickly and methodically, priming right to the edges, mixing to a consistent water ratio, and pouring in a continuous wet edge across the floor.

Should you use self levelling concrete yourself or leave it to a professional?

For a small floor with minor variation, a confident DIYer with the right products and a flat profile to achieve can manage self levelling concrete themselves. For floors larger than about 20 square metres, floors with significant height variation, or floors destined for a professional epoxy coating, it is worth leaving the levelling work to the same crew doing the epoxy. Adhesion failures and hollow spots under the compound are hard to detect until the epoxy coat starts to separate months down the track.

Getting the primer right matters as much as the pour itself. Most self levelling compound manufacturers specify a particular primer dilution, dwell time and surface-dry condition before the compound is poured. Residential applicators often skip the primer or use the wrong product and end up with compound that sounds hollow underfoot. On a floor headed for an epoxy finish, that is not acceptable.

A professional floor preparation crew will diamond grind the concrete to an open profile, apply the correct primer, pour and gauge the compound, and assess the finished surface before the epoxy work begins. That full sequence is the only way to guarantee the epoxy topcoat bonds properly, cures evenly and performs for the long haul.

If your slab has visible dips, uneven sections from old tiles or settlement, or grinding marks from a previous removal job, get it assessed before any coating work starts. Good prep is the difference between an epoxy floor that looks great for ten years and one that starts lifting within two.

Get a quote for floor preparation and epoxy coating

Concrete Paint for Floors: What Works and What Doesn’t

Concrete Paint for Floors: What Works and What Doesn’t

Concrete paint is a water- or solvent-based coating rolled or brushed directly onto bare concrete to add colour and a basic layer of protection. It works well for low-traffic decorative areas like garden paths and feature walls, but on floors that take daily foot traffic, vehicle loads or moisture from below, standard concrete paint tends to peel, chip and wear through within a year or two.

What exactly is concrete paint, and how is it different from a floor coating?

Concrete paint is a pigmented film-forming product, usually acrylic or masonry-based, designed to sit on the surface of concrete rather than bond chemically with it. A floor coating, by contrast, penetrates or chemically bonds to the slab. Because concrete paint doesn’t key into the substrate the same way, it sits proud of the surface and is far more vulnerable to peeling once moisture, abrasion or flexing works underneath it.

The main types you’ll find at hardware stores in Melbourne are:

  • Acrylic concrete paint: Water-based, easy to apply, quick to dry. Fine for garage walls, garden edging or a basement floor that sees almost no traffic.
  • Porch and floor enamel: Slightly tougher than straight acrylic. Still a surface film, still prone to peeling under heavy use.
  • Rubber-based masonry paint: More flexible than standard acrylic, which helps it cope with minor concrete movement, but it scratches easily and doesn’t handle hot tyre marks or chemical spills.

None of these are the same thing as an epoxy floor coating, a polyurethane coating or a penetrating concrete sealer. Knowing the difference before you spend a weekend on prep and application can save you a lot of frustration.

Where does concrete paint actually hold up well?

Concrete paint is not useless. It earns its place in the right situations, and being straight about that matters more than rubbishing the product altogether.

It performs reliably on surfaces that stay dry, see light foot traffic only, and don’t need to resist chemicals or heavy point loads. Think of a covered alfresco path, a garden retaining wall, a storage shed floor that barely gets walked on, or a laundry wall behind the trough. In those settings, a quality acrylic concrete paint applied over a clean, properly primed surface can last three to five years before needing a refresh.

The other scenario where it makes sense is when budget is genuinely tight and the surface is temporary. If you’re renting a commercial space short-term and just want the concrete looking tidy, a roller coat of concrete paint is cheap, fast and good enough. You’re not expecting it to last a decade.

One concrete detail worth knowing: on outdoor surfaces, UV stability matters. Many standard concrete paints fade noticeably within the first Melbourne summer. Look for products that specifically call out UV resistance on the label, or plan to repaint every couple of years.

Why does concrete paint fail on busy floors?

The failure modes of concrete paint on working floors follow a predictable pattern, and once you’ve seen it once you’ll recognise it everywhere. It usually starts at the edges and joins, where foot or wheel traffic is concentrated. Small chips lift, moisture gets underneath, and a patch the size of a 50-cent coin can spread to a full panel failing within a month.

The main reasons it fails come down to four things:

  1. Moisture vapour transmission: Concrete breathes. Water vapour moves up through the slab from the ground below, and a surface-applied paint film traps it. That pressure has nowhere to go except to push the paint off. This is one of the most common causes of peeling on garage and workshop floors, particularly in Melbourne suburbs where older slabs were poured without a proper vapour barrier.
  2. Adhesion to laitance: The weak, dusty top layer of a concrete slab is called laitance. Most DIYers roll paint straight over it. The paint bonds to the laitance, not to the solid concrete underneath, and when that dusty layer breaks down, so does the paint. Proper prep, meaning either acid etching or mechanical grinding, removes laitance before any coating goes down.
  3. Hot tyre pickup: In a garage that sees regular car use, tyres heat up during driving and are still warm when parked. That warmth softens acrylic paint films and the rubber literally pulls strips off the floor. It’s a phenomenon specific to acrylic and enamel coatings and it’s almost guaranteed to happen within the first summer.
  4. Abrasion from foot traffic: Paint films are thin, typically 50 to 100 microns dry film thickness. An epoxy floor coating applied at proper coverage rates builds to 300 microns or more. That difference in thickness translates directly into wear resistance. A busy workshop floor will wear through standard concrete paint at the walkways within six months.

What prep is actually needed before applying concrete paint?

This is where most DIY jobs fall apart before a drop of paint hits the floor. Prep is not optional and it’s not a quick sweep with a broom. At minimum, a floor that’s going to hold any coating needs the following.

First, the slab has to be clean. Oil, grease, curing compounds and old adhesive residue all break adhesion. Degrease thoroughly with a dedicated concrete degreaser, not a general-purpose cleaner. Rinse well and let it dry completely, which in Melbourne’s cooler months can take longer than you’d expect.

Second, the surface profile has to be right. Concrete paint needs something to grip. Acid etching opens the pores of the concrete and gives a mechanical key. For best results on a floor that sees any real use, mechanical diamond grinding is better still because it removes laitance consistently and doesn’t leave acid residue to neutralise.

Third, moisture has to be checked. A simple plastic sheet test, tape a 600mm square of plastic sheeting flat to the slab, seal all edges with tape, leave it for 24 hours and look for condensation on the underside, will tell you if you have a moisture problem. If the underside is wet, a surface paint film is not the right solution.

When should you skip concrete paint and go straight to a proper floor coating?

If your floor is a garage, workshop, warehouse, showroom or any commercial or residential space that sees regular traffic, concrete paint is a short-term fix that will cost you more in labour and materials over five years than doing it properly once.

A two-part epoxy floor coating chemically bonds to prepared concrete, builds real film thickness, resists hot tyres, chemicals and abrasion, and with a polyurethane topcoat can handle UV exposure outdoors without going chalky. Decorative options like metallic epoxy and vinyl flake systems give you a finish that concrete paint simply cannot replicate, and they last the distance on working floors. Metallic and flake finishes in particular have become popular in Melbourne homes and commercial fitouts because they look sharp and hold up where acrylic paint would have given up long ago.

The honest answer is this: if the job is worth doing, it’s worth doing with the right product. Concrete paint has its place, but that place is not a busy garage floor or a commercial slab that needs to perform for years.

Book a consult for concrete floor coating