Do You Need to Grind Concrete Before Epoxy Flooring? A Melbourne Installer Answers

Family owned & operated · Melbourne & surrounds · Call us free: +61 485 031 001
Do You Need to Grind Concrete Before Epoxy Flooring? A Melbourne Installer Answers

Do You Need to Grind Concrete Before Epoxy Flooring? A Melbourne Installer Answers

Back to Blog

The short answer is yes , if you want the epoxy to last. Grinding concrete before epoxy flooring is not a premium add-on or an optional extra. It’s the single most important step in the whole installation process. This post explains why, what happens when it’s skipped, and how to tell whether your installer is doing it properly.

Key takeaways

  • Diamond grinding creates the mechanical bond between epoxy and concrete. Without it, most floors fail within 1–3 years.
  • Acid etching is not an equivalent substitute for grinding on Melbourne residential slabs.
  • Grinding removes oil contamination, old coatings, and the weak surface layer of concrete.
  • A properly ground floor feels like 40–60 grit sandpaper , slightly rough but uniform.
  • Any installer who skips grinding or substitutes acid etching is cutting a corner that will cost you later.

Why epoxy needs a prepared concrete surface

Epoxy doesn’t work like paint. Paint air-dries on whatever surface you apply it to. Epoxy undergoes a chemical reaction that produces a cross-linked polymer , and for that polymer to adhere permanently, it needs to grip into the pores of the concrete at a mechanical level.

New, untouched concrete usually has a smooth trowelled surface. The pores are partially closed. Concrete that’s been sealed or coated has the pores blocked entirely. Oil-contaminated concrete has a layer of hydrocarbons that physically prevents bonding. In all these cases, epoxy applied without preparation will delaminate , sometimes within weeks, almost always within 2 years.

Grinding solves all of these problems at once. It opens the pores, removes contamination, strips old coatings, and creates a uniform rough profile (called CSP , Concrete Surface Profile) that gives the epoxy something to grip.

What is diamond grinding?

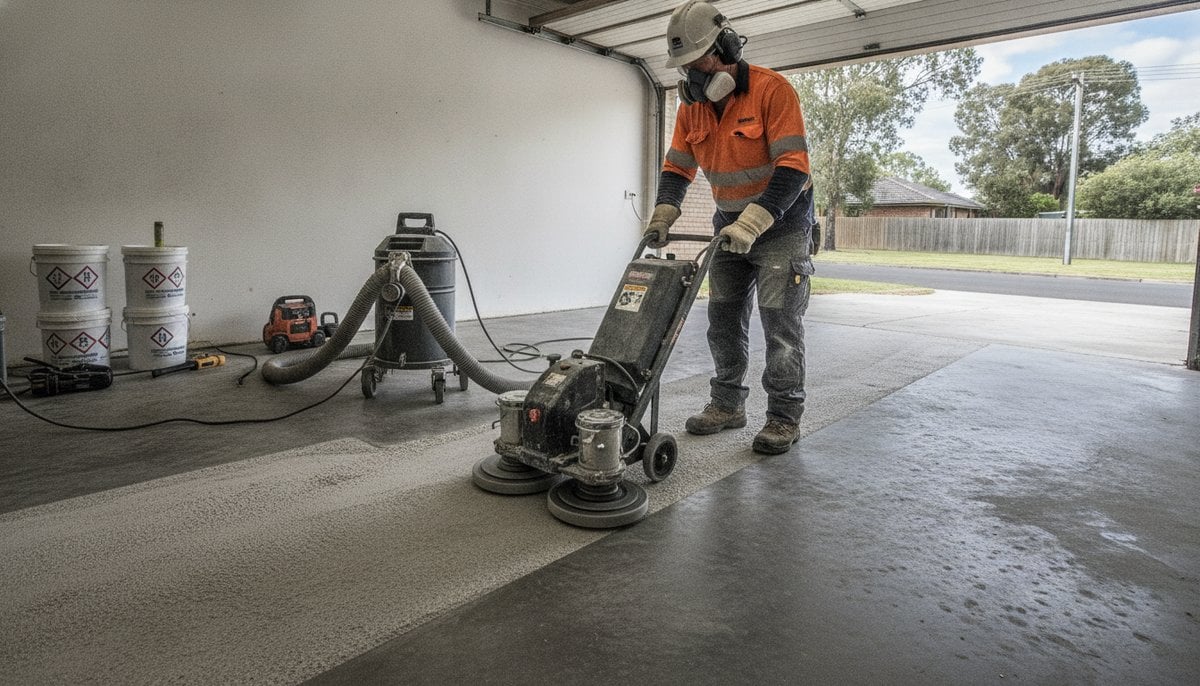
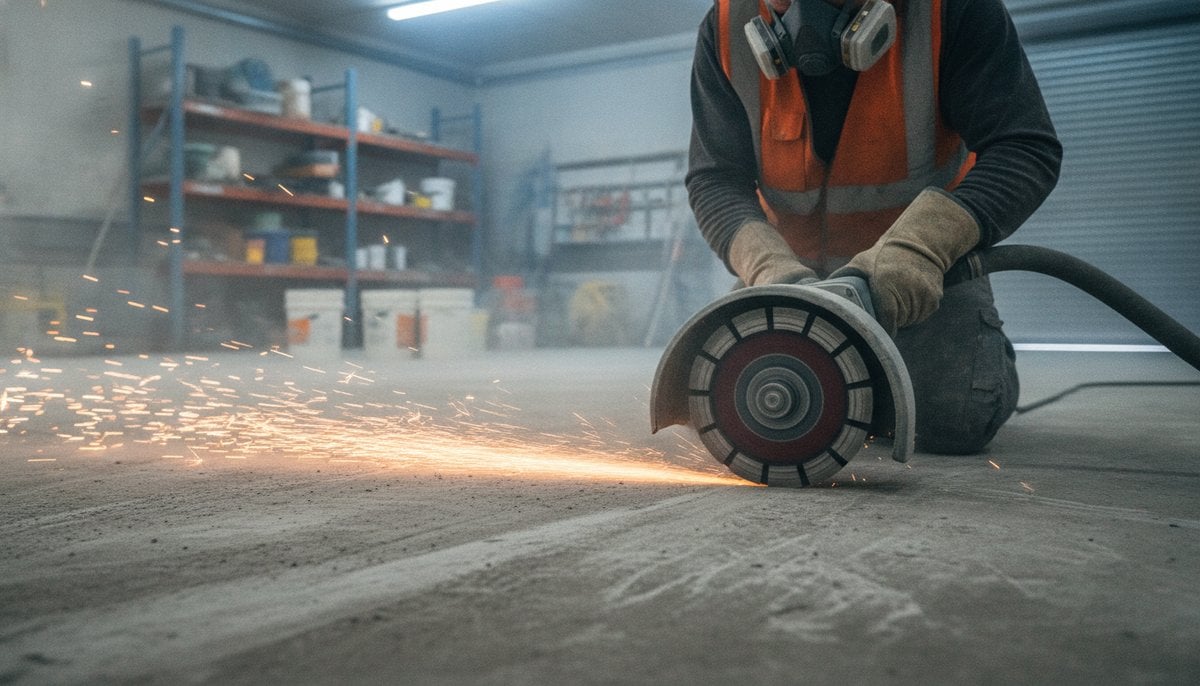
Diamond grinding uses a machine fitted with diamond-tipped segments to shave the top 1–2mm off the concrete surface. The diamonds are embedded in metal bonds and rotate at high speed across the floor, producing a consistent, controlled profile. Professional installers use walk-behind grinders for open floor areas and angle grinders with diamond cups for edges and corners.

The process generates a significant amount of concrete dust, which is why professional equipment includes dust shrouds connected to industrial vacuums. A correctly set up grinding job produces very little visible dust , most is captured at the point of generation.

What profile should the concrete be ground to?

The target for most residential epoxy systems is CSP 2–3 on the International Concrete Repair Institute scale. CSP 2 looks and feels like fine sandpaper. CSP 3 is slightly rougher. Either profile provides enough mechanical key for standard epoxy flake or metallic epoxy systems.

Grinding too aggressively (CSP 4–5) creates too much surface profile and can cause pinholes in thinner coating systems. Grinding too lightly (CSP 1) doesn’t open the pores adequately. A skilled installer knows the right machine settings and diamond grit for your specific slab.

Can you use acid etching instead of grinding?

Acid etching (applying diluted hydrochloric or muriatic acid to the concrete) is sometimes offered as a cheaper preparation alternative. It does open concrete pores to some degree on new, clean, uncoated slabs. But it fails in the most common Melbourne garage scenarios:

Slab condition Diamond grinding Acid etching
New, clean, porous concrete Works well Adequate
Trowelled hard finish Works well Inadequate
Oil or grease contamination Works well Does not remove oil
Previous paint or sealer Removes it Cannot remove it
Old failed epoxy Removes it Cannot remove it
Aged or hardened concrete Works well Inadequate bond profile

Melbourne garages are typically older slabs with some combination of oil staining, a previous coating, and a trowelled finish. Acid etching is not appropriate for most of them. If an installer quotes you a price that seems unusually low and mentions acid etching rather than grinding, that’s why , and it’s a risk to the floor’s longevity.

What happens if grinding is skipped?

The failure pattern is consistent: the floor looks excellent for 6–18 months. Then delamination starts, usually at the edges first or around the entry point where foot traffic concentrates. Chips or bubbles appear. Within 2–3 years the floor needs to be stripped and redone , at full cost again, plus the cost of grinding out whatever is left of the failed coating.

The grinding that should have been done the first time now has to be done anyway, plus remediation of the failed epoxy. Skipping preparation is never actually cheaper in the long run.

How to check if your installer is grinding properly

You don’t need to be on-site during grinding to verify it was done. After prep and before the epoxy goes down, look at the concrete surface:

  • It should look uniformly lighter in colour than the original slab , grinding removes the surface skin and exposes fresh concrete aggregate
  • It should feel like rough sandpaper, not smooth
  • Any oil stains should be reduced or gone
  • Old paint should be removed, not just scuffed

If the floor still looks shiny, smooth, or has visible oil patches, preparation was not adequate. Raise this with the installer before the epoxy goes down , not after.

FAQ: concrete grinding before epoxy Melbourne

Does every garage floor need to be ground before epoxy?

Yes, for any professional system designed to last 10+ years. The only exception might be brand-new, perfectly clean, highly porous concrete , but even then, grinding produces a better result than etching alone.

How much does concrete grinding add to the cost?

Grinding is typically included in a professional epoxy quote rather than being a separate line item. If you see a quote that itemises grinding at $15–$25/m², that’s normal and expected. A quote with no mention of preparation at all is missing a critical component.

Can I rent a grinder and do it myself?

Hire centres do rent concrete grinders. However, achieving a consistent CSP 2–3 profile without experience is difficult, and inadequate grinding still leads to adhesion failure. Preparing the floor incorrectly yourself doesn’t reduce the risk , it just means the failure is on your account rather than the installer’s. For a floor you’re investing $3,000–$5,000 in, professional preparation is worth it.

How long after grinding before epoxy can be applied?

Usually the same day or the next morning. The ground surface should be clean, dry, and free of dust. Some installers prime the same day as grinding; others wait until the following morning to ensure any residual moisture from the vacuum process has dissipated.

Talk to a Melbourne installer who grinds every floor

Metal and Flake diamond grind every garage floor before installation as standard , not as an upgrade. If you want a floor that lasts 10–20 years rather than 2–3, start with the right preparation. Book a free on-site quote across Melbourne and see exactly what’s included before you commit.

Ready for a Floor That Lasts?

Get a free, no-obligation quote from Melbourne’s trusted epoxy specialists.

Get a Free Quote
+61 485 031 001

How to Prepare a Garage Floor for Epoxy: A Melbourne Installer Guide

Family owned & operated · Melbourne & surrounds · Call us free: +61 485 031 001
How to Prepare a Garage Floor for Epoxy: A Melbourne Installer Guide

How to Prepare a Garage Floor for Epoxy: A Melbourne Installer Guide

Back to Blog

The most common reason epoxy garage floors fail in Melbourne isn’t the epoxy itself , it’s the preparation. A floor that peels within two years is almost always a preparation problem: insufficient grinding, inadequate crack repair, or moisture that wasn’t addressed before the coating went down. This guide walks through exactly how to prepare a garage floor for epoxy the right way, from what a professional does on day one to what you should check before signing any quote.

Key takeaways

  • Surface preparation accounts for around 80% of an epoxy floor’s longevity.
  • Diamond grinding is the industry standard for Melbourne residential slabs , acid etching is not a substitute.
  • Oil contamination, moisture, and existing coatings must all be addressed before epoxy goes down.
  • A concrete profile of CSP 2–3 (equivalent to 40–60 grit sandpaper) is the target for most residential epoxy systems.
  • If a quote doesn’t specify the preparation method, ask before you sign anything.

Why preparation matters more than the epoxy itself

Epoxy bonds to concrete through mechanical adhesion , it literally grips the microscopic pores and profile of the concrete surface. If those pores are closed (trowelled concrete), contaminated (oil, paint, curing compound), or wet (moisture transmission), the epoxy can’t form a proper bond. It looks fine for a few months, then starts delaminating from the edges or blistering in patches.

This is why experienced Melbourne installers spend more time on preparation than on applying the actual coating. A double garage typically takes 4–6 hours to grind, clean, and repair , compared to 1–2 hours to roll out the epoxy coats.

Step 1: Clear the garage completely

Everything needs to come out. Vehicles, shelving units, garden equipment, stored boxes. Installers need full access to every corner and along all edges. Built-in cabinetry that can’t be moved will need the epoxy cut in carefully around it, which takes more time and is reflected in the quote.

Step 2: Inspect and assess the slab

Before grinding starts, a professional installer will inspect the concrete for:

  • Cracks: hairline cracks, structural cracks, and control joint cracks all need different treatment
  • Oil and chemical contamination: common in working garages; requires degreasing and sometimes grinding out the contaminated layer
  • Existing coatings: old paint, sealer, or failed epoxy must be removed entirely
  • Moisture: a plastic sheet taped to the slab overnight reveals moisture transmission , if condensation forms underneath, the moisture needs addressing first
  • Spalling or surface damage: pitting, aggregate exposure, or delamination of the top concrete layer

This inspection shapes what additional prep work is required beyond standard grinding. A good installer tells you what they find , not what you want to hear.

Step 3: Diamond grinding

Diamond grinding is the non-negotiable foundation of professional epoxy preparation in Melbourne. A walk-behind or handheld diamond grinder with the appropriate grit removes the top layer of concrete, opens the pores, removes contamination, and creates the surface profile (roughness) needed for epoxy to bond.

What profile are they grinding to?

Concrete Surface Profile (CSP) is a standardised measure of surface roughness. For most residential epoxy systems, the target is CSP 2–3 , roughly equivalent to 40–60 grit sandpaper. This is coarse enough for mechanical bonding but not so rough that it creates pinholes in the coating.

Why not acid etching instead?

Acid etching (using muriatic or hydrochloric acid to open concrete pores) is a cheaper alternative used by some DIYers and budget installers. It works on new, uncontaminated concrete in moderate condition. It does not work on:

  • Concrete with a trowelled hard finish (very common in Melbourne garages)
  • Contaminated concrete (oil, grease, old paint)
  • Concrete that has been previously sealed or coated
  • Older slabs with surface hardening

Diamond grinding works on all of these. For Melbourne residential garages, grinding is the correct method.

Step 4: Crack repair

After grinding, cracks are more visible and can be properly assessed. The repair method depends on the crack type:

  • Hairline cracks (under 1mm): filled with a low-viscosity epoxy filler that wicks into the crack under gravity
  • Medium cracks (1–5mm): routed out into a consistent channel, filled with semi-rigid polyurea crack filler, and feathered flush
  • Structural or moving cracks: addressed differently , a moving crack filled with rigid epoxy will reopen. Flexible filler or a saw-cut control joint approach is used instead

Crack repair adds cost but it’s not optional. An unfilled crack telegraphs through the finished floor and will eventually allow moisture ingress that undermines adhesion.

Step 5: Oil and contamination treatment

Oil staining is extremely common in Melbourne garage floors. If a car has ever dripped oil or if the garage was used as a workshop, the concrete has absorbed hydrocarbons that prevent epoxy from bonding.

Treatment options include:

  • Degreasing: a commercial alkaline degreaser applied, scrubbed, and rinsed before grinding
  • Grinding through the contamination: grinding deep enough to remove the stained concrete layer entirely
  • Oil-tolerant primer: some professional primer systems are formulated to penetrate and bond through minor residual contamination , but this is a last resort, not a substitute for proper degreasing

Step 6: Moisture check

Melbourne’s clay soils and older slab construction mean moisture transmission is common, particularly in ground-floor garages. A slab that appears dry on the surface can have significant vapour transmission when tested properly.

Professional methods include a calcium chloride test or in-situ relative humidity test. A simple but effective field test is taping a sheet of plastic to the concrete for 16–24 hours , if moisture condenses underneath, the slab has active vapour transmission.

High moisture levels require a moisture-tolerant primer or a moisture barrier coat before the epoxy base coat. Installing standard epoxy over a wet slab without addressing this leads to blistering.

Step 7: Final vacuum and tack

After grinding and repair, the floor is vacuumed thoroughly to remove all concrete dust. Any remaining dust acts as a bond-breaker. Some installers also blow out corners and edges with compressed air. The floor should be completely clean and dry before primer is applied.

What to look for in a professional preparation

When getting quotes for an epoxy garage floor in Melbourne, ask these questions:

  • Do you use diamond grinding or acid etching for prep?
  • What CSP profile do you grind to?
  • Is crack filling included, or quoted separately?
  • How do you handle oil contamination?
  • Do you test for moisture before applying primer?

A professional installer will answer these questions without hesitation. An evasive or vague answer is a signal to get another quote.

FAQ: preparing a garage floor for epoxy Melbourne

How long does preparation take for a standard double garage?

A standard double garage (40 m²) takes 4–6 hours of preparation including grinding, crack filling, and cleaning. This is typically done on day one, with primer and base coat applied the same day or the following morning.

Can I prepare my own floor before an installer arrives?

You can clear the garage and degrease obvious oil spots. However, the grinding must be done by the installer with professional equipment , a hired angle grinder is not a substitute for a walk-behind diamond grinder. Let the professional handle everything from the grinding stage.

What if my garage floor has old paint on it?

Old paint must be removed entirely before epoxy is applied. Diamond grinding will remove most paint coatings. If the paint is thick or multiple layers deep, additional grinding passes or a chemical stripper may be required. Epoxy applied over existing paint will fail.

Does preparation cost extra?

Quality installers include standard preparation (grinding, basic crack fill) in their base quote. Additional work for significant oil contamination, structural cracking, or moisture remediation is typically quoted separately once the slab is inspected in person.

Book a free assessment for your Melbourne garage

The best way to know what preparation your slab needs is to have a professional look at it. Metal and Flake offer free on-site assessments and quotes across Melbourne, with a written breakdown of what preparation is required before any epoxy flake or metallic epoxy system goes down. Book your free quote here.

Ready for a Floor That Lasts?

Get a free, no-obligation quote from Melbourne’s trusted epoxy specialists.

Get a Free Quote
+61 485 031 001