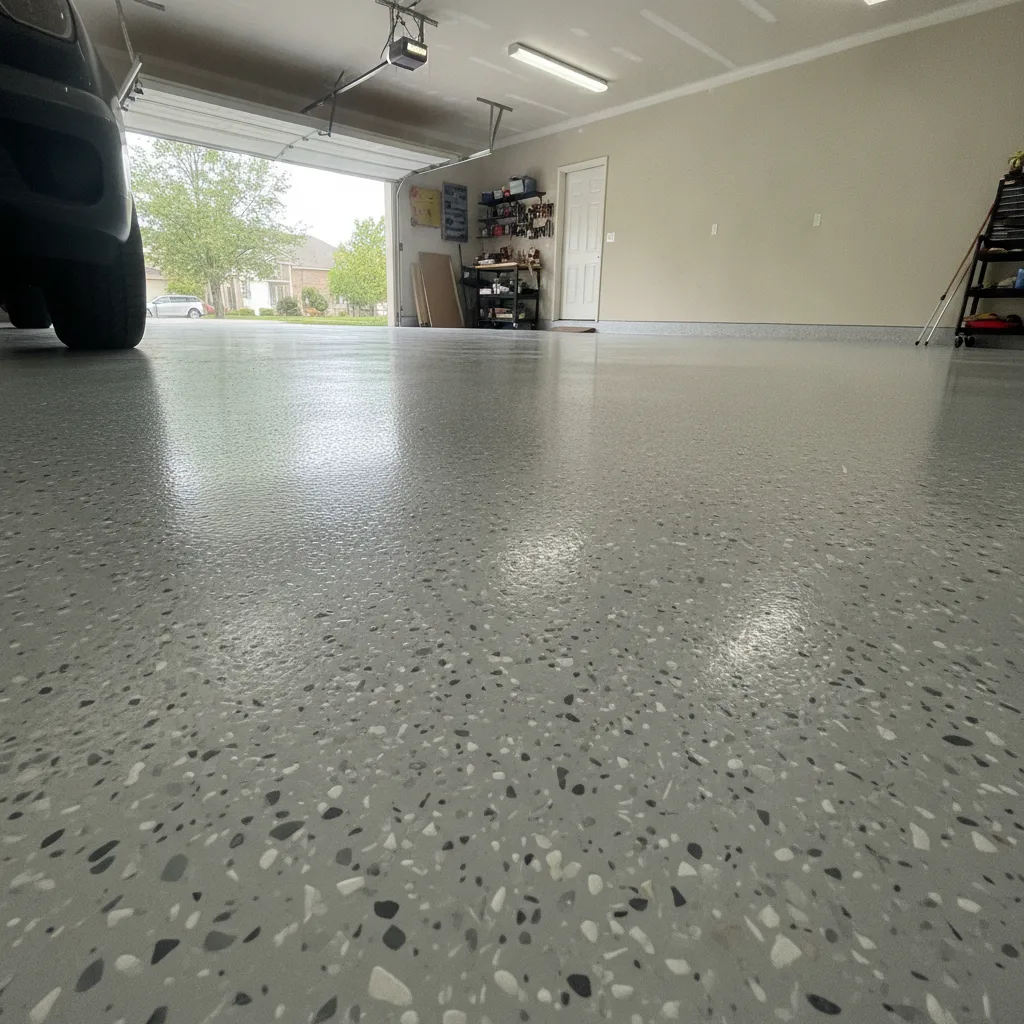
Garage Makeover in Hoppers Crossing: Epoxy Floor Ideas for Locals
A garage makeover in Hoppers Crossing is one of the best-value home upgrades you can do. Coating the concrete floor with a quality epoxy system transforms a dull, dusty slab into a clean, hardwearing surface that handles oil, tyre marks and heavy foot traffic without complaint. Most residential jobs are finished within one to two days and last a decade or more with minimal upkeep.
Why do Hoppers Crossing homeowners choose an epoxy garage floor?
Hoppers Crossing homeowners choose epoxy garage floors because the coating seals porous concrete against oil stains, moisture and surface dusting, while dramatically lifting the look of the space. A sealed floor is far easier to sweep and mop than bare concrete, and the reflective finish bounces light around a garage that often has limited natural lighting. It also holds up under the weight of vehicles and tool trolleys without chipping or peeling the way paint does.
Bare concrete is essentially a sponge. Every drip from an engine, every muddy boot and every dragged toolbox leaves a mark that becomes harder to shift over time. An epoxy coating acts as a permanent barrier between all of that and the slab underneath. Once cured, the surface is chemical-resistant and can handle petrol, brake fluid and household cleaners without absorbing them.
There is also the lifestyle angle. A lot of people in the outer western suburbs use their garage as more than just a car park. It becomes a workshop, a gym, a man cave or a place to store the jet ski over winter. A quality epoxy floor makes that multi-use space feel intentional rather than makeshift.
What epoxy floor finishes work best for a garage makeover?
The best epoxy floor finishes for a garage makeover are metallic flake systems, solid colour broadcast coats and full metallic epoxy, each suited to different budgets and aesthetics. Decorative flake (also called chip or fleck) is the most popular choice for residential garages: the coloured vinyl chips are broadcast into the wet base coat, sealed under a clear topcoat and hide minor surface imperfections extremely well.
Here is a quick breakdown of the main options:
- Decorative flake: Chips are scattered across the wet epoxy base, creating a terrazzo-style texture. The clear topcoat locks everything in and adds a slip-resistant profile. This is the go-to for busy family garages because scuffs and tyre marks are almost invisible against the patterned surface.
- Solid colour epoxy: A single pigmented coat with a clear sealer on top. Clean, sharp and great for garages that double as workshops because spills are easy to spot and clean up.
- Metallic epoxy: A pigmented base coat is manipulated while wet to create swirling, three-dimensional effects that mimic marble or molten metal. This finish suits showroom-style garages or anyone who wants a real statement floor.
Colour choice matters more than most people expect. Light greys and whites make a single-car garage feel significantly larger. Darker charcoals and slate tones give a slicker, more contemporary feel. The flake blend can be customised to match the house exterior or just personal preference.
How important is concrete preparation before an epoxy coating?
Concrete preparation is the single most important step in any epoxy garage floor job. Skipping or rushing the prep is the number one reason DIY epoxy kits peel within a year. The slab must be mechanically ground or shot-blasted to open the pores of the concrete and give the epoxy a rough surface to bond into. Any cracks, spalling or surface contamination need to be addressed before a single drop of product goes down.
This is where professional results and hardware-store kits genuinely part ways. Diamond grinding with a ride-on or walk-behind grinder removes the concrete laitance (the weak, dusty top layer) and leaves a CSP 2 to CSP 3 surface profile. That profile is what gives the epoxy something to grip. Without it, even expensive product will lift under tyre heat or point loading.
Old oil stains are another common issue in Hoppers Crossing garages, especially in homes where a workshop or older vehicle has been stored for years. Contaminated concrete needs degreasing and sometimes light scarifying before grinding so the oil does not simply get pushed deeper into the slab. A good installer will check for moisture too, because concrete that reads above four per cent moisture content can cause adhesion failures regardless of how well the surface is ground.
How long does a garage makeover in Hoppers Crossing actually take?
A standard single or double garage epoxy floor makeover in Hoppers Crossing typically takes one to two days from prep through to the final topcoat. Day one covers grinding, crack repair and the base coat application. Day two involves the topcoat or clear sealer. Most systems need a further 24 hours of cure time before light foot traffic and around 72 hours before vehicles are parked on the surface.
The timeline can stretch slightly if the concrete needs significant remediation work, say, deep cracks that need grinding out and filling with flexible polyurethane filler, or if the weather is unusually cold. Epoxy cures through a chemical reaction that slows in low temperatures, so very cold nights can push the full vehicle-ready cure to four or five days in winter.
Planning around that curing window is worth doing. If you park two cars in the garage every night, book the job for a period when you can leave vehicles in the driveway for a few days. It is a small inconvenience for a floor that will look sharp for years.
What should locals know about maintaining an epoxy garage floor?
Maintaining an epoxy garage floor is straightforward: sweep regularly to remove grit that can act as an abrasive underfoot, mop with a pH-neutral cleaner when needed and wipe up chemical spills promptly rather than letting them sit. Avoid dragging sharp metal edges directly across the surface and use rubber feet or felt pads on heavy tool cabinets to prevent point loading on the topcoat.
One thing that surprises people is how much easier the garage becomes to clean overall. Because the surface is sealed and non-porous, a quick mop once a month is usually enough to keep it looking new. Compare that to bare concrete, which traps dust and grease in its surface and never really looks clean no matter how hard you scrub.
UV stability is worth asking about when choosing a product. Some older polyurethane topcoats will amber or yellow over time when exposed to sunlight coming through garage windows or a roller door left open during the day. A quality aliphatic polyurethane or polyaspartic topcoat resists yellowing and keeps the floor looking sharp for longer, which matters a lot if you have chosen a light grey or white flake blend.
Hoppers Crossing sits in Melbourne’s outer west, where summer temperatures regularly push into the high thirties. Hot tyre pick-up (where warm rubber temporarily bonds to a soft coating) is a real issue with cheaper single-coat systems. A properly formulated two or three coat system, with a hard topcoat, handles Australian summer conditions without leaving tyre marks on the floor.
If the topcoat ever does wear in a high-traffic zone after many years of use, a recoat is far simpler and cheaper than a full floor replacement. That is another reason epoxy makes sense as a long-term investment rather than just a cosmetic upgrade.
Book a residential garage floor coating in Hoppers Crossing with Metal and Flake.