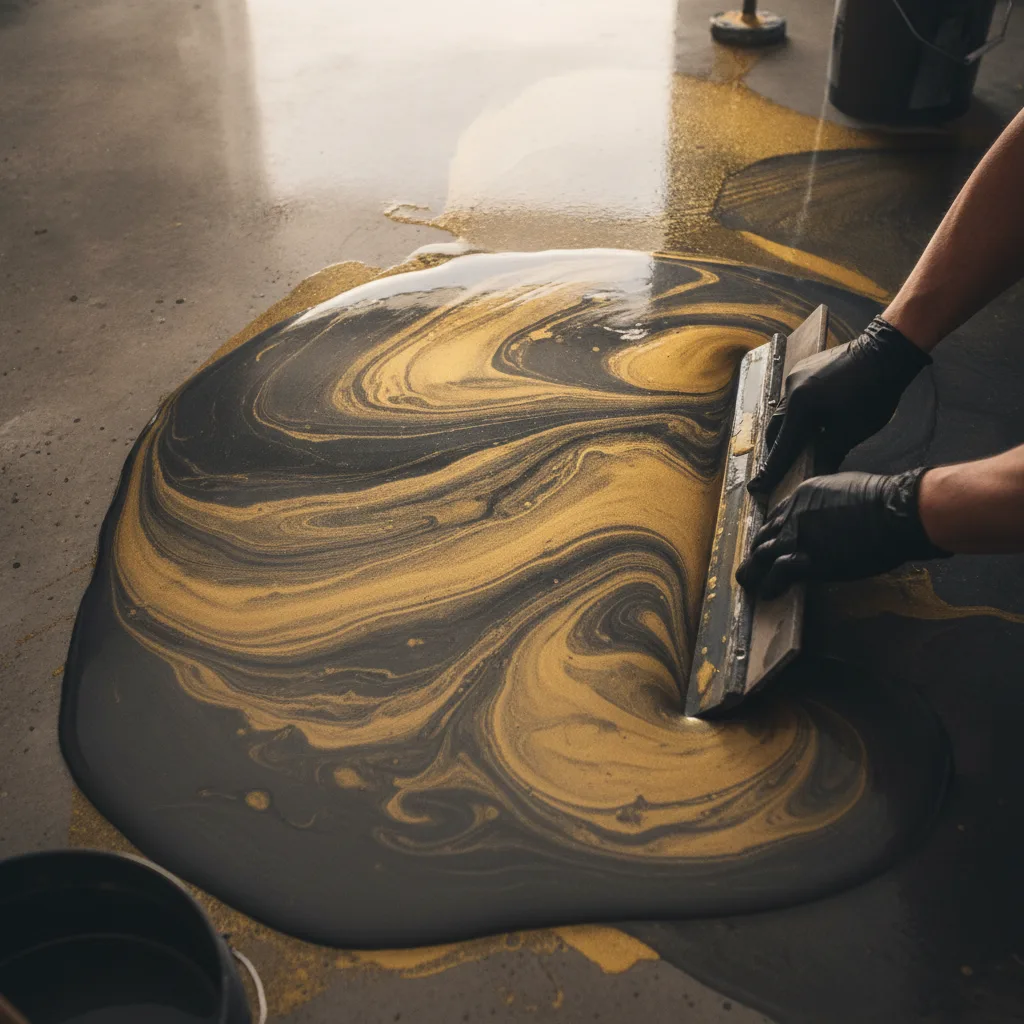
Metallic Epoxy for Floors: Design Options and Installation Tips
Metallic epoxy for floors is a two-part epoxy coating mixed with fine metallic pigment that produces a flowing, three-dimensional finish with depth and movement. It suits garages, living areas, commercial spaces and showrooms. Colours range from champagne and charcoal to ocean blue and copper. A professional installation typically takes two to three days including cure time.
What design options are available with metallic epoxy for floors?
Metallic epoxy floors come in a wide range of colours and movement patterns. The metallic pigment shifts and swirls as it is worked, so no two floors look identical. Common looks include single-colour with soft wave effects, two-tone blends that mimic marble or lava, and full-coverage pearlescent finishes with high gloss or satin topcoats.
Here is a closer look at the main design directions homeowners and business owners tend to choose.
Single-colour wave. One metallic pigment is mixed into the base coat and then manipulated with a squeegee, roller or blower to create organic ripple patterns. Champagne, bronze and silver are the most popular picks for garage floors and home theatres because they read as neutral but still have visual interest.
Two-tone marble blend. Two contrasting pigments, say charcoal and gold or white and blue, are poured together and then worked before they set. The result looks like polished stone at a fraction of the cost. This option suits open-plan living areas and retail spaces where the floor needs to carry the room visually.
Ocean or geode effect. Deep blues, teals and greens layered over a white or pearl base create a look that resembles agate or deep water. Designers and homeowners use it in bathrooms, feature corridors and bar areas. The layering technique requires a skilled applicator to time the pour correctly before the product begins to set.
Topcoat finish. Regardless of colour, the topcoat choice changes the final character of the floor significantly. A high-gloss polyurethane topcoat amplifies the metallic depth and makes the space feel larger. A satin topcoat softens the shine and reduces glare, which suits workshop and garage environments where overhead lighting can bounce off a mirror-like surface.
How do you prepare a concrete slab for metallic epoxy?
Proper surface preparation is the single most critical step when installing metallic epoxy for floors. The concrete must be clean, dry and mechanically profiled so the epoxy can bond at a chemical level. Skipping or rushing prep is the number-one reason epoxy coatings fail, typically within the first twelve months.
These are the preparation steps a professional installer works through before any product touches the floor.
Moisture testing. Concrete slabs hold residual moisture, especially in Melbourne’s cooler months. A calcium chloride or relative-humidity probe test tells you whether the slab is dry enough. Most epoxy systems require the moisture vapour emission rate to sit below a specified threshold, often around 3 pounds per 1,000 square feet per 24 hours on older imperial specs, or the equivalent in metric readings. Applying epoxy over a damp slab causes adhesion failure and blistering.
Mechanical grinding. Diamond-cup grinders or shot-blasters open up the surface pores of the concrete and remove any existing sealers, paint or laitance (the weak top layer that forms as concrete cures). This creates a surface profile that epoxy can grip. Hand grinding around edges and in corners is fiddly work but it matters just as much as the main field.
Crack and joint repair. Hairline cracks are filled with a flexible polyurea or epoxy filler before the base coat goes down. Movement joints need to be addressed separately because they are designed to flex, and a rigid coating bridging a live joint will crack again.
Dust removal. All grinding debris must be vacuumed thoroughly. Any dust left on the surface sits between the slab and the coating and weakens the bond.
What happens on installation day for a metallic epoxy floor?
On installation day for a metallic epoxy floor, the installer applies a primer or base coat first, then mixes and pours the metallic layer, manipulates the pigment to achieve the chosen pattern and allows each coat to reach the right cure stage before the next one goes down. The full process across a typical residential garage or room runs over two to three days.
Here is how the sequence plays out in practice.
Day one: primer coat. A penetrating epoxy primer seals the slab and locks out any remaining minor moisture. Some systems use a 100-percent-solids epoxy base coat in this step. It is rolled on and left to cure to a tacky-but-firm state, usually four to eight hours depending on ambient temperature.
Day two: metallic broadcast. The metallic epoxy is mixed to manufacturer ratios, poured onto the primed slab in ribbons and then spread with a squeegee. The installer uses a spiked roller to remove air bubbles and a leaf blower or alcohol spray to push the pigment into waves and swirls. This is where the artistic skill sits. The product has a working time of roughly 20 to 30 minutes per batch, so the applicator needs to move at a steady pace without stopping to second-guess decisions.
Day two or three: topcoat. Once the metallic layer has hardened, typically overnight, a clear polyurethane or polyaspartic topcoat is applied in one or two coats. Polyaspartic topcoats cure faster (some are walk-ready in four to six hours) and offer excellent UV stability, which matters in spaces with direct sunlight. Polyurethane topcoats are more economical and still deliver a tough, abrasion-resistant surface.
Cure and handover. Light foot traffic is usually safe after 24 hours. Vehicle traffic on a garage floor should wait 72 hours minimum. Full chemical cure takes around seven days, so it pays to avoid dragging heavy furniture or parking cars with a tight turning radius during that window.
What maintenance does a metallic epoxy floor actually need?
Metallic epoxy floors are low-maintenance compared to polished concrete or natural stone. Regular sweeping and a damp mop with a pH-neutral cleaner is all most floors need week to week. Avoid harsh solvents and abrasive scrubbing pads, which can scratch or dull the topcoat over time.
In high-traffic commercial environments, a maintenance coat of topcoat every few years extends the life of the floor and refreshes the gloss without requiring a full reinstall. Residential floors installed in a well-prepared garage or living area can hold their look for a decade or more with basic care.
One practical tip: put felt pads under furniture legs and use a rubber-backed mat near entry doors. Grit carried in on shoes is the most common cause of surface micro-scratches on any coated floor.
If you are thinking about the look and longevity of your next floor project, the design and installation details covered here give you a solid foundation for conversations with any installer. When you are ready to move from planning to laying, Book a metallic epoxy floor installation with Metal and Flake.