Metallic Epoxy Floor Kits: Why DIY Often Falls Short
A metallic epoxy floor kit from a hardware store or online supplier can look tempting on the packet, but the results rarely match. Between inadequate surface prep, incorrect mixing ratios and unpredictable pigment movement, most DIY attempts end up peeling, clouding or blotching within a year. A professional install removes every one of those variables.
What exactly is a metallic epoxy floor kit?
A metallic epoxy floor kit is a packaged set of two-part epoxy resin, metallic pigment powder and a clear topcoat, sold as an all-in-one solution for coating concrete floors at home. The kit typically covers between 10 and 20 square metres, and the marketing promises the kind of swirling, liquid-metal look you see in showrooms and high-end garages. The reality depends almost entirely on the preparation and application skill of the person using it.
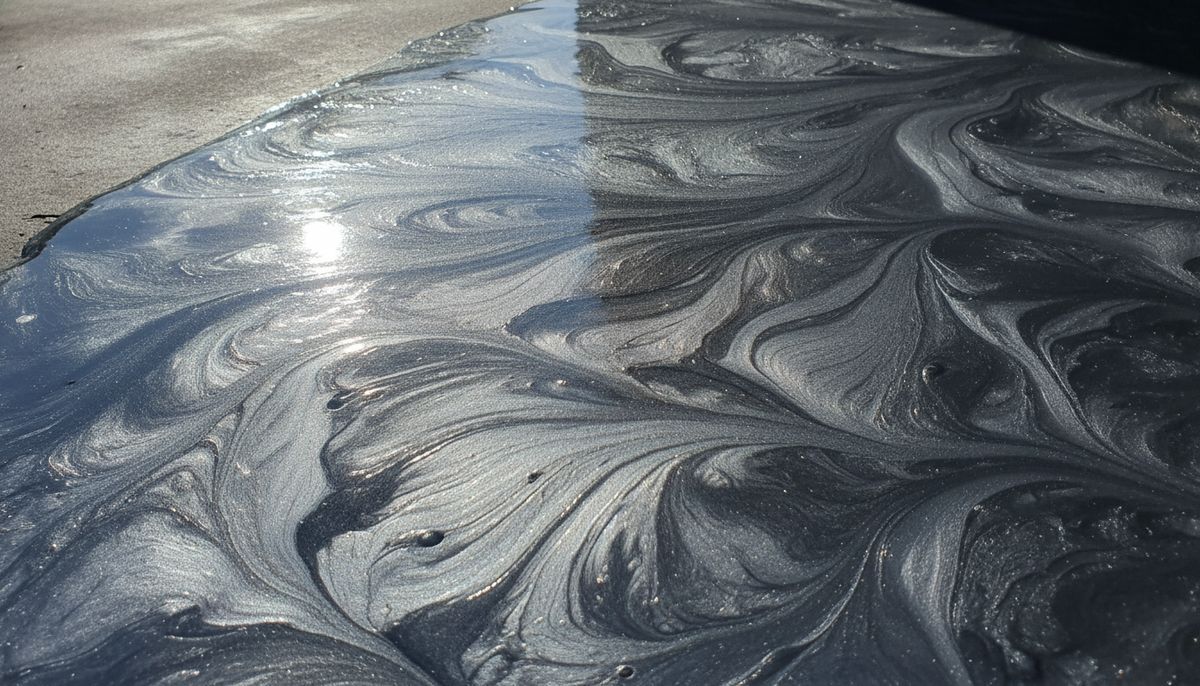
The core chemistry is sound. Metallic pigments, usually aluminium or mica-based particles, suspend in the resin and shift as the product is spread, creating that flowing, three-dimensional depth that makes the finish so visually striking. What the packaging rarely spells out is that achieving a consistent result requires controlled temperature, precise mixing, aggressive concrete profiling and a very steady hand with a squeegee. Miss any one of those steps and the finish will show it.
Why do metallic epoxy floor kits so often fail on concrete?
Metallic epoxy floor kits fail most often because of inadequate concrete preparation, not because the product itself is poor. Concrete must be mechanically ground or acid-etched to an open, porous surface, sometimes called a concrete surface profile (CSP) of 2 to 3, so the epoxy can physically bond. Box-kit instructions frequently suggest a light acid wash, which is rarely enough, especially on older slabs with contamination, previous coatings or moisture issues.
Here are the most common failure points when a homeowner tackles a metallic epoxy kit solo:
- Moisture in the slab. Concrete breathes. If moisture vapour transmission is too high, the epoxy lifts from underneath, forming bubbles and then peeling sheets within months. Professional installers test with a calcium chloride test or a relative humidity probe before a single drop of product hits the floor.
- Wrong ambient temperature. Epoxy is temperature-sensitive. Most two-part systems need to be applied between roughly 10°C and 30°C with low humidity. A Melbourne summer garage at 35°C can cause the mix to kick (harden) before it has been fully spread, leaving drag marks and uneven pigment distribution.
- Incorrect mixing ratios. Part A and Part B must be blended in exact proportions, usually by weight rather than volume, and mixed for a full two to three minutes with a paddle mixer. Short-mixing or eyeballing the ratio results in soft spots that never properly cure.
- Thin topcoat. Budget kits often include just enough clear topcoat for a single thin pass. Without at least two coats of a quality polyaspartic or polyurethane clear, the metallic layer scratches and dulls within a year of light traffic.
A 2023 review of consumer epoxy products by an Australian trade publication found that fewer than one in three DIY epoxy floor jobs lasted more than two years without needing a full strip and redo. That is not a knock on the people who attempt them. It reflects the gap between what a consumer kit is designed to do and what a professional-grade system with proper prep can achieve.
What does a professional metallic epoxy install do differently?
A professional metallic epoxy install differs from a kit job mainly in surface preparation, product grade and application technique. Tradespeople use diamond grinding equipment to open the concrete to the correct profile, apply a moisture-blocking primer where needed, use a higher solids content resin system, and build up layers with a controlled squeegee-and-back-roll method that directs exactly how the metallic pigment moves across the floor.
The grinding step alone changes the outcome dramatically. A single-disc angle grinder hired from a tool shop is not the same as a planetary diamond grinder that a flooring contractor brings on the day. The planetary machine levels high spots, removes laitance (the weak surface layer on concrete) and creates a uniform texture across the whole slab. That uniform texture is what gives the finished coat an even depth and prevents the patchy, tide-mark look that plagues DIY kits.
Professional systems also use a base coat, a metallic broadcast layer and at least two clear topcoats, each applied at the right film thickness and with the right window of time between coats. The total dry film thickness on a quality commercial install is typically 1.5 to 2 millimetres. A single-coat kit rarely reaches 0.5 millimetres. Thickness matters for durability, especially in a garage that sees vehicle traffic, jack stands or dropped tools.
Is a metallic epoxy floor kit ever the right choice?
A metallic epoxy floor kit can be the right choice for very small, low-traffic areas like a garden shed, a laundry or a small workshop bench area, where longevity is less critical and aesthetics are a secondary concern. For anything larger, or for spaces like a garage, showroom, café or home studio where you want the finish to look sharp for five to ten years, a kit is a false economy.
Consider the real cost. A decent kit for a single-car garage (around 20 square metres) runs between $300 and $600 in materials. Add the hire of surface prep equipment, the cost of a moisture test kit, masking tape, mixing paddles, disposable gloves and the time invested over a weekend, and you are not far off the lower end of a professional quote. The difference is that the professional result comes with experience, correct prep and a finish that bonds to the slab properly.
If the slab has any existing cracks, control joint movement, prior contamination from oil or paint, or if you are not confident running a grinder over a large area without gouging it, the DIY route is likely to cost more in the long run once a redo is factored in.
How does a metallic epoxy floor compare to flake epoxy for garages?
A metallic epoxy floor and a flake epoxy floor suit different priorities. Metallic epoxy creates a seamless, swirling liquid-metal aesthetic that works well in showrooms, man caves, commercial spaces and statement home interiors. Flake epoxy (also called chip or broadcast flake) is more forgiving to texture variation, hides minor imperfections more easily, and tends to be more slip-resistant because the raised flake surface adds grip. Both systems require the same rigorous surface preparation to bond properly and last.
For a Melbourne garage that doubles as a workshop, flake is often the practical workhorse. For a home gym, luxury garage or retail space where the floor is part of the visual experience, metallic epoxy makes a strong impression. The best choice comes down to how the space is used, what the slab condition is like, and what the client wants to look at every day.
Metal and Flake installs both systems across Melbourne and surrounds, using professional-grade products and diamond-ground preparation every time. Whether you want a flowing silver metallic finish or a bold broadcast flake that stands up to daily punishment, the outcome should look as good in five years as it does on day one.
Book a professional metallic epoxy install with Metal and Flake