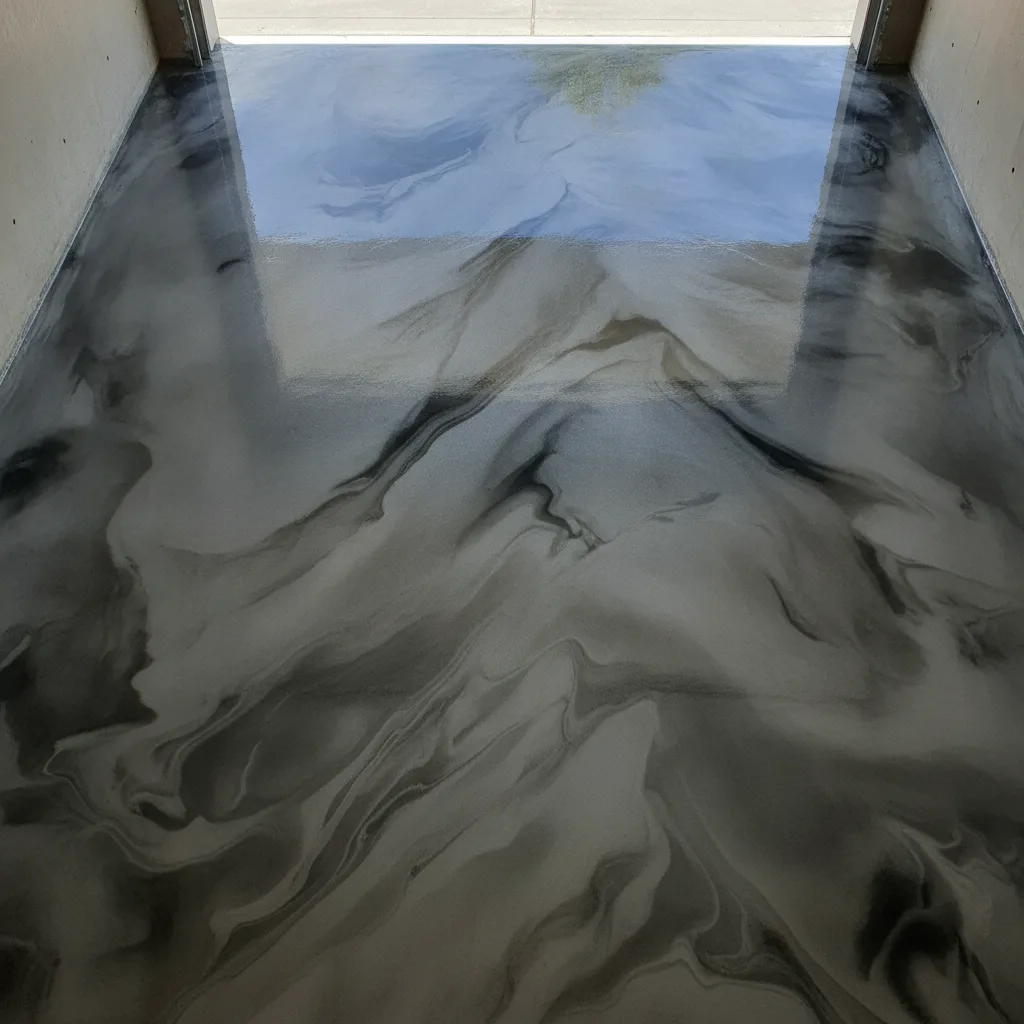
Metallic Epoxy Floor Epping: A Local Installer’s Checklist
A metallic epoxy floor in Epping gives you a high-gloss, three-dimensional finish that suits garages, living areas and commercial spaces alike. Getting it right comes down to surface prep, the right product system and a qualified applicator who understands Melbourne’s climate. This checklist covers every step so you know exactly what to expect before work starts.
What exactly is a metallic epoxy floor and why is it popular in Epping?
A metallic epoxy floor is a two-part resin system mixed with fine metallic pigments. When spread across a prepared concrete slab, those pigments shift and swirl, producing a liquid-metal or lava-like appearance that’s completely unique to each pour. It’s popular in Epping because the suburb sits in Melbourne’s northern growth corridor, where newer homes on concrete slabs are common and homeowners want floors that look as good as the rest of the house.
The finish is not just visual. A properly installed metallic epoxy system adds a hard, chemical-resistant layer that handles car tyres, dropped tools, spilt motor oil and heavy foot traffic without fading. That combination of looks and durability is what drives demand across Epping’s mix of residential garages, warehouse units and shopfronts on High Street and Cooper Street.
What does good concrete preparation involve before a metallic epoxy floor goes down?
Proper concrete preparation for a metallic epoxy floor means mechanically grinding or shot-blasting the slab to open the surface profile, remove laitance and create a texture that the resin can grip. Skipping this step is the single biggest reason metallic epoxy fails. A delaminated floor lifts in sheets within months, wasting every dollar spent on materials.
Here is the prep checklist a professional applicator should work through on your Epping slab:
- Moisture test. Slabs less than 28 days old, or sitting over poor drainage, trap moisture vapour. A simple calcium chloride test or relative humidity probe tells you whether a moisture barrier primer is needed before the metallic coat goes down.
- Crack and joint repair. Live cracks (ones that still move with temperature or load) get routed out and filled with a flexible polyurea filler. Static cracks get a rigid epoxy filler. Neither type should be painted over and hoped for the best.
- Surface profile check. Concrete Surface Profile 3 (CSP 3) is the industry benchmark for most epoxy systems. That’s a texture roughly like 60-grit sandpaper. Your applicator should confirm this with a profile comparator card rather than guessing.
- Contamination removal. Oil stains from years of car parking need a degreaser and sometimes a hot-water extraction. Epoxy simply won’t bond to oil-saturated concrete.
- Slab temperature check. Epping’s winters bring cold nights that push slab temperatures below 10°C. Most epoxy primers need the surface above that threshold to cure correctly, so scheduling matters.
How many coats does a metallic epoxy floor system need in Epping?
A full metallic epoxy floor system in Epping typically requires three to four coats: a penetrating primer, the metallic base coat, a clear mid-coat to lock in the pigment patterns, and a topcoat sealer for UV stability and abrasion resistance. Skimping to two coats saves money upfront but cuts the floor’s usable life in half or worse.
Here is how each layer works:
- Primer coat. A low-viscosity epoxy primer soaks into the open concrete and seals the surface. This is the foundation. Without it, the metallic coat sits on top of dust rather than bonding to the slab.
- Metallic base coat. This is where the magic happens. The applicator spreads the pigmented epoxy and uses tools, sometimes a leaf blower or roller technique, to push the metallic powder into swirls, waves or cellular patterns. Each floor looks different because the pigments move while the resin is still wet.
- Clear flood coat. A second clear epoxy pour locks the pattern in place and evens out the surface. This coat also adds depth, making the floor look like you’re looking through glass at something three-dimensional below.
- Polyaspartic or polyurethane topcoat. This is the armour layer. Polyaspartic topcoats cure fast (handy in Epping’s variable weather) and offer better UV resistance than standard epoxy. UV stability matters even indoors near windows or roller doors that let in direct afternoon sun.
What questions should you ask any metallic epoxy installer in Epping before signing off?
Before you hand over a deposit to any metallic epoxy installer in Epping, ask these six questions directly. A qualified applicator will answer all of them without hesitation. Vague or defensive answers are a reliable warning sign.
- Do you use diamond grinding or shot blasting for prep? Hand sanding or acid etching alone is not sufficient for a full metallic system.
- What brand and system are you using, and can I see the product data sheet? Reputable installers use commercial-grade systems from verified suppliers and are happy to show you the spec sheet.
- How do you handle moisture in the slab? If the installer waves this off, walk away.
- What is the total dry film thickness of the finished system? A proper metallic floor should land between 1.5 mm and 3 mm total build. Anything thinner won’t hold up.
- Is the topcoat UV stable? A standard epoxy topcoat will amber and chalk within 12 to 18 months in a sunny Epping garage. You want polyaspartic or polyurethane.
- What warranty do you offer on materials and labour? Workmanship warranties of two to five years are standard among quality local installers.
How do you maintain a metallic epoxy floor once it’s installed?
Maintaining a metallic epoxy floor is straightforward: sweep regularly, mop with a pH-neutral cleaner and avoid dragging sharp metal objects across the surface. Most topcoats can handle a thorough clean with a soft mop and diluted mild detergent without any damage to the gloss or colour. Avoid citrus-based cleaners and anything with ammonia, as these gradually break down the topcoat over time.
Epping households with active garages should place rubber mats under jack stands and floor jacks. The rubber spreads point load and prevents the concentrated pressure from denting or marking the surface. That’s a simple step that extends the floor’s life by years at zero cost.
If the topcoat eventually dulls after many years of use, a light recoat of the polyaspartic layer brings the gloss back without stripping and redoing the entire system. That’s a far cheaper refresh than ripping up and relaying the floor from scratch.
What does a metallic epoxy floor typically cost for a standard Epping garage?
A metallic epoxy floor in a standard single or double garage in Epping generally runs higher per square metre than a plain solid-colour epoxy because of the additional materials and technique involved. As a rough guide, a full metallic system with proper prep and a polyaspartic topcoat in Melbourne sits in the range of $80 to $120 per square metre installed, depending on slab condition, floor size and the complexity of the pattern chosen. Larger areas cost less per square metre. Slabs with heavy contamination, significant crack repair or very poor profiles cost more.
The price gap between a budget installer and a quality one rarely exceeds a few hundred dollars on a typical garage job. But the gap in outcome can be years of service life. A floor that delaminates at 18 months costs more to fix than it would have cost to do it properly the first time.
Get at least two quotes from local Epping or northern Melbourne installers, and compare them against this checklist rather than just the bottom-line number. A quote that doesn’t mention concrete prep in detail is missing the most important part of the job.
Book a metallic epoxy quote in Epping with Metal and Flake.