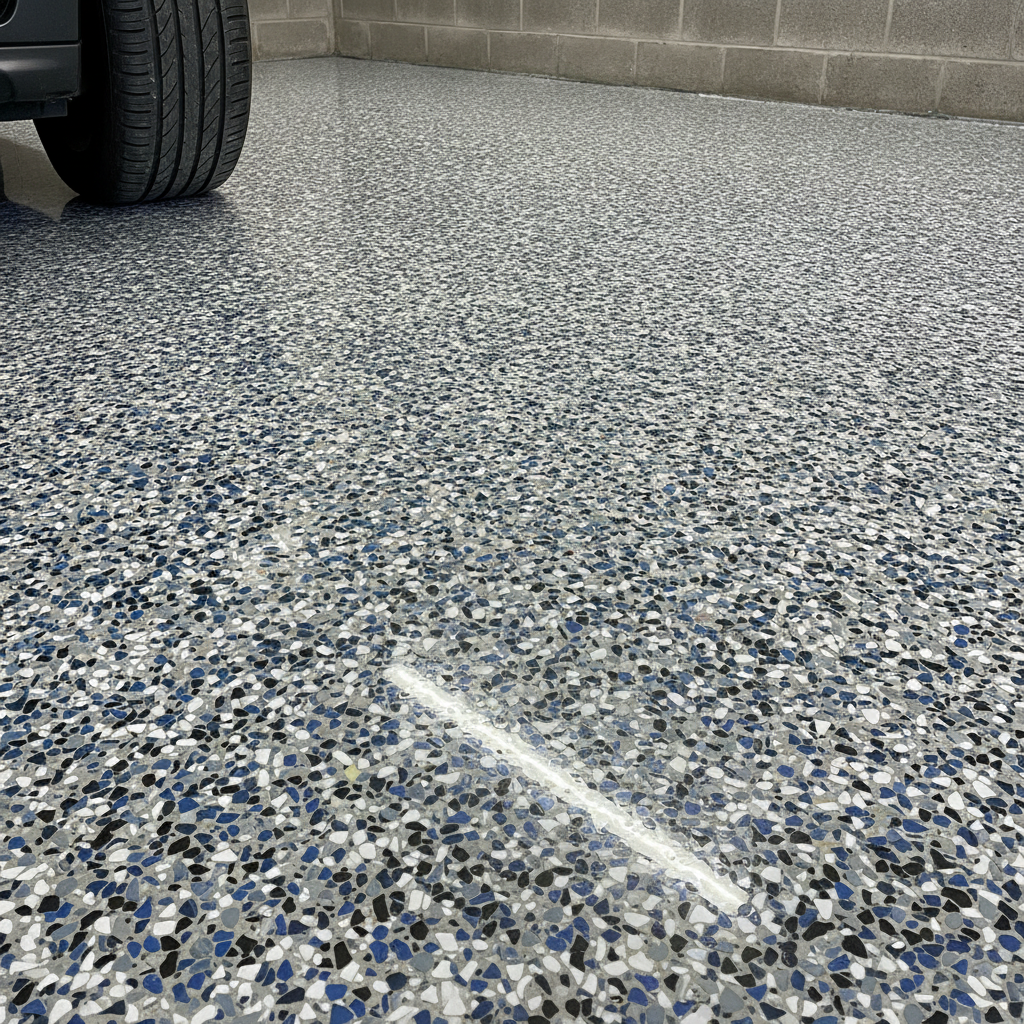
Epoxy Flake Flooring: The Complete Installation Guide for Melbourne Garages
Epoxy flake flooring is a multi-layer system where vinyl flakes are broadcast into a wet epoxy base coat, then locked in with a clear polyurethane or epoxy topcoat. The result is a hard, slip-resistant surface that hides tyre marks, resists oil and looks sharp for ten or more years when installed correctly on a properly prepared concrete slab.
What makes epoxy flake flooring a good choice for a garage?
Epoxy flake flooring suits garages because the broadcast flakes add texture underfoot, which improves grip on a surface that regularly gets wet from rain, car wash runoff and morning dew. The flakes also break up the visual footprint of dirt and minor scuffs between cleans, making the floor look presentable with very little effort day to day.
Compared to plain grey concrete, a flake floor does several practical jobs at once. It seals the slab so oil spills sit on the surface instead of soaking in. It reflects light, which is noticeable in a single-car garage that has only one or two ceiling fixtures. And the colour variety, from subtle granite blends to bold metallic mixes, means you can match the floor to the rest of the space rather than just accepting whatever the builder poured.
Melbourne’s climate adds a specific reason to consider this system. Concrete slabs here go through genuine temperature swings between summer and winter. A quality epoxy flake system uses products formulated to flex with the slab rather than delaminate when the mercury swings from 5°C in July to 40°C in February.
What surface preparation does epoxy flake flooring actually need?
Surface preparation is the single biggest factor in whether an epoxy flake floor lasts. The concrete must be mechanically ground or diamond-ground to open the surface profile so the epoxy base coat can bond properly. Any existing coatings, sealers or contamination need to come off first. Cracks and spalls are filled with an appropriate repair mortar before coating begins.
A common mistake with DIY kits is skipping real mechanical prep and using acid etching instead. Acid etching cleans the surface but does not open the concrete profile the way grinding does. On a sealed or previously painted slab, an acid etch will leave the coating sitting on a weak surface layer and the floor will peel within months, often in sheets.
Moisture testing matters too. Concrete that holds moisture above the acceptable threshold will cause the epoxy to bubble or blister. A professional installer will check moisture vapour emission before any product goes down, which is especially relevant for slabs that sit on the ground without a proper vapour barrier underneath.
Once the slab is ground, repaired and confirmed dry, a priming coat goes down. The primer penetrates deeper into the concrete than the base coat can on its own, giving the whole system a stronger anchor from the bottom up.
How does the epoxy flake flooring installation process work, step by step?
The installation follows a clear sequence: grind, repair, prime, base coat with flake broadcast, scrape back excess flakes, apply grout coat or mid coat, then finish with the topcoat. Each layer needs to cure before the next one goes down, so the full process typically runs across two days on a standard double garage.
Here is how each stage plays out in practice.
Diamond grinding. The grinder removes any surface laitance and opens the concrete to a profile roughly equivalent to 60 to 80 grit sandpaper. This is a dusty job and a good installer will use a machine with vacuum extraction to keep the garage and your home liveable.
Crack and spall repair. Hairline cracks in a domestic slab are common and most can be filled with a flexible polyurea or epoxy repair compound. Structural movement cracks need a different approach, so the installer should flag these before quoting.
Primer coat. A low-viscosity epoxy primer is rolled on and left to penetrate. This is usually done on day one and allowed to cure overnight.
Base coat and flake broadcast. On day two, the coloured epoxy base coat goes down. While it is still wet, vinyl flakes are broadcast by hand across the entire surface in a full-reject throw, meaning flakes are thrown until the base coat is completely hidden. This gives a uniform, tightly packed chip pattern with no holidays or bare patches.
Scrape and vacuum. Once the base coat cures, any loose or standing flakes are scraped flat and vacuumed up. This step levels the surface and removes excess flake so the topcoat can lay flat without creating a lumpy or uneven finish.
Grout or mid coat (optional). Some systems include a clear epoxy grout coat that fills the voids between flakes before the topcoat. This is more common on commercial jobs but adds durability on high-traffic domestic floors.
Topcoat. A polyurethane or polyaspartic clear topcoat is rolled on in one or two coats. This is the layer that takes the daily punishment and protects the colour beneath. Polyaspartic topcoats cure faster and have better UV stability than standard epoxy clears, which is worth knowing if part of the garage gets direct sunlight.
How long does epoxy flake flooring take to cure before you can use it?
Most epoxy flake floors are light-foot-traffic ready within 24 hours of the final topcoat going down. Driving a car onto the surface typically requires a full 72-hour cure, and placing heavy stationary loads like a workshop shelf unit or tool cabinet is best left until the seven-day full-cure mark has passed. Rushing this is one of the most common causes of early surface damage.
Polyaspartic topcoats can shorten these times significantly. Some polyaspartic finishes reach full hardness in as little as 24 hours, which is why they are popular on jobs where the homeowner needs quick turnaround. The tradeoff is that polyaspartics cure fast even during application, so they require an experienced hand to keep the finish consistent.
Temperature affects cure time. Below about 10°C, standard epoxy products slow down considerably and may not cure properly at all. Melbourne winters can push overnight temperatures in an unheated garage below this threshold, so installation is best scheduled for the warmer months or the installer needs to account for temperature with the product selection.
What does epoxy flake flooring cost for a typical Melbourne garage?
For a standard double garage of roughly 36 to 40 square metres, a professionally installed epoxy flake floor in Melbourne typically runs from around $2,000 to $4,500 depending on the condition of the slab, the flake and topcoat specification, and the thickness of the system. Single garages are cheaper in total cost but cost more per square metre because the setup, grinding and travel time are roughly fixed regardless of size.
Factors that push the price up include: heavily contaminated or previously painted slabs that need extra grinding passes, significant crack repair, premium polyaspartic topcoats, and decorative details like a border colour or metallic base. Factors that bring it down include a clean, uncoated slab in good condition and a straightforward single-colour chip blend.
A detailed quote should always break out the prep work separately from the coating costs. If a quote is suspiciously cheap and the prep line item is vague or missing, that is the most likely area where corners are being cut, and a peeling floor two years later will cost far more to fix than the saving was worth.
How do you maintain epoxy flake flooring to keep it looking good?
Epoxy flake flooring is genuinely low maintenance, which is a big part of its appeal for a busy household. Regular sweeping or a leaf blower to clear dust and grit is the main weekly task. A mop with warm water and a mild pH-neutral cleaner handles the deeper clean. Avoid bleach, ammonia-based cleaners and abrasive scrubbing pads, all of which can dull the topcoat over time.
Oil and fuel spills should be wiped up promptly rather than left to sit, not because they will soak in, but because petroleum products can soften some topcoat formulations if they pool for extended periods. A clean rag or paper towel is all you need.
The topcoat is the sacrificial layer in this system. On a busy domestic garage that sees daily vehicle traffic, a light maintenance coat over the topcoat every five to seven years keeps the floor looking fresh and extends the life of the full system without needing to strip and recoat from scratch.
Book epoxy flake floor installation with Metal and Flake