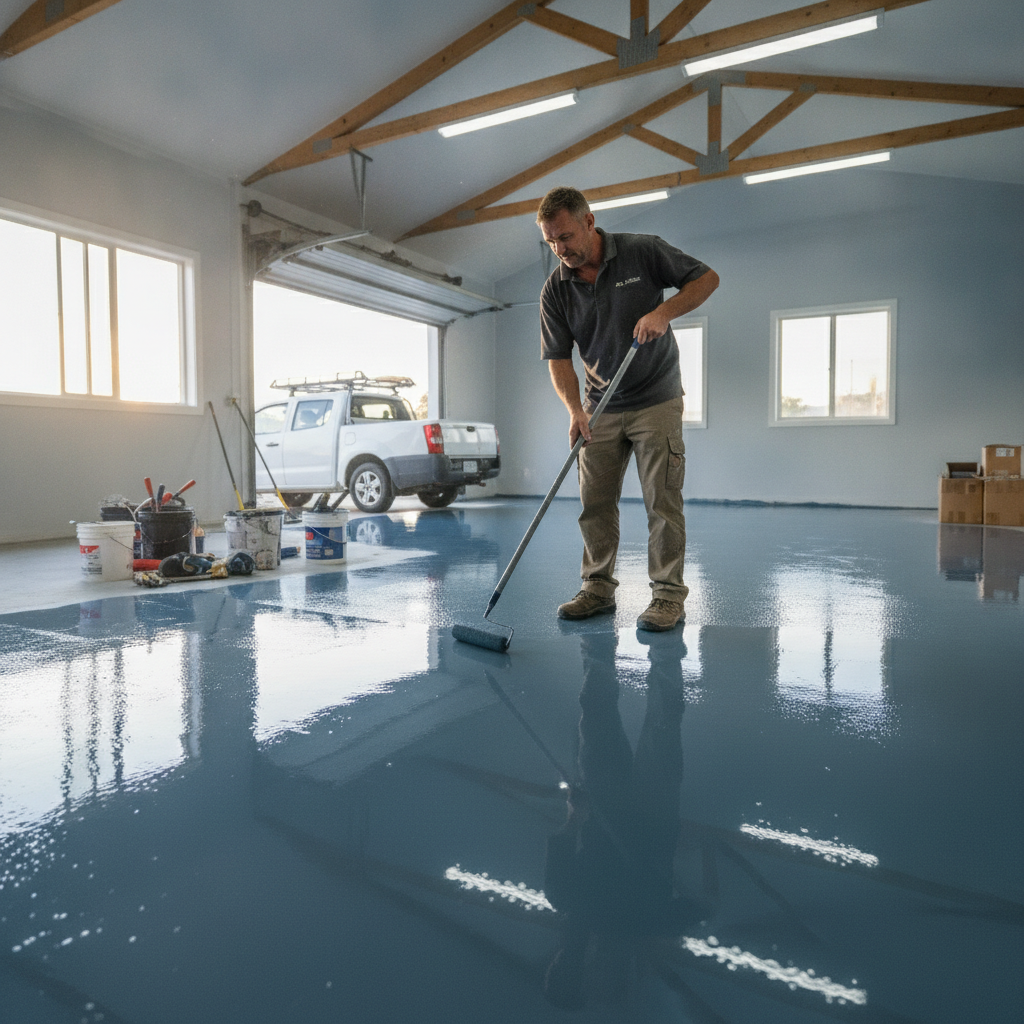
Epoxy Garage Floors in Hoppers Crossing: Local Installer Guide
An epoxy garage floor in Hoppers Crossing transforms a dull concrete slab into a durable, easy-clean surface that handles daily vehicle traffic, oil spills and Melbourne’s humidity swings without fading or peeling. Professionally installed systems typically bond at a thickness of 3 to 5 mm, resist abrasion far better than bare concrete, and last well over a decade with minimal upkeep.
Why is Hoppers Crossing a great fit for epoxy garage flooring?
Hoppers Crossing sits in Melbourne’s outer west, where suburban homes are built on large blocks with double and triple garages that see real daily use. The local climate, with warm summers and cool, wet winters, causes concrete slabs to expand and contract. A properly prepared and primed epoxy system accommodates that movement, forming a seamless surface that won’t let moisture wick through and lift the coating the way cheaper DIY kits often do.
Homes in the area also tend to have generous garage footprints, which means there is plenty of room to showcase a premium finish. A flake or metallic epoxy coating does not just protect the slab; it genuinely elevates the look of the whole space, making it feel less like storage and more like a functional extension of the home. That matters when you are maintaining or increasing property value in a suburb where presentation counts.
What does the epoxy garage floor installation process actually involve?
The installation process for an epoxy garage floor starts with surface preparation and finishes with a clear topcoat, typically spanning two to three days from start to full cure. Each stage is non-negotiable: skipping or rushing any one of them is the primary reason coatings delaminate within the first year.
Here is what a professional residential installation looks like step by step.
Diamond grinding the concrete. Before any product touches the slab, the surface is mechanically ground using industrial diamond tooling. This opens the pores of the concrete, removes any existing sealer or paint, and creates the profile the epoxy needs to bond correctly. Hand-rolled acid etching, which is the shortcut used in many retail kits, simply cannot achieve the same adhesion surface.
Crack and joint repair. Existing cracks are filled with a flexible polyurea or epoxy filler and allowed to cure. Control joints are either filled or left as stress-relief lines depending on how the slab was poured and how much movement is expected.
Primer coat. A penetrating epoxy primer is rolled out to seal the concrete and prevent air bubbles (also called outgassing) from forming in the base coat. Outgassing is a common culprit in failed DIY jobs, particularly in warmer months.
Base coat and decorative layer. The coloured epoxy base coat goes down next. If a flake finish is chosen, vinyl flakes are broadcast into the wet coat until full saturation is reached, then excess flake is swept back and reclaimed. For a metallic finish, pigmented metallic powders are worked into the base coat with rollers and squeegees to create the flowing, three-dimensional effect that has become a signature of high-end residential garages.
Grout coat and topcoat. On flake systems, a grout coat locks the chips in place before the final clear topcoat is applied. The topcoat, usually a polyaspartic or urethane product, adds UV stability, chemical resistance and the sheen level of your choice, from satin through to high gloss.
How do metallic and flake finishes compare for a residential garage?
Metallic and flake epoxy coatings both outperform plain grey epoxy on durability, but they suit different tastes and spaces. Flake systems hide dirt and minor scuffs more readily day to day, while metallic systems deliver a one-of-a-kind visual depth that makes a garage feel more like a showroom. The right choice depends on how the space is used and how you want it to look.
Flake, sometimes called chip or broadcast systems, is the more forgiving finish. The multi-tonal pattern of the chips breaks up any unevenness in the slab visually, and the texture from the chips adds a slight grip underfoot, which is useful in a working garage where wet boots and tyres are common. Popular colour combinations for Hoppers Crossing homes include charcoal and white blends that complement the grey render exteriors that are common in the area.
Metallic epoxy creates a seamless, glassy surface with swirling tones that are genuinely unique to each pour. No two floors look exactly alike because the metallic pigments move and settle differently every time. This finish suits garages that double as workshop showrooms, home gyms or entertainment spaces where the floor is part of the overall design statement. It is also a popular choice for homeowners who have invested in quality cabinetry and LED lighting and want the floor to match that level of finish.
Both systems are available with anti-slip additives mixed into the topcoat, a worthwhile upgrade for any residential garage in a climate that delivers wet winters.
What should Hoppers Crossing homeowners budget for an epoxy garage floor?
For a professionally installed residential epoxy garage floor in Melbourne’s west, most homeowners budget between $40 and $80 per square metre depending on the system chosen, the condition of the existing slab and the complexity of the finish. A standard double garage of around 36 square metres typically falls in the $1,500 to $2,800 range for a quality flake system, with metallic finishes sitting toward the upper end of that scale.
That figure is meaningfully higher than a hardware-store DIY kit, which typically runs $300 to $500 for the same area. But the comparison is not straightforward. DIY kits use water-based products applied over unground concrete. Professional systems use 100-percent-solids epoxy applied over mechanically ground concrete. The adhesion, thickness and longevity are entirely different products. A professional coating installed correctly should not need replacement for 10 to 15 years. A DIY kit applied without proper surface prep commonly fails, bubbles or peels within two to three years, particularly in garages that see hot tyre traffic.
When you factor in the cost of stripping a failed coating and re-doing the job properly, the professional option is consistently the more economical choice over a five-year horizon.
How long does it take to get back into the garage after installation?
Most professional epoxy garage floor installations in Hoppers Crossing are completed over two days, with foot traffic possible at the 24-hour mark and vehicle traffic safe at the 72-hour mark. Full chemical cure, where the coating reaches its maximum hardness and chemical resistance, takes approximately seven days, though normal residential use can resume well before that point.
Planning is straightforward: most homeowners empty the garage, park vehicles on the driveway for three days, and return to a fully transformed space by the weekend. The installer will give you specific walk-on and drive-on times based on the exact products used and the temperature forecast for the cure window, since cooler conditions extend cure times slightly and warmer conditions accelerate them.
If you are considering new garage cabinetry or shelving at the same time, it is always better to complete the floor coating first and install the cabinetry after, so every centimetre of the slab is coated and protected before anything is fixed to the wall.
Ready to get started? Book Metal and Flake for residential garage floor coating in Hoppers Crossing.